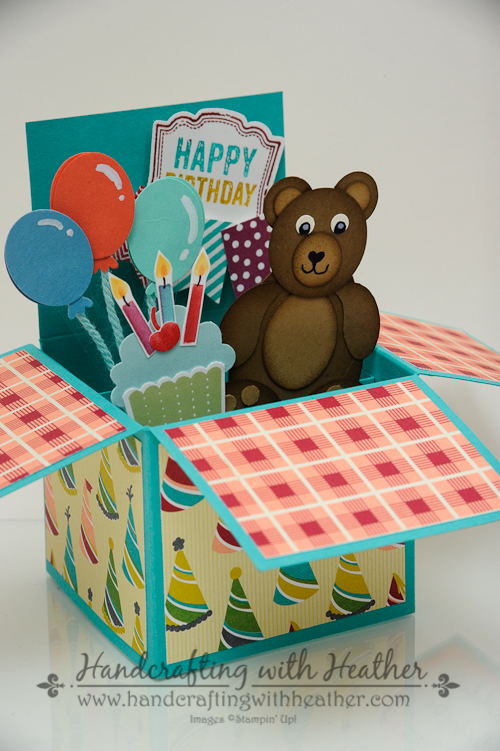
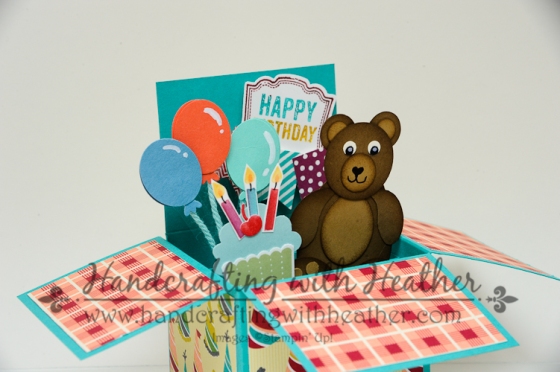
I have been seeing these cute “card in a box” projects all over Pinterest lately, and I just couldn’t resist doing one for my son Carter’s third birthday! We are going to have a small party at Build-a-Bear Workshop followed by a teddy bear picnic. It just seemed like the perfect opportunity to try a card in a box. I love, love, love how this one turned out! The Birthday Basics DSP was the perfect pair for my birthday picnic theme. Another thing I love about these cards is that you get a huge “WOW” factor right out of the envelope… but they are really easy to make!
If you like my post today, please leave me a comment. I love hearing from you and sharing ideas. Plus, as an added benefit, you will be entered into my monthly drawing for a chance to win a free card. Also, If you aren’t already a subscriber, please consider following me via email. Just click on the “follow” button in the sidebar.
Now, when I decided I wanted to do a card in a box, I had no idea how to do it, so I did a search to find a video tutorial. I have to thank Stamp and Scrap with Frenchie for her great video tutorial. You can find a link to her instructions at the bottom of this post below the supply list. I modified some of the dimensions for my card, but the basic premise for the box is the same. The other great thing about these cards is they fold up and fit into a regular A2 invitation style envelope! I made my own envelope using the envelope punch board so that the colors would coordinate. I love that tool, it makes creating custom envelopes so easy!
I chose Bermuda Bay card stock for my card base, and adhered panels of the birthday hat and plaid designer series papers from the Birthday Basics DSP pack to the sides of my box. I used sticky strip to hold the box together. I wanted the plaid paper to resemble a table cloth at a picnic. Then, I printed the invitation details and the words from the teddy bear picnic song onto Whisper White card stock using my computer’s printer. Then, I cut out my printed panels and used my Real Red ink and a sponge dauber to ink around the edges of the panels. I adhered the party details to the back and the song lyrics to the underside of the box flaps using SNAIL adhesive.
Once the foundation of my box was finished, it was time to create my embellishments. I wish I had taken pictures of the process along the way, but I didn’t. I will do my best to describe the steps I took, but please feel free to contact me with questions if you have them. I used the following punches to create the teddy bear, cupcake, balloons, and banners:
Teddy Bear:
- x1 – extra large oval punch – Soft Suede (body)
- x1 – 1″ circle punch – Soft Suede (head)
- x3 – small oval – Soft Suede (arms/feet)
- x1 – small oval – Baked Brown Sugar (belly)
- x2 – 1/2″ circle – Soft Suede (ears)
- x3 – 1/2″ circle – Baked Brown Sugar (mouth/paws)
- x2 – circle from owl builder punch – Baked Brown Sugar (inside of ears)
- x6 – circle from cupcake builder punch – Baked Brown Sugar (toes)
- x2 – circle from cupcake builder punch – Whisper White (eyes)
Once I had punched all my pieces, I cut one of the Soft Suede small ovals “yin yang” style to create the two arms. Then I used my sponge dauber to ink the edges of EVERYTHING (except the eyes and toes) with Soft Suede ink. I used Multipurpose Liquid Glue to put everything together. then I colored on the nose and the pupils with a sharpie. I used my Stampin’ Chalk Marker to add a little gleam to the eyes.
Balloons – I chose a variety of bright colors for the balloons. Each one was made from the following list of materials:
- x2- small oval punch
- x1 – foot of the owl from the owl builder punch.
- strip of clear plastic – window sheets
- twine from the Sweet Sorbet Accessory Pack (Sale-a-bration item)
- Stampin’ Chalk Marker
To make the balloons I punched two ovals and sandwiched the owl foot, twine, and plastic strip between them to create the balloon. Then I added a reflection with the Stampin’ Chalk Marker.
Cupcake: The cupcake was created with the Cupcake Builder Punch and the Create a Cupcake stamp set (wood mount and clear mount). I stamped the cupcake wrapper in Pear Pizzazz ink and then punched it out with the cupcake builder punch. The frosting was punched from Pool Party card stock. I colored the candles and the cherry using my Stampin’ Write Markers in Real Red, Rich Razzleberry, Bermuda Bay, Daffodil Delight, and Pumpkin Pie (Brights Collection and Regals Collection). Then I cut out the candles with paper snips and added a wick with a black pen. I punched the cherry out using my cupcake builder punch. Then, I glued everything together using multipurpose liquid glue.
Once my balloons, cupcake, and teddy bear were finished and ready to be added to the box, I added two strips of bermuda bay along the inside of the box (see the video tutorial for instructions) to support the embellishments. Then I stuck everything on with mini glue dots, making sure my embellishments weren’t taller than the back of the box. This ensures that it will all fit nicely into the envelope.
Banners & Greeting: I colored my birthday greeting from the Label Love stamp set (wood mount and clear mount) with my Bermuda Bay, Rich Razzleberry, and Daffodil Delight Stampin’ Write Markers. Then I stamped it on Whisper White and punched it out using the Artisan Label Punch (The Label Love stamp set and Artisan Punch are available as a bundle for 15% discount; wood mount and clear mount). I stamped my banners using the Banner Blast stamp set (Sale-a-bration item) and punched them out using the Banner Punch (Sale-a-bration item). Finally, I adhered the greeting and the banners to the background of the box using Stampin’ Dimensionals.
These cards are a lot of steps and they take some time, but they are not difficult to do. Everyone will be very impressed with your work, which is something I always enjoy. There’s nothing like hearing someone say, “You made that!?!” If you liked this card, please don’t forget to leave me a comment so you will be entered into my drawing. Also, please pin it to Pinterest for me. I am new to blogging and I would love your help in developing a blog following. If you scroll to the bottom of the post, you will find a “pin it” button just below my supply list for the project. Remember, I’ve also linked the video tutorial for making a card in a box below the supply list.
If you would like to purchase the Birthday Basics DSP, Create a Cupcake stamp set, or any of the other great products featured in this project, shop in my online store by clicking here. Remember you can earn a FREE item with every $50 purchase through March 31st (including the Banner Blast stamp set and Banner Punch). The final days of Sale-a-bration are fast approaching. Don’t miss your chance to get these great products before they are gone!
You can find a complete list of supplies used for this project at the very bottom of this post.
____________________________________________________________
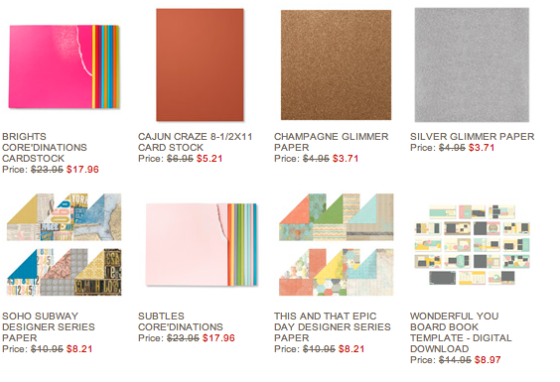
Weekly Deals from Stampin’ Up! March 25-31
Here are the new Weekly Deals from Stampin’ Up!:
Click here to see the Weekly Deals from Stampin’ Up! in my online store. The Weekly Deals are only while supplies last and only available at these great prices through March 31.
________________________________________________________________________________________
If you need any stamping supplies, I’d be very happy to be your Demonstrator. Just click on Order Stampin’ Up! Online Now in the main menu or in the sidebar to go directly to my online store or drop me an email if you have any questions.
Happy Stamping!
Heather
- It’s Sale-a-bration time!! You’ll get a free item from Stampin’ Up! for every $50 that you purchase between now and March 31! Click on my Stampin’ Up! Promotions page for more information!
- Visit my online store here.
- Shop the Clearance Rack here.
____________________________________________________________
Stampin’ Up! items used to create this project:
Stamp Sets: Create a Cupcake (121982); Banner Blast (Sale-a-bration); Label Love (130622)
Dies, Punches, & Embossing Folders: Banner Punch (Sale-a-bration); Artisan Label Punch (130920); Cupcake Punch (121807); Owl Builder Punch (118074); extra large oval (119859); 1″ circle (119868); small oval (120908); 1/2″ circle (119869).
Card Stock & DSP: Bermuda Bay (131197) – card base 4-1/4″ x 11″ (score at 1/2″, 3-1/8″, 5-3/4″, 8-3/8″ and along the length of the card at 2″), 2 strips for supporting embellishments – 4-1/8″ x 1″; Baked Brown Sugar (131296) – punches for teddy bear listed in post; Soft Suede (115318) – teddy bear punches listed in the post; Whisper White (100730) – 2-1/8″ x 3-3/4″ panel (back of card), 3 panels 2-3/8″ x 1-3/4″ (teddy bear picnic lyrics); cupcake wrapper, candles, label love greeting, teddy bear eyes; Pool Party (122924) – cupcake punch; Birthday Basics DSP (130145) – Plaid: 3 panels 2-3/8″ x 1-3/4″, Birthday Hat: 3 panels 2-3/8″ x 2″, 1 panel 2-3/8″ x 4″ (back of card).
Markers & Ink: Soft Suede Classic Stampin’ Pad (126978); Regals Collection Stampin’ Write Markers (131262); Brights Collection Stampin’ Write Markers (131259); Stampin’ Chalk Marker (132133); Pear Pizzazz Classic Stampin’ Pad (131180)
Embellishments: Twine from Sweet Sorbet Accessory Pack (Sale-a-bration)
Tools: sponge daubers (102892); envelope punch board (133774)
Adhesive: SNAIL (104332); Stampin’ Dimensionals (104430); Glue Dots (103683); Sticky Strip (104294); Multipurpose Liquid Glue (110755)
Card Tutorial: Stamp and Scrap with Frenchie


This is my favorite card of all time. It’s a show stopper!
LikeLike
This is fabulous! Beautifully created, perfect little birthday invitation. Love it!!
LikeLike
totally adorable card in a box, love that little bear you created!
LikeLike
Wonderful! I love, love, love it!
LikeLike
What a magical card/invite for the birthday boy. This is something to treasure through the years. Beautiful.
LikeLike
Love your style. Glad I found your page! Thanks for sharing!
LikeLike
This is great! It is so vibrant and just PERFECT! THank you for including the video. I have been wanting to try one of these for awhile. I think I am a bit intimadated. 🙂
LikeLike
Don’t be intimidated. They are really pretty simple. Have fun!
Heather
>
LikeLike
I love this! I’m looking for a birthday card for my nephews 3rd birthday. And he loves his teddy! TFS
LikeLike