
Today I wanted to show you how a little Stampin’ Up! magic with the Birthday Basics DSP and the Scalloped Tag Topper Punch can turn gift giving into a breeze.
If you like my post today, please leave me a comment. I love hearing from you and sharing ideas. Plus, as an added benefit, you will be entered into my monthly drawing for a chance to win a free card. Also, If you aren’t already a subscriber, please consider following me via email. Just click on the “follow” button in the sidebar.

My son will be three in a couple of weeks. The year I was pregnant with him, we had 7 other babies born at school. In addition to that, there are 10 kids who live on our street. I tell you all this just to demonstrate that we get invited to a lot of birthday parties! Between the gifts, the cards, and the gift wrap it gets pretty expensive. Now, you know I’ve got the cards covered, but it wasn’t until recently that I realized I could make some super cute gifts with plain brown craft paper and a couple of minutes with some punches. I’ve seen tons of really cute stamped packages out there, but I don’t always have time to color a bunch of stamps and make a paper bow, etc. So, today’s share is my 5 minute solution to kids birthday wrap!

I started by cutting a 2″ x 3-1/2″ strip of the candles paper from the Birthday Basics designer series paper pack. Then I cut a circle of Coastal Cabana card stock using my Circles Framelits Dies (I would have used the 1-3/4″ circle punch if I had it… that is going on an order soon!). I added the circle to my birthday candle tag using Stampin’ Dimensionals. Next, I quickly punched a cupcake using the Cupcake Builder Punch and three different papers from the Birthday Basics DSP pack. Those were glued together using Multipurpose Liquid Glue and added to the label with Stampin’ Dimensionals.

Finally, I stamped the “Happy Birthday” sentiment from the Teeny Tiny Wishes stamp set (wood mount and clear mount) on Whisper White card stock using my Bermuda Bay Classic Stampin’ Pad. I punched it out using the Word Window Punch. Then I used the Modern Label Punch to create a base for my greeting in Bermuda Bay card stock. I layered everything together using Stampin’ Dimensionals and threaded some white ribbon through to finish it all off with a cute little bow.

This gift tag was quick and easy to make. In fact, I think I might go ahead and make several more to have on hand next time we are invited to a birthday party! If you liked this project, please don’t forget to leave me a comment so you will be entered into my drawing. Also, please pin it to Pinterest for me. I am new to blogging and I would love your help in developing a blog following. If you scroll to the bottom of the post, you will find a “pin it” button just below my supply list for the project.
If you would like to purchase the Birthday Basics DSP, Cupcake Punch, or any of the other great products featured in this project, shop in my online store by clicking here. Remember you can earn a FREE item with every $50 purchase through March 31st. The final days of Sale-a-bration are here. Don’t miss your chance to get these great products before they are gone!
You can find a complete list of supplies used for this project at the very bottom of this post.
____________________________________________________________
Weekly Deals from Stampin’ Up! March 25-31
Here are the new Weekly Deals from Stampin’ Up!:
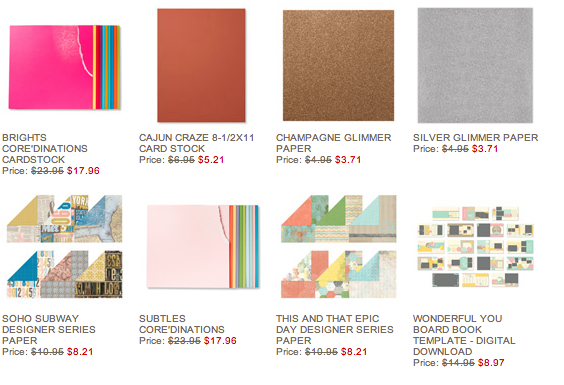
Click here to see the Weekly Deals from Stampin’ Up! in my online store. The Weekly Deals are only while supplies last and only available at these great prices through March 31.
____________________________________________________________
If you need any stamping supplies, I’d be very happy to be your Demonstrator. Just click on Order Stampin’ Up! Online Now in the main menu or in the sidebar to go directly to my online store or drop me an email if you have any questions.
Happy Stamping!
Heather
- It’s Sale-a-bration time!! You’ll get a free item from Stampin’ Up! for every $50 that you purchase between now and March 31! Click on my Stampin’ Up! Promotions page for more information!
- Visit my online store here.
- Shop the Clearance Rack here.
____________________________________________________________
Stampin’ Up! items used to create this project:
Stamp Sets: Teeny Tiny Wishes (127802)
Dies, Punches, & Embossing Folders: Cupcake Punch (121807); Scalloped Tag Topper Punch (133324); Circles Framelits Dies (130911); Word Window Punch (119857); Modern Label Punch (119849)
Card Stock & DSP: Bermuda Bay (131197) – modern label punch; Whisper White (100730) – word window punch; Coastal Cabana (131297) – Circles framelit die cut; Birthday Basics DSP – Birthday candles: 2″ x 3-1/2″ tag, polka dots: cupcake wrapper, coastal cabana floral – cupcake icing, raspberry ripple – cherry.
Markers & Ink: Bermuda Bay Classic Stampin’ Pad (131171)
Embellishments: Ribbon (the one I used is not a Stampin’ Up! item) – Use 5/8″ Organza Ribbon (114319) from Stampin’ Up!
Tools: N/A
Adhesive: Stampin’ Dimensionals (104430); Multipurpose Liquid Glue (110755)


