Happy Stampers Occasions Catalog & Sale-A-Bration Blog Hop – Stampin’ Up!

Well, what started out as a holiday vacation, turned into a longer than anticipated sabbatical from blogging… But, I’m back today, just in time for the Happy Stampers blog hop!  Today, we have created projects featuring products from the Stampin’ Up! … Continue reading

Elegant Black and White Mixed Bunch Boxed Card Set – Stampin’ Up!

Today’s project is another boxed set of cards featuring the Mixed Bunch stamp set from Stampin’ Up!  (As you can tell, I’m on a mission to get all of my son’s teacher gifts knocked out!) I was inspired to create these cards by a video I saw created by Brandy Cox (www.brandyscards.com).  I changed the stamp sets and punches to suit what I had in my collection, but the basic design is the same.  I love the simple elegance of the black and white color scheme.

Mixed Bunch B&W (1 of 5)

This card is an easy one to do “assembly line” style to create multiple cards with the same design, which makes it ideal for creating a boxed set.  The base of the card is a black panel with a smaller white card glued on top.  This allows for the look of a colored card base, but allows you to cut down on supplies.  The Whisper White card stock is very economical for making a large number of cards, which is a nice benefit of this design.

Mixed Bunch B&W (5 of 5)

I created a belly band for my box and stamped the envelopes so that they would coordinate beautifully with the cards.  For directions on creating the box, click here.

Mixed Bunch B&W (2 of 5)

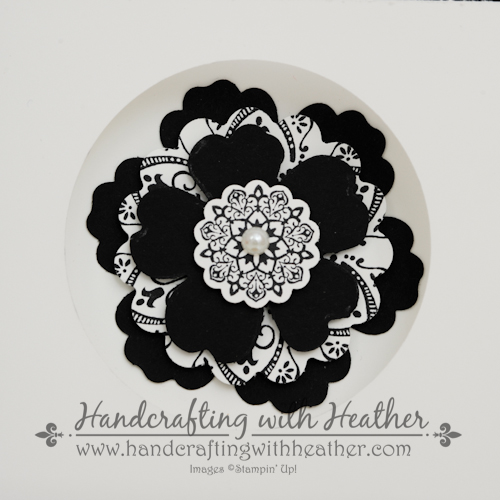
I used the 2-1/2″ circle punch to create a hole in the front of the card, and then glued this beautiful black and white flower to the inside of the card.  The flower features the following elements:

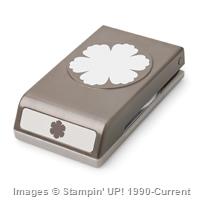
  • Blossom Punch – Basic Black card stock
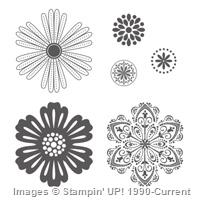
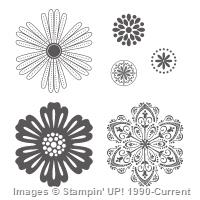
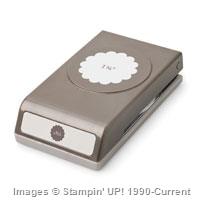
  • 1-3/4″ Scallop Circle Punch – Whisper White stamped with flower from Mixed Bunch (these don’t line up, but I just wanted the design from the flower stamp, so it didn’t matter).
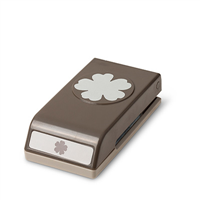
  • Pansy Punch – Basic Black card stock
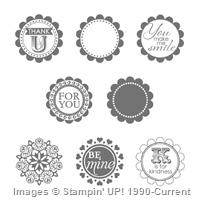
  • 7/8″ Scallop Circle Punch – Whisper White stamped with medalion from A Round Array stamp set.
  • Large Basic Pearl (or rhinestone)

Mixed Bunch B&W (3 of 5)

Another neat element of this card is the “ribbon” along the left edge.  I created this by stamping scrap strips of whisper white card stock using the flower from Mixed Bunch.  I think it adds an element of elegance and is a great way to use up all those little scraps you have lying around.

Mixed Bunch B&W (4 of 5)

I think this set is just beautiful.  I’m a sucker for a black and white color scheme, and I like how these cards can be used for a variety of occasions.  If you like this project, I hope you will pin it to Pinterest for me. You will find a “pin it” button at the end of this post below the supply list.

Also, Please consider selecting me as your demonstrator for your stamping needs.  I would love the opportunity to earn your business.  If you need any supplies you can shop now in my online store!  Feel free to drop me an email if you have any questions or if you would like a catalog.  I’m here to help!

Happy Stamping!

Heather

  • Visit my online store here.
  • Shop the Clearance Rack here.

New Weekly Deals From Stampin’ Up! Nov. 18-24

Click the images below to order the weekly deal products from my online store.  The Weekly Deals are only while supplies last and only available at these great prices through November 24th.


Stampin’ Up! Products Used for Today’s Project

If you would like to order any of the products featured in today’s project, click the images below to order from my online store.

Supply List

Built for Free Using:  My Stampin Blog


Card Stock Cuts

“Post Card” Style Base:  Basic Black- 4-1/4″ x 5-1/2″

Folded White Card Base:  Whisper White – 8″ x 5-1/4″ (scored at 4″)

Card Box: Kraft – 9″ x 9″

Belly Band: Basic Black – 11″ x 7/8″ strip; Whisper White – 11″ x 3/4″ strip.

Happy Stampers Birthday Card Bomb (Part 2) – Stampin’ Up!

On Sunday, I shared several birthday cards I received from members of the Happy Stampers Birthday Bomb Club.  Today, it is my pleasure to share the rest of the bunch with you.  We really have some talented stampers in our group!

Created by Kristi Gray

Created by Kristi Gray

Created by Amy Koenders

Created by Amy Koenders

Created by Sylvia Wilson

Created by Sylvia Wilson

Created by Nancy Pellow

Created by Nancy Pellow

Created by Nancy Pellow

Created by Nancy Pellow

I told you these ladies were talented!  I was definitely feeling the birthday love each day as more cards arrived in the mail.  It is always so special to get something that someone made by hands with love.  Remember, if you were inspired by any of these designs, you can pin them to Pinterest by clicking on the “pin it” button at the bottom of this post.

I hope you will consider selecting me as your demonstrator for your stamping needs.  If you need any supplies you can shop now in my online store!  Feel free to drop me an email if you have any questions or if you would like a catalog.  I’m here to help!

Happy Stamping!

Heather

  • Visit my online store here.
  • Shop the Clearance Rack here.

Project Life by Stampin’ Up! Giveaway!

Screen Shot 2014-10-28 at 6.50.46 AM

You could win a complete Project Life by Stampin’ Up! prize pack including every product available in the product line! You could also win one of 100 Project Life by Stampin’ Up! Card & Accessory Packs.  For all of the details, visit the giveaway sign-up page here.  You can either enter your contact information or use your Facebook account to sign up.  The contest ends at 11:59:59 PM Mountain Time on November 30, 2014.

At the very bottom of the signup page, there is a spot to enter a bit.ly link if someone referred you.  If you’d like to enter my link as the referring source, here it is (just copy and paste it):  http://bit.ly/133fQ2N


New Weekly Deals From Stampin’ Up! Nov 4-10

Capture

Click here to see the Weekly Deals from Stampin’ Up! in my online store.  The Weekly Deals are only while supplies last and only available at these great prices through November 10th.

Happy Stampers Birthday Card Bomb (Part 1) – Stampin’ Up!

The Happy Stampers group has a Birthday Card Bomb club.  Last week was my birthday… (the big 4-0) and it was so wonderful to receive so many beautiful cards from the talented women in my group.  I’m excited to share some of them with you today!

Created by Cheryl Sanders

Created by Cheryl Sanders

Created by Judy Wright

Created by Judy Wright

Created by Sue Prather

Created by Sue Prather

Created by Sandi MacIver

Created by Sandi MacIver

Aren’t these cards wonderful!  It is such a special feeling to get a handcrafted card in the mail.  This is the first half of the bunch, stay tuned for the rest of the lovely cards that I received in the mail.  Remember, if you were inspired by any of these designs, you can pin them to Pinterest by clicking on the “pin it” button at the bottom of this post.

I hope you will consider selecting me as your demonstrator for your stamping needs.  If you need any supplies you can shop now in my online store!  Feel free to drop me an email if you have any questions or if you would like a catalog.  I’m here to help!

Happy Stamping!

Heather

  • Visit my online store here.
  • Shop the Clearance Rack here.

Project Life by Stampin’ Up! Giveaway!

Screen Shot 2014-10-28 at 6.50.46 AM

You could win a complete Project Life by Stampin’ Up! prize pack including every product available in the product line! You could also win one of 100 Project Life by Stampin’ Up! Card & Accessory Packs.  For all of the details, visit the giveaway sign-up page here.  You can either enter your contact information or use your Facebook account to sign up.  The contest ends at 11:59:59 PM Mountain Time on November 30, 2014.

At the very bottom of the signup page, there is a spot to enter a bit.ly link if someone referred you.  If you’d like to enter my link as the referring source, here it is (just copy and paste it):  http://bit.ly/133fQ2N


New Weekly Deals From Stampin’ Up! Oct 28 – Nov 3

Capture

Click here to see the Weekly Deals from Stampin’ Up! in my online store.  The Weekly Deals are only while supplies last and only available at these great prices through November 3rd.


Stampin’ Up! Products Used for Today’s Projects

If you would like to order any of the products featured in today’s project, click the images below to order from my online store.  I did not attempt to identify the colors used for today’s cards, but I have included the stamp sets and embellishments that made these cards so special.  


Bloom with Hope and Floating Watercolor Technique (Part 2) – Stampin’ Up!

First, before I get to my project for today, I need to announce the blog candy winner from last week’s blog hop. I totally forgot to do the drawing on Tuesday! Random.org picked comment number 14, so the lucky winner is Dana! Send me your mailing address, and I will get your Paper Pumpkin kit in the mail. Congratulations and sorry for the delay!

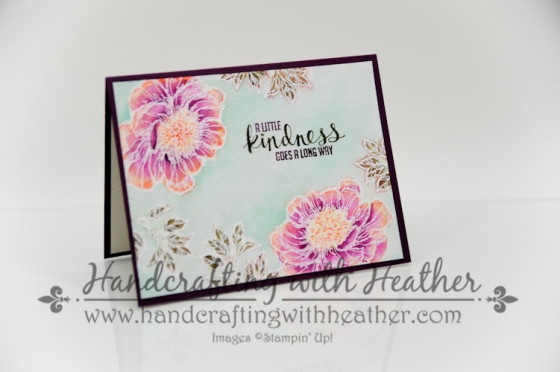
Now, onto today’s project… On Wednesday I shared a card featuring the Bloom with Hope stamp set from Stampin’ Up! that used the Floating Watercolor Technique.  Today, I have another card that I created using the same technique.

Bloom with Hope Float Technique (1 of 7)

I started by stamping the flowers and leaves with versamark ink on watercolor paper. Then I heat embossed them using white embossing powder.

Bloom with Hope Float Technique (4 of 7)

Next, I “painted” the petals with water and then I used my re-inkers to add color to the wet surface.  The water causes the color to spread and fade as it moves outward.  The result can be unpredictable, but I think it is pretty.

Bloom with Hope Float Technique (3 of 7)

After I painted the flowers and leaves, I dry embossed the card base using the Lovely Lace embossing folder.  Then I added some pearls that I colored using my Rich Razzleberry Stampin’ Blendabilities.

I like the clean and simple design of this card.  I hope that you like it to and will consider pinning this project to Pinterest.  You will find a “pin it” button at the end of this post below the supply list.

I hope you will consider selecting me as your demonstrator for your stamping needs.  If you need any supplies you can shop now in my online store!  Feel free to drop me an email if you have any questions or if you would like a catalog.  I’m here to help!

Happy Stamping!

Heather

  • Visit my online store here.
  • Shop the Clearance Rack here.

Project Life by Stampin’ Up! Giveaway!

Screen Shot 2014-10-28 at 6.50.46 AM

You could win a complete Project Life by Stampin’ Up! prize pack including every product available in the product line! You could also win one of 100 Project Life by Stampin’ Up! Card & Accessory Packs.  For all of the details, visit the giveaway sign-up page here.  You can either enter your contact information or use your Facebook account to sign up.  The contest ends at 11:59:59 PM Mountain Time on November 30, 2014.

At the very bottom of the signup page, there is a spot to enter a bit.ly link if someone referred you.  If you’d like to enter my link as the referring source, here it is (just copy and paste it):  http://bit.ly/133fQ2N


New Weekly Deals From Stampin’ Up! Oct 28 – Nov 3

Capture

Click here to see the Weekly Deals from Stampin’ Up! in my online store.  The Weekly Deals are only while supplies last and only available at these great prices through November 3rd.


Stampin’ Up! Products Used for Today’s Projects

If you would like to order any of the products featured in today’s project, click the images below to order from my online store.


Card Stock Cuts

Card Base:  Blackberry Bliss – 5-1/2″ x 8-1/2″

Panels:  Watercolor Paper – 2″ x 5-1/4; Very Vanilla – 4″ x 5-1/4″ (inside of card)

Bloom with Hope and Floating Watercolor Technique – Stampin’ Up!

Over the summer I pinned several cards that used the Floating Watercolor Re-inker Technique, and I have finally gotten around to trying it with this card featuring the Bloom with Hope stamp set from Stampin’ Up!

Bloom with Hope Float Technique (5 of 7)

I started by stamping the flowers and leaves with versamark ink on watercolor paper. Then I heat embossed them using white embossing powder.   I chose to use white Stampin’ Embossing powder for this card because I wanted it to look like a batik effect when it was finished.

Bloom with Hope Float Technique (7 of 7)

Next, I “painted” the petals with water and then I used my re-inkers to add color to the wet surface.  The water causes the color to spread and fade as it moves outward.  The result can be unpredictable, but I think it is pretty.

Bloom with Hope Float Technique (6 of 7)

After I painted the flowers and leaves, I added a wash to the background.  First, I painted the whole background with water, then I painted it with a diluted ink solution.  After allowing everything to dry, I added the sentiment from the Kinda Eclectic stamp set from Stampin’ Up!

I am pretty pleased with how it turned out in the end.  I hope that you like it to and will consider pinning this project to Pinterest.  You will find a “pin it” button at the end of this post below the supply list.

I hope you will consider selecting me as your demonstrator for your stamping needs.  If you need any supplies you can shop now in my online store!  Feel free to drop me an email if you have any questions or if you would like a catalog.  I’m here to help!

Happy Stamping!

Heather

  • Visit my online store here.
  • Shop the Clearance Rack here.

Project Life by Stampin’ Up! Giveaway!

Screen Shot 2014-10-28 at 6.50.46 AM

You could win a complete Project Life by Stampin’ Up! prize pack including every product available in the product line! You could also win one of 100 Project Life by Stampin’ Up! Card & Accessory Packs.  For all of the details, visit the giveaway sign-up page here.  You can either enter your contact information or use your Facebook account to sign up.  The contest ends at 11:59:59 PM Mountain Time on November 30, 2014.

At the very bottom of the signup page, there is a spot to enter a bit.ly link if someone referred you.  If you’d like to enter my link as the referring source, here it is (just copy and paste it):  http://bit.ly/133fQ2N


New Weekly Deals From Stampin’ Up! Oct 28 – Nov 3

Capture

Click here to see the Weekly Deals from Stampin’ Up! in my online store.  The Weekly Deals are only while supplies last and only available at these great prices through November 3rd.


Stampin’ Up! Products Used for Today’s Projects

If you would like to order any of the products featured in today’s project, click the images below to order from my online store.


Card Stock Cuts

Card Base:  Blackberry Bliss – 5-1/2″ x 8-1/2″

Panels:  Watercolor Paper – 4″ x 5-1/4; Very Vanilla – 4″ x 5-1/4″ (inside of card)

2014 Holiday Catalog Blog Hop – Stampin’ Up!


10584045_980253772001198_5992599337409961142_n

I have a special post for you today… It’s the Happy Stampers Holiday Catalog Blog Hop!  This may be your first stop on the blog hop, or you may have linked to me from Sandi MacIver’s website.  Either way, I hope you enjoy the projects I have in store for you today.  Yes, that’s right, projects, plural.  I have a trio of coordinated projects for you today featuring the Bright and Beautiful stamp set from the brand new Stampin’ Up! Holiday Catalog, which is live as of today!  You can finally order all those great holiday items that you have been waiting for!  I used many of the new products for today’s blog hop, and I’m excited to tell you all about them.

Bright & Beautiful (7 of 12)

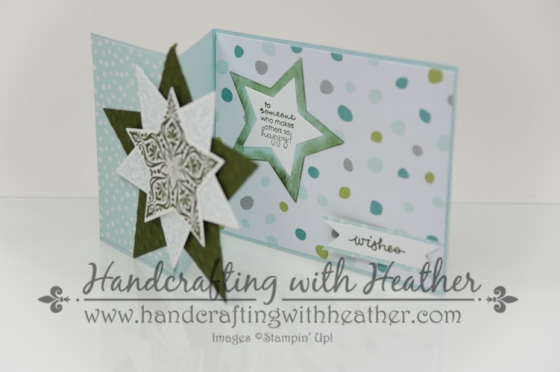
My first project for you today is a shaker card created with the Bright and Beautiful stamp set.  I heat embossed the beautiful star images using silver Stampin’ Emboss powder, and cut out the window using the coordinating Stars framelits die.

Bright & Beautiful (3 of 12)

For the confetti, I punched tons of little stars using the brand new Star Confetti Punch from the holiday catalog.   I used a combination of Glimmer Paper and Silver Foil Sheets to add just the right amount of sparkle.  I also punched some matte stars from Cherry Cobbler and Whisper White card stock.  I just love how this card came together.

Bright & Beautiful (5 of 12)

Bright & Beautiful (6 of 12)

For my second project, I continued the theme by maintaining the same color scheme and embossing technique for this adorable box and gift tag set.  The box was created using one of my new favorite tools, the Gift Box Punch Board!

Bright & Beautiful (10 of 12)

As I played around with the board, I found that if you change the paper size, but follow all the other directions, it changes the height of the box.  For this box, I used a 7-1/2″ x 7-1/2″ piece of card stock and scored at the Large vertical mark, and the XL horizontal mark.  (Note, when you change the dimensions, you have to do custom diagonals, by lining up the corners with the diagonal score groove.)

Bright & Beautiful (9 of 12)

What’s inside the box is almost as good as the box itself!  I just love these gift tags created using the Merry Everything stamp set and the new Note Tag Punch.  I am jumping for joy over these two.  They make creating gift tags a total breeze.  I also used my Scalloped and Angled Tag Topper Punches for some added dimension, but you could easily punch out a ton of gift tags and put them right on the top of a present without the extra layer.  In fact, I’ve got some sticker paper around here somewhere that is going to get a lot of stamping love this holiday season!

Bright & Beautiful (11 of 12) Bright & Beautiful (12 of 12)

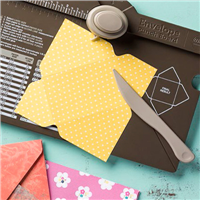
Of course, a blog hop wouldn’t be complete without some blog candy!  So, I decided to create a gift card envelope for you using the same design elements as my box and card.  This one is created with another item that is sure to become a staple in my gift giving repertoire… the Gift Card Envelope & Trims Thinlits Dies.  If you would like the chance to win this darling gift card holder and the decorative dots embossing folder, please leave me a comment to let me know what you think of my blog hop projects today.  I will announce the winner in my post next Tuesday, September 2.

Bright & Beautiful (14 of 12)

I hope you have enjoyed my projects today and that you will pin them to Pinterest.  You will find a “pin it” button at the bottom of this post below the supply list.  Also, please subscribe to my blog via email by clicking on the “follow” button if you are a fan of my work, and don’t forget to leave me a comment for your chance to win that great notepad!

Doing this blog hop has been a lot of fun.  Use the arrow buttons below to check out what Amy Koenders has created for you today on the next stop of the journey.

Blog Hop Backward Arrow
Blog Hop Forward Arrow

If you happen to get lost, or want to go back and check out one of the posts, here is a list for you – and don’t forget to leave a little sweet comment on each blog for your chance to win blog candy!

Amy Koenders – www.stampwithamyk.com

Marian Anderson –   http://craftingwithmarian.stampinup.net/blog

Trude Thoman – http://stampwithtrude.blogspot.com/

Kristi Gray – www.stampingwithkristi.com

Denise Melia – www.Fivebichonsandme.blogspot.com

Sandi MacIver www.stampingwithsandi.com

Heather Van Looy http://www.handcraftingwithheather.com (You are here.)


I hope you will consider selecting me as your demonstrator for your stamping needs.  If you need any supplies you can shop now in my online store!  Feel free to drop me an email if you have any questions or if you would like a catalog.  I’m here to help!

Happy Stamping!

Heather

  • Visit my online store here.
  • Shop the Clearance Rack here.

The Holiday Catalog is Here!

Holiday Catalog

Visit my online store here.


$51 in FREE products ends Today!

Whether you are a hobbyist or someone interested in building your own business, this week will be a great time to join Stampin’ Up!  For one week only from August 21-28  for only $99 you will get your choice of $150 worth of product.  In addition, during the month of August you can order from the new Holiday catalog before it is available to the public (on August 28).  If you have at least $99 worth of product on your wish list, you really should consider this opportunity.  Being a demonstrator has SO MANY awesome benefits and the opportunity has zero risk!  If you are interested in learning more please contact me at handcraftingheather@icloud.com or click here fore more information.


WEEKLY DEALS for August 26 – September 1

Screen Shot 2014-08-26 at 7.19.28 AM

Click here to see the Weekly Deals from Stampin’ Up! in my online store.  The Weekly Deals are only while supplies last and only available at these great prices through September 1.


Stampin’ Up! Products Used for Today’s Projects

If you would like to order any of the products featured in today’s project, click the images below to order from my online store.

World of Dreams Blank Card – Stampin’ Up!

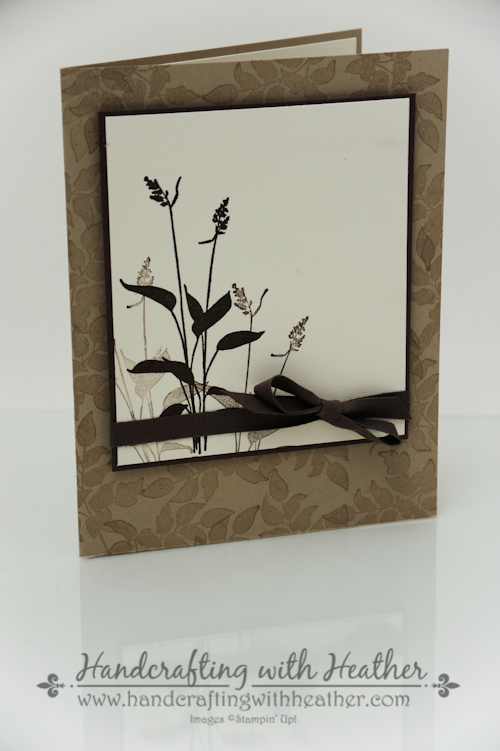
Before I get to today’s project, let me remind you that your opportunity to get $150 worth of product for only $99 begins today!  See all the details at the bottom of the post.  Now, onto today’s project, which is a clean and simple card featuring the World of Dreams stamp from Stampin’ Up!  This card was quick and simple to create.  It is blank inside, making it perfect for any occasion.

World of Dreams (3 of 4)

I started with a Crumb Cake card base, which I stamped using the leaf stamp from World of Dreams.  I used crumb cake ink, and stamped off before stamping onto the card base.  This gave my card interest, while also allowing the pattern to fade into the background.

World of Dreams (5 of 4)

Next, I stamped the “wheat” image (I’m not exactly sure what that plant is, but it is gorgeous!) onto a panel of Very Vanilla card stock using Early Espresso ink.  I stamped the image three times without re-inking to create depth.  Then I layered my panel onto a panel of Early Espresso card stock using SNAIL adhesive.  I tied a bow (Early Espresso) around my layered panels and added them to the front of the card with Stampin’ Dimensionals.  I just love the feel of the new 1/4″ cotton ribbon.  It is really soft and easy to work with.

World of Dreams (6 of 4)

For the inside of the card, I repeated my stamped image from the front.  I like how simple yet elegant this card is.  I think I will send it to my uncle who has recently been diagnosed with Cancer.  The neutral colors make it seem peaceful and well suited for a man.

Please pin this project to Pinterest if you are a fan of this card.  You will find a “pin it” button at the bottom of this post below the supply list and card stock cuts.  Also, please subscribe to my blog via email by clicking on the “follow” button if you enjoy reading my posts.

I hope you will consider selecting me as your demonstrator for your stamping needs.  I also offer free catalogs to all of my customers.  If you are my customer or want to be my customer, please email me your name and mailing address.  I’ll be more than happy to send you a copy of our catalogs.  You can email me at handcraftingheather@icloud.com.

If you need any supplies you can shop now in my online store!  Feel free to drop me an email if you have any questions or if you would like a catalog.  I’m here to help!

Happy Stamping!

Heather

  • Visit my online store here.
  • Shop the Clearance Rack here.

Get $150 worth of products for only $99 NOW!

join_1

Whether you are a hobbyist or someone interested in building your own business, this week will be a great time to join Stampin’ Up!  For one week only from August 21-28  for only $99 you will get your choice of $150 worth of product.  In addition, during the month of August you can order from the new Holiday catalog before it is available to the public (on August 28).  If you have at least $99 worth of product on your wish list, you really should consider this opportunity.  Being a demonstrator has SO MANY awesome benefits and the opportunity has zero risk!  If you are interested in learning more please contact me at handcraftingheather@icloud.com or click here fore more information.


WEEKLY DEALS for August 19-25

 Screen Shot 2014-08-19 at 6.18.15 AM

Click here to see the Weekly Deals from Stampin’ Up! in my online store.  The Weekly Deals are only while supplies last and only available at these great prices through August 25.


Stampin’ Up! items used to create today’s project:

If you would like to order any of the products featured in today’s project, click the images below to order from my online store.

Card Base: Crumb Cake – 5-1/2″ x 8-1/2″ scored at 4-1/4″

Panels:  Early Espresso- 3-1/2″ x 4″; Very Vanilla – 3-3/8″ x 3-7/8″ (front of card), 4″ x 5-1/4″ (inside of card)

Swallowtail Sympathy Card – Stampin’ Up!

Today’s project is a clean and simple sympathy card featuring the Swallowtail stamp from Stampin’ Up!  This card was created in honor of my dear friend who passed away last week.  My thoughts and prayers go out to her husband and the rest of her family.  I hope that this card will bring a small moment of comfort to them as they deal with their loss.

Swallowtail Sympathy Card (5 of 5)I started this card by adhering a panel of Blackberry Bliss to a Rich Razzleberry card base.  You can’t see that very well in the picture, but in person the blackberry bliss mat for the butterfly panel adds a little extra contrast.  next I stamped the Swallowtail image on a panel of Whisper White card stock using Versamark ink and heat embossed it with white embossing powder.

Swallowtail Sympathy Card (4 of 5)I used the resist technique to sponge over my embossed design with Rich Razzleberry ink.  Then I wiped the embossed image with a paper towel to remove the ink that had stuck to the embossing.  Next, I stamped the “With Sympathy” sentiment from the Bloom with Hope stamp set (hostess reward) in Blackberry Bliss ink.

Swallowtail Sympathy Card (3 of 5)

Finally, I tied a bow with Rich Razzleberry 1/4″ cotton ribbon around my white panel and adhered it to the front of the card using Stampin’ Dimensionals.

Swallowtail Sympathy Card (6 of 5)

For the inside of my card, I stamped the sentiment from Bloom with Hope in Blackbery Bliss ink.  Then I added some butterflies from the Papillon Potpourri stamp set in Rich Razzleberry and Blackberry Bliss ink.  I used the same stamps to add some butterflies to the envelope too.

Swallowtail Sympathy Card (7 of 5)

I think the image of a butterfly is perfect for a sympathy card.  Butterflies are a symbol of transformation.  This card brings me a little peace as I think about the passage from this life into the next.  I know my friend is in a place of love and serenity now.

Please pin this project to Pinterest if you are a fan of this card.  You will find a “pin it” button at the bottom of this post below the supply list and card stock cuts.  Also, please subscribe to my blog via email by clicking on the “follow” button if you enjoy reading my posts.

I hope you will consider selecting me as your demonstrator for your stamping needs.  I also offer free catalogs to all of my customers.  If you are my customer or want to be my customer, please email me your name and mailing address.  I’ll be more than happy to send you a copy of our catalogs.  You can email me at handcraftingheather@icloud.com.

If you need any supplies you can shop now in my online store!  Feel free to drop me an email if you have any questions or if you would like a catalog.  I’m here to help!

Happy Stamping!

Heather

  • Visit my online store here.
  • Shop the Clearance Rack here.

WEEKLY DEALS for August 5-11

 Screen Shot 2014-08-05 at 5.30.32 AM

Click here to see the Weekly Deals from Stampin’ Up! in my online store.  The Weekly Deals are only while supplies last and only available at these great prices through August 11.


Stampin’ Up! items used to create today’s project:

If you would like to order any of the products featured in today’s project, click the images below to order from my online store.


Card Stock Cuts

Card Base: Rich Razzleberry – 5-1/2″ x 8-1/2″ scored at 4-1/4″

Panels:  Blackberry Bliss – 4″ x 5-1/4″; Whisper White – 3-7/8″ x 5-1/8″ (front of card), 4″ x 5-1/4″ (inside of card)

Bloom With Hope & Label Love Wedding Card – Stampin’ Up!

My little sister got married yesterday!  I am so happy for her and her new husband.  It is so exciting to welcome my new brother-in-law into the family.  Today’s project is a wedding card featuring the Bloom with HopeChalk Talk, & Label Love stamp sets from Stampin’ Up!

Bloom With Hope Label Love Wedding (2 of 6)

I think the Bloom with Hope background in black and vanilla is so elegant and just perfect for this occasion.

Bloom With Hope Label Love Wedding (3 of 6)

I finished off the inside of the card by stamping the same floral design from the Bloom with Hope stamp set which is available as a hostess reward from Stampin’ Up!

Bloom With Hope Label Love Wedding (5 of 6)

Bloom With Hope Label Love Wedding (6 of 6)

This lovely card was just perfect to honor my sister and her groom on their special day.  If you love this project as much as I do, please pin it to Pinterest.  You will find a “pin it” button at the bottom of this post below the supply list and card stock cuts.  Also, please subscribe to my blog via email by clicking on the “follow” button if you are a fan of my work.

I hope you will consider selecting me as your demonstrator for your stamping needs.  If you would like to earn the Bloom with Hope stamp set by hosting a party, please contact me at handcraftingheather@icloud.com.

If you need any supplies you can shop now in my online store!  Feel free to drop me an email if you have any questions or if you would like a catalog.  I’m here to help!

Happy Stamping!

Heather

  • Visit my online store here.
  • Shop the Clearance Rack here.

WEEKLY DEALS for July 8-14

Screen Shot 2014-07-08 at 9.59.36 PM

Click here to see the Weekly Deals from Stampin’ Up! in my online store.  The Weekly Deals are only while supplies last and only available at these great prices through July 14.


Stampin’ Up! items used to create today’s project:

If you would like to order any of the products featured in today’s project, click the images below to order from my online store.


Card Stock Cuts

Card Base: Basic Black – 4-1/4″ x 11″

Panels:  Very Vanilla – 4″ x 5-1/4″ (two panels – one on front, one inside), 2-1/2″ x 3-1/2″ panel, 2-1/8″ x 3-1/8″ panel; Basic Black – 2-5/8″ x 3-5/8″ panel, 2-3/8″ x 3-3/8″ panel

Sentiment & Die Cuts:  Very Vanilla – Artisan Label Punch