Flower Frenzy Frames for a Wedding – Stampin’ Up!

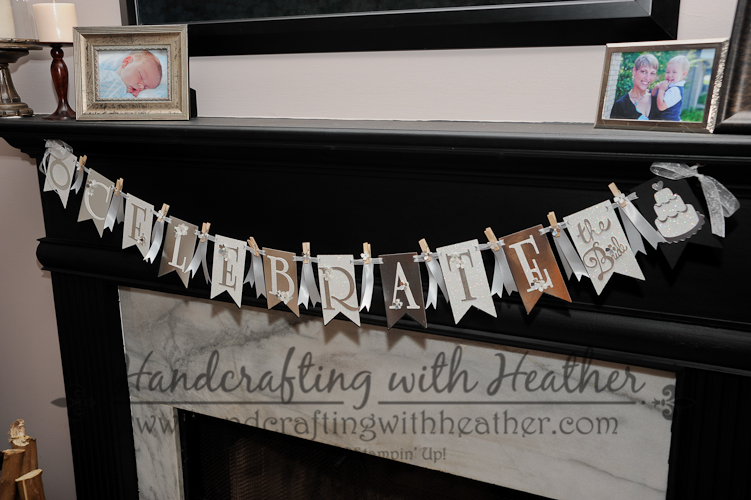
As many of you know, my sister is getting married this week.  For today’s project, I wanted to share one of the signs that we made for the wedding using the Flower Frenzy Bigz Die.

Flower Frenzy Wedding Signs (7 of 12)

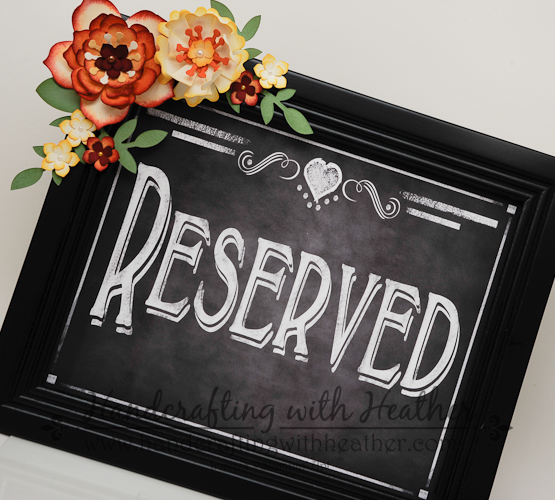
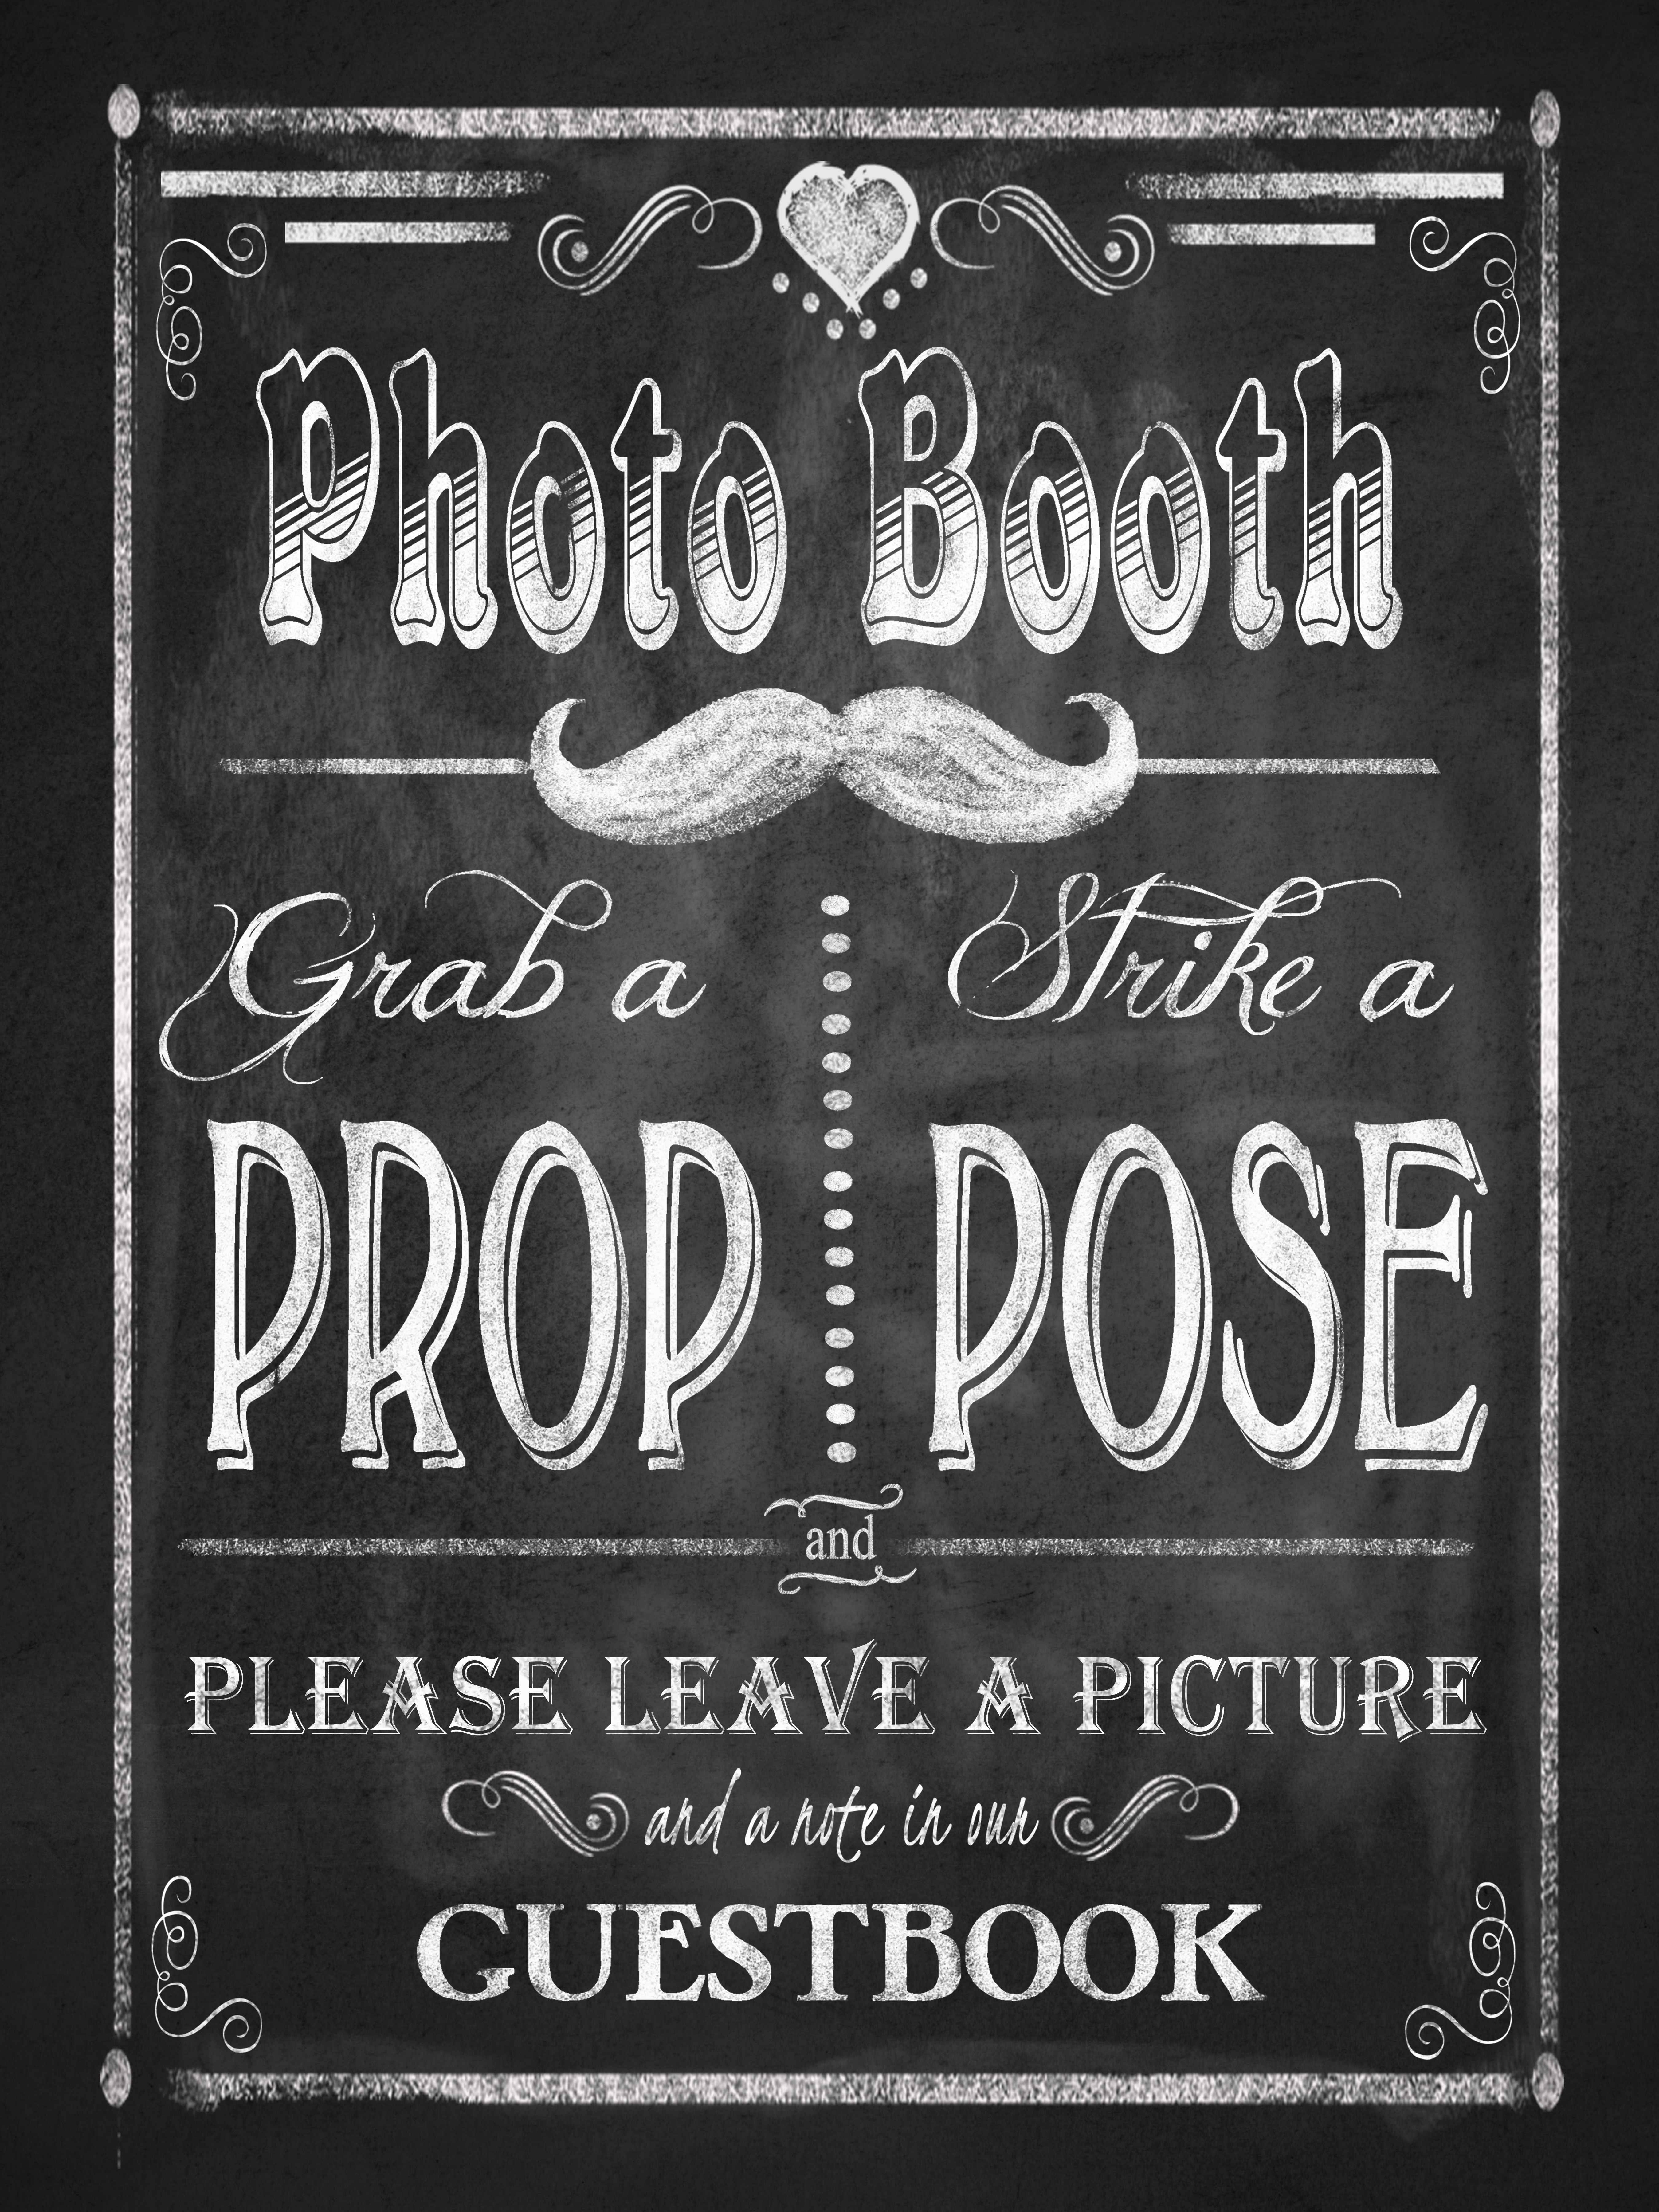
If you have ever planned a wedding, you know that there is a lot of signage needed, reserved signs for the family, a thank you message for the gift table, instructions for the photo booth (all the rage at weddings these days), etc.  Of course, you know I couldn’t just put a plain old framed sign out there… what a perfect opportunity to make our signage something beautiful for the wedding using dies and punches from Stampin’ Up!

Flower Frenzy Wedding Signs (8 of 12)

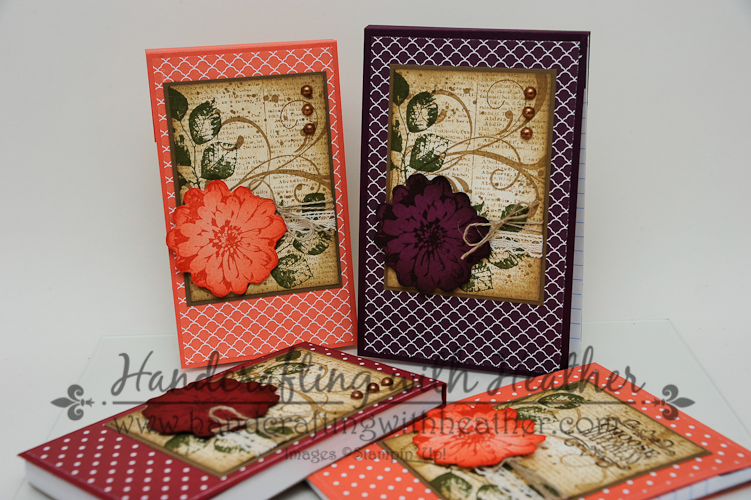
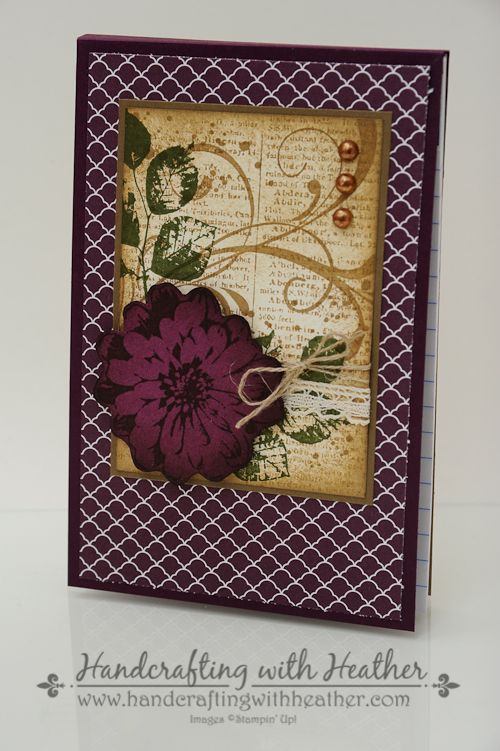
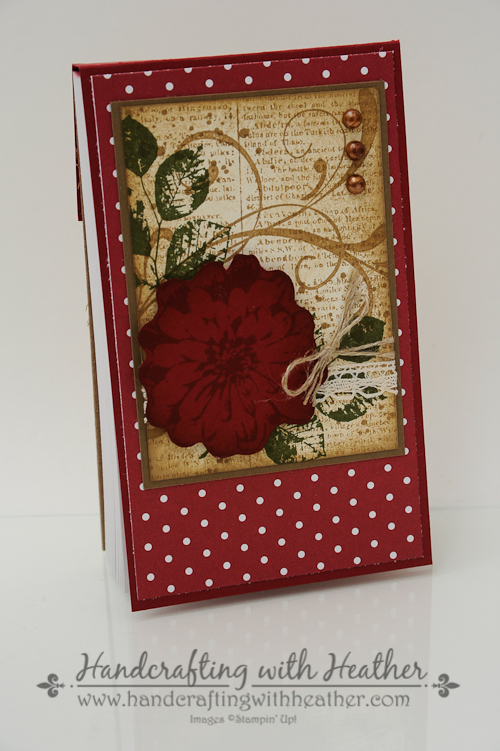
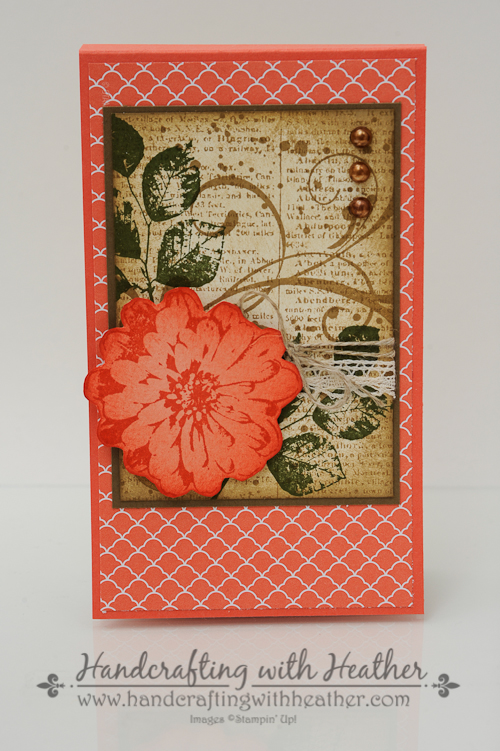
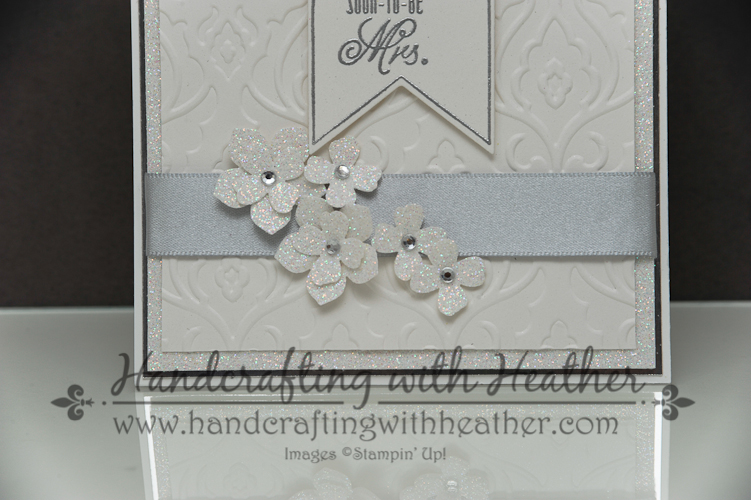
For the flowers, I used the Flower Frenzy Die, Fun Flower Punch, Pansy Punch, Petite Petals Punch,  and the flower from the Itty Bitty Accents Punch.  There isn’t a magic combination, I just played around with layering the different shapes and came up with something that I liked.

Flower Frenzy Wedding Signs (2 of 12)

Here are a few tips I discovered along the way…

  • Use lots of layers & curl them with a bone folder.
  • Sponging the edges of the petals makes a world of difference!
  • Attach the layers together with Stampin’ Dimensionals to make them pop!
  • Use Stampin’ Blendabilities markers to color the pearls in the center (I used the Bronze marker from the skin tone assortment for the largest flower).

Flower Frenzy Wedding Signs (11 of 12)

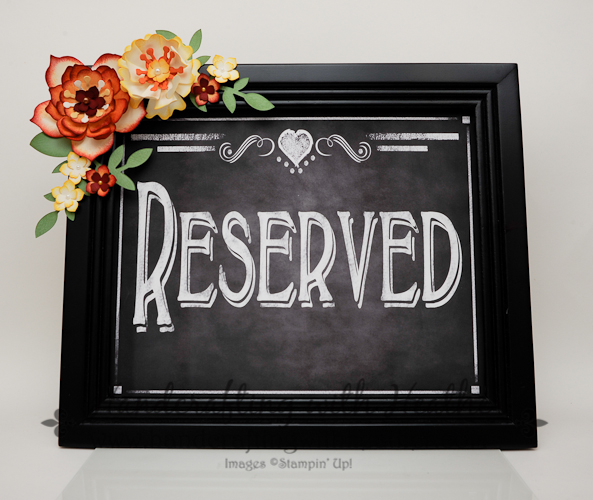
By the way, the actual signs were digital downloads purchased from Pineapple Soup Printables on Etsy.  We were able to purchase several custom signs that met our needs.  Lisa was great to work with and she got our order together very quickly.  Here are the other signs she created for us.  I would highly recommend working with her if you need any custom signage for any event.

heather_thank you 8x10 print

heather_guestbook 8x10 print

Photo Booth 18x24 print

Photo Booth instructions 8x10 print

I think these signs turned out beautifully and they will add a touch of whimsy and a pop of color to my sister’s wedding.  The frames would also make a great gift for someone you love.  Imagine giving a treasured photo of a grandchild in a beautifully decorated frame!  The possibilities are really endless.

Flower Frenzy Wedding Signs (1 of 12)

If you are a fan of this project and want to pin it to Pinterest, you will find a “pin it” button at the bottom of this post below the supply list and card stock cuts.  Also, please subscribe to my blog via email by clicking on the “follow” button if you are a fan of my work.

I hope you will consider selecting me as your demonstrator for your stamping needs.  I also offer free catalogs to all of my customers.  If you are my customer or want to be my customer, please email me your name and mailing address.  I’ll be more than happy to send you the gorgeous book.  You can email me at handcraftingheather@icloud.com.

Also, it is not too late to sign up for my one-to-one card swap.  The details and registration link are below.

If you need any supplies you can shop now in my online store!  Feel free to drop me an email if you have any questions or if you would like a catalog.  I’m here to help!

Happy Stamping!

Heather

  • Visit my online store here.
  • Shop the Clearance Rack here.

2014 Annual Catalog One-to-One Swap…
there’s still time to join in!

Just a reminder about my one-to-one swap.  I hope you will join in the fun!  It is so great when I get to actually connect with all of you and this is a wonderful way for us to share our inspiration and creativity with each other.  To participate, you will send me one card created with current Stampin’ Up! products (no retired items please) and a self-addressed stamped envelope.  Once all the swaps have arrived, I will send you someone else’s card in the mail.  It’s that easy!  If you have questions, please feel free to contact me at handcraftingheather@icloud.com.

To participate, please register for the event by clicking on the button below.   Once registration is complete, you will receive an email with specific instructions (including the address for where to send your swaps).  Projects are due in hand by July 10, 2014.  I can’t wait to see what you create!  Happy Stamping!

Eventbrite - 2014 Annual Catalog One-to-One Swap


WEEKLY DEALS for July 1 – 7

Screen Shot 2014-07-01 at 6.54.36 AM

Click here to see the Weekly Deals from Stampin’ Up! in my online store.  The Weekly Deals are only while supplies last and only available at these great prices through July 7.


Stampin’ Up! items used to create today’s project:

If you would like to order any of the products featured in today’s project, click the images below to order from my online store.

Happy Fourth of July with Paper Pumpkin – Stampin’ Up!

Happy Fourth of July everyone!  I finally got around to breaking out my June Paper Pumpkin kit.  It was just perfect to celebrate Independence Day!  I created a few different projects with the kit: a wreath, a card, and some pinwheels in a wall vase.  This was my first month of My Paper Pumpkin.  It was really easy to put together with simple instructions, and kind of fun to get a surprise craft in the mail.  To subscribe to My Paper Pumpkin click here.

June Paper Pumpkin (2 of 14)

This whimsical wreath was created by gluing several pinwheels from the kit onto a styrofoam wreath form.  Then I embellished by pushing tulle into the styrofoam with a skewer to fill in the gaps.  I took inspiration from my friend Amy Koenders, and flattened some of the straws that came with the kit and then wrapped them around a pencil to create some curly cue embellishments.

June Paper Pumpkin (3 of 14)

Although the wreath was fun to create, the pinwheels also were really cute all by themselves.  I have a wall vase that one of my students gave me, and I put a few of the pinwheels in there.  It was a great festive decoration, with very little effort.

June Paper Pumpkin (7 of 14)

Finally, I used some of the leftover pinwheels and punched a few banners with the banner punch.  I used those to create a 4th of July inspired card.  I chose to use the Everything Eleanor stamp set because I thought it gave a suggestion of fireworks.

June Paper Pumpkin (9 of 14)

I hope you have a wonderful 4th of July!  Enjoy spending time with friends and family and try to squeeze in a little creative time for yourself.

If you are a fan of this project and want to pin it to Pinterest, you will find a “pin it” button at the bottom of this post below the supply list and card stock cuts.  Also, please subscribe to my blog via email by clicking on the “follow” button if you are a fan of my work.

I hope you will consider selecting me as your demonstrator for your stamping needs.  I also offer free catalogs to all of my customers.  If you are my customer or want to be my customer, please email me your name and mailing address.  I’ll be more than happy to send you the gorgeous book.  You can email me at handcraftingheather@icloud.com.

Also, it is not too late to sign up for my one-to-one card swap.  The details and registration link are below.

If you need any supplies you can shop now in my online store!  Feel free to drop me an email if you have any questions or if you would like a catalog.  I’m here to help!

Happy Stamping!

Heather

  • Visit my online store here.
  • Shop the Clearance Rack here.

2014 Annual Catalog One-to-One Swap…
there’s still time to join in!

Just a reminder about my one-to-one swap.  I hope you will join in the fun!  It is so great when I get to actually connect with all of you and this is a wonderful way for us to share our inspiration and creativity with each other.  To participate, you will send me one card created with current Stampin’ Up! products (no retired items please) and a self-addressed stamped envelope.  Once all the swaps have arrived, I will send you someone else’s card in the mail.  It’s that easy!  If you have questions, please feel free to contact me at handcraftingheather@icloud.com.

To participate, please register for the event by clicking on the button below.   Once registration is complete, you will receive an email with specific instructions (including the address for where to send your swaps).  Projects are due in hand by July 10, 2014.  I can’t wait to see what you create!  Happy Stamping!

Eventbrite - 2014 Annual Catalog One-to-One Swap


WEEKLY DEALS for July 1 – 7

Screen Shot 2014-07-01 at 6.54.36 AM

Click here to see the Weekly Deals from Stampin’ Up! in my online store.  The Weekly Deals are only while supplies last and only available at these great prices through July 7.


Stampin’ Up! items used to create today’s project:

If you would like to order any of the products featured in today’s project, click the images below to order from my online store.

Everyday is a New Adventure with Project Life From Stampin’ Up!

It’s Thursday, and that means it’s time for more Project Life posts from me and Amy Koenders!  I love this “Every Day is a New Adventure” card from the Everyday Adventure Project Life Card Collection.  The colors remind me of spring time.

Project Life Everyday Adventure (1 of 6)

I combined three different journal cards from the Everyday Adventure Project Life Card Collection to create the front of my card.  Then I sponged around the edges with Bermuda Bay ink.  I added some Soft Sky Taffeta Ribbon and some flowers and butterflies created with the Itty Bitty Accents Punch Pack and the Bitty Butterfly Punch.  Finally, I punched a butterfly in the center of a scrap of card stock and used it as a mask to sponge two butterflies with Bermuda Bay and Pistachio Pudding ink.

Project Life Everyday Adventure (4 of 6)

I finished off the inside of my card by sponging butterflies in Pistachio Pudding, Soft Sky, and Bermuda Bay ink on a panel of Whisper White card stock using the same masking technique employed on the front of the card.

Project Life Everyday Adventure (5 of 6)

Project Life Everyday Adventure (6 of 6)

Now that you’ve seen what I created using Project Life today, check out how Amy Koenders of Stamp with Amy K used Project Life for her creation.  And, don’t forget to pin this card to Pinterest if you are a fan.  You will find a “pin it” button at the bottom of this post below the supply list and card stock cuts.

I hope you will consider selecting me as your demonstrator for your stamping needs.  I offer free catalogs to all of my customers.  If you are my customer or want to be my customer, please email me your name and mailing address.  I’ll be more than happy to send you the gorgeous 2014 Annual Catalog.  You can email me at handcraftingheather@icloud.com.

Also, it is not too late to sign up for my one-to-one card swap.  The details and registration link are below.

If you need any supplies you can shop now in my online store!  Feel free to drop me an email if you have any questions or if you would like a catalog.  I’m here to help!

Happy Stamping!

Heather

  • Visit my online store here.
  • Shop the Clearance Rack here.

One-to-One Swap Cards are due next week… There’s still time to sign up!

Just a reminder about my one-to-one swap.  I hope you will join in the fun!  It is so great when I get to actually connect with all of you and this is a wonderful way for us to share our inspiration and creativity with each other.  To participate, you will send me one card created with current Stampin’ Up! products (no retired items please) and a self-addressed stamped envelope.  Once all the swaps have arrived, I will send you someone else’s card in the mail.  It’s that easy!  If you have questions, please feel free to contact me at handcraftingheather@icloud.com.

To participate, please register for the event by clicking on the button below.   Once registration is complete, you will receive an email with specific instructions (including the address for where to send your swaps).  Projects are due in hand by July 10, 2014.  I can’t wait to see what you create!  Happy Stamping!

Eventbrite - 2014 Annual Catalog One-to-One Swap


WEEKLY DEALS for July 1 – 7

Screen Shot 2014-07-01 at 6.54.36 AM

Click here to see the Weekly Deals from Stampin’ Up! in my online store.  The Weekly Deals are only while supplies last and only available at these great prices through July 7.


Stampin’ Up! items used to create today’s project:

If you would like to order any of the products featured in today’s project, click the images below to order from my online store.


Card Stock Cuts

Card Base: Soft Sky – 4-1/4″ x 11″

Panels:  Project Life Polka Dot Panel (Bermuda Bay) – 3-78″ x 5-1/8″; Project Life Striped Panel – 2-1/2″ x 3-1/2″; Every Day Adventure Project Life Panel – 2-5/8″ x 3-1/2″; Whisper White (inside of card) – 4″ x 5-1/4″

Bridal Shower “Celebrate” Banner – Stampin’ Up!

My sister’s bridal shower is next week!  I can hardly believe it.  I have been having so much fun pulling all the details together… like this gorgeous banner that I made for the mantle of the fireplace.

Bridal Banner (4 of 11)

This banner was made using Stampin’ Up! punches and paper, as well as my Brother Scan N’ Cut e-cutter (one of my new toys).  I used the e-cutter to cut out the letters, wedding cake, and diamond ring die cuts.   Bridal Banner (7 of 11)

Check this out… the words “the bride” in the photo above were handwritten on a piece of white paper using a sharpie marker.  Then I scanned the file and converted it to a cut file, which I cut out of silver foil from Stampin’ Up!  Isn’t that amazing!

Bridal Banner (6 of 11)

I love how the Dazzling Diamonds Glimmer PaperSilver Foil,  and Silver Satin Ribbon all came together to create such an elegant banner.  The flowers from the Itty Bitty Accents Punch Pack were the perfect addition for embellishing the banner.

I hope my sister and her friends enjoy the festivities of the bridal shower.  I think this banner and the other details I have created are going to create the perfect environment to honor my sister on her special night.  If you are a fan of this project and want to pin it to Pinterest, you will find a “pin it” button at the bottom of this post below the supply list and card stock cuts.  Also, please subscribe to my blog via email by clicking on the “follow” button if you are a fan of my work.

I hope you will consider selecting me as your demonstrator for your stamping needs.  I also offer free catalogs to all of my customers.  If you are my customer or want to be my customer, please email me your name and mailing address.  I’ll be more than happy to send you the gorgeous book.  You can email me at handcraftingheather@icloud.com.

Also, it is not too late to sign up for my one-to-one card swap.  The details and registration link are below.

If you need any supplies you can shop now in my online store!  Feel free to drop me an email if you have any questions or if you would like a catalog.  I’m here to help!

Happy Stamping!

Heather

  • Visit my online store here.
  • Shop the Clearance Rack here.

2014 Annual Catalog One-to-One Swap…
there’s still time to join in!

Just a reminder about my one-to-one swap.  I hope you will join in the fun!  It is so great when I get to actually connect with all of you and this is a wonderful way for us to share our inspiration and creativity with each other.  To participate, you will send me one card created with current Stampin’ Up! products (no retired items please) and a self-addressed stamped envelope.  Once all the swaps have arrived, I will send you someone else’s card in the mail.  It’s that easy!  If you have questions, please feel free to contact me at handcraftingheather@icloud.com.

To participate, please register for the event by clicking on the button below.   Once registration is complete, you will receive an email with specific instructions (including the address for where to send your swaps).  Projects are due in hand by July 10, 2014.  I can’t wait to see what you create!  Happy Stamping!

Eventbrite - 2014 Annual Catalog One-to-One Swap


WEEKLY DEALS for July 1 – 7

Screen Shot 2014-07-01 at 6.54.36 AM

Click here to see the Weekly Deals from Stampin’ Up! in my online store.  The Weekly Deals are only while supplies last and only available at these great prices through July 7.


Stampin’ Up! items used to create today’s project:

If you would like to order any of the products featured in today’s project, click the images below to order from my online store.

Blendabilities, Blog Candy, a Sale and More from Stampin’ Up! – July 1, 2014

Blog Candy Winner!

Dixie is the lucky winner for this week’s blog candy!  One of these lovely notepads will be heading your way as soon, Dixie!  Please send me an email with your mailing address.

Choose Happiness Pads (6 of 6)


Stampin’ Blendabilities Now Available for Order!

Great news!  Today is the day!  The following Stampin’ Blendabilities sets are now available for purchase!  Click here to view a brochure about all the great features of Blendabilities.  The remaining colors listed in the catalog will be available to the public on August 1, 2014.  Click here to shop online now!

  • Cherry Cobbler (item #130995)
  • Coastal Cabana (item #131000)
  • Daffodil Delight (item #130998)
  • Old Olive (item #130999)
  • Pumpkin Pie (item #130997)
  • Rich Razzleberry (item #131003)
  • Skin Tone Assortment (item #129370)

In addition, the following accessories are also now available:

  • Memento Ink Pad (item #132708)
  • Memento Ink Refill (item #133456)
  • Color Lifter (item #129369)

Designer Series Paper Sale!

Click the image above to shop for Designer Series Paper in my online store.


2014 Annual Catalog One-to-One Swap – (Deadline July 10, 2014)

There are still 10 days left in my one-to-one swap!  It is not too late for you to get in on the action!  I hope you will join in the fun!  It is so great when I get to actually connect with all of you and this is a wonderful way for us to share our inspiration and creativity with each other.  To participate, you will send me one card created with current Stampin’ Up! products (no retired items please) and a self-addressed stamped envelope.  Once all the swaps have arrived, I will send you someone else’s card in the mail.  It’s that easy!  If you have questions, please feel free to contact me at handcraftingheather@icloud.com. To participate, please register for the event by clicking on the button below.   Once registration is complete, you will receive an email with specific instructions (including the address for where to send your swaps).  Projects are due in hand by July 10, 2014.  I can’t wait to see what you create!  Happy Stamping!

Eventbrite - 2014 Annual Catalog One-to-One Swap


WEEKLY DEALS for July 1 – 7

Screen Shot 2014-07-01 at 6.54.36 AM

Click here to see the Weekly Deals from Stampin’ Up! in my online store.  The Weekly Deals are only while supplies last and only available at these great prices through July 7.


Newest Digital Downloads from Stampin’ Up!

Click here to see all the latest digital downloads for My Digital Studio from Stampin’ Up!


Other Stampin’ Up! Links & Promotions

  • Visit my online store here.
  • Shop the Clearance Rack here.

Happy Stamping! Heather

Choose Happiness Notepads – Stampin’ Up!

Today’s project is one that brings a smile to my face.  I just love these adorable notepads featuring the Choose Happiness and Everything Eleanor stamp sets from Stampin’ Up!  I have a secret obsession with stationery and notepads of all kinds… no wonder I made my way into the art of making cards, lol!  I love having cute little notepads all over the place to jot down a quick note, or make a list.  (For those of you who saw my craft room post, you might have noticed that I’m also obsessed with organization, so lists make me happy too.)

Choose Happiness Pads (6 of 6)

These adorable notepads are so easy to make, and can be altered for any color scheme or stamped design.  They would make great gifts too!  I purchased some small notepads from Staples and Amazon.com for this project today, but you could really make them in any size.  I prefer to use “Gum-Top” notepads, which means they are glued along the top edge, rather than having cardboard wrapped around the top and secured with staples.  However, either type of pad can be used for this project.

Choose Happiness Pads (2 of 6)

The process I use for making these pads is the same, regardless of the dimensions.  For this post, I am going to tell you how to measure your notepad to make a cover with a perfect fit, rather than focusing on the dimensions of this specific project.

Begin by measuring the height and width of the front of your notepad.  I like to add 1/8″ to the height, so that the cover extends beyond the bottom of the pad by just a little bit when it is closed.  This makes it easier to open the pad.  Next, measure the depth of the notepad and add that measurement to the height.  Finally, add 1-1/2″ to those two measurements to account for the part that will wrap around the back.  Cut a rectangle out of card stock that is equal to:

width measurement x (height + depth + 1-1/2″)

For example, if your notepad measures 3″ x 5″ and is 1/4″ deep then you would cut your card stock to 3″ x 6-3/4″ then you would score it at 1-1/2″ and 1-3/4″.  Of course, where you score your card will depend on the dimensions of your notepad.  The first score mark will always be 1-1/2″, but the second score mark will depend on the depth of your notepad.  To determine the second score mark, add 1-1/2″ to the depth of the notepad.

Once you have scored your card stock, wrap it around the front of the notepad and secure it on the back of the notepad with a strong adhesive, such as sticky strip, Fuse Adhesive, or Multipurpose Liquid Glue.  Be sure that you don’t glue along the top edge of the notepad, just on the back.

Choose Happiness Pads (4 of 6)

Once the cover is in place, you can really decorate it any way you want.  For this set, I created notepads in Blackberry Bliss, Crisp Cantaloupe, and Cherry Cobbler.  I used coordinating DSP from the Background Designer Series Paper stacks and added a beautiful art piece featuring several stamp sets from Stampin’ Up! I began by stamping the Dictionary background stamp in Baked Brown sugar on a panel of Very Vanilla card stock.  Next, I stamped the flourish image from Everything Eleanor in the same shade, and I added some ink splotches from Gorgeous Grunge too.  Then I used Mossy Meadow ink, and the leaf image from Kinda Eclectic to add some foliage.  Next, I sponged the background with Baked Brown Sugar ink.  Finally, I added some Venetian Crochet Trim and Linen Thread to the panel.

Choose Happiness Pads (1 of 6)

I stamped the flower image from Choose Happiness in the same color card stock as I used for the cover of each notepad.  For the Blackberry Bliss and Cherry Cobbler pads, I used the coordinating ink color and sponged around the edges with it too.  For the Crisp Cataloupe pads, I wanted a little more contrast for the flower, so I used Calypso Coral ink.  Finally, I added the flower to the background with Stampin’ Dimensionals and mounted the entire piece on a Baked Brown Sugar mat.

Choose Happiness Pads (3 of 6)

For one of the pads, I stamped the “Choose Happiness” sentiment in Early Espresso ink to finish it off.  For the others, I colored three large pearls with my Bronze Stampin’ Blendabilities Marker (from the Skintone set).  Then I added them to the top right corner of the art piece for a finishing touch.

Choose Happiness Pads (6 of 6)

These notepads are the perfect size to slip into your purse or keep on the corner of a desk.  I just adore them!  If you love them too, today is your lucky day.  Leave me a comment about this post, and I will draw one lucky winner to receive one in the mail!  I will announce the winner in my post on Tuesday, July 1st.  (Which also happens to be the day that several Blendabilties Marker sets will be available to the public!  Are you getting excited yet?)

I know you are going to want to save this idea for later, so you should definitely pin it to Pinterest.  You can find a “pin it” button at the very bottom of this post.  To subscribe to my blog via email, just click on the “follow” button in the sidebar near the top.

I hope you will consider selecting me as your demonstrator for your stamping needs.  I offer free catalogs to all of my customers.  If you are my customer or want to be my customer, please email me your name and mailing address.  I’ll be more than happy to send you the gorgeous 2014 Annual Catalog.  You can email me at handcraftingheather@icloud.com.

Also, it is not too late to sign up for my one-to-one card swap.  Cards are due to me by July 10, which is a little less than two weeks from now.  The details and registration link are below.  I hope that you will join in the fun!

If you need any supplies you can shop now in my online store!  Feel free to drop me an email if you have any questions or if you would like a catalog.  I’m here to help!

Happy Stamping!

Heather

  • Visit my online store here.
  • Shop the Clearance Rack here.

Tomorrow is the Last Day to Sign Up for Only $50!

Tomorrow is the last day to take advantage of the $50 sign up special from Stampin’ Up!  If you have at least $50 worth of products you would like to purchase from the new annual catalog you should really consider joining.  There are many benefits of becoming a demonstrator including a great discount and access to advanced products.  Did you know you could order several of the Stampin’ Blendabilities marker sets now if you were a Stampin’ Up! Demonstrator?

Now is a great time to join my team!  I welcome Hobbyist Demonstrators, and during the month of June, new recruits can join Stampin’ Up! at one of two great prices. Stampin’ Up! will continue to offer their traditional starter kit priced at $99 ($125 product value + FREE Shipping), but only during the month of June they will also be offering a reduced priced starter kit at the low price of $50 ($55 product value + FREE Shipping).  Drop me a note at handcraftingheather@icloud.com if you have any questions or if you’d like additional details.  I’d love to have you on my team!  You can read more information about the benefits of being a Demonstrator here.


2014 Annual Catalog One-to-One Swap

Just a reminder about my one-to-one swap.  I hope you will join in the fun!  It is so great when I get to actually connect with all of you and this is a wonderful way for us to share our inspiration and creativity with each other.  To participate, you will send me one card created with current Stampin’ Up! products (no retired items please) and a self-addressed stamped envelope.  Once all the swaps have arrived, I will send you someone else’s card in the mail.  It’s that easy!  If you have questions, please feel free to contact me at handcraftingheather@icloud.com.

To participate, please register for the event by clicking on the button below.   Once registration is complete, you will receive an email with specific instructions (including the address for where to send your swaps).  Projects are due in hand by July 10, 2014.  I can’t wait to see what you create!  Happy Stamping!

Eventbrite - 2014 Annual Catalog One-to-One Swap


WEEKLY DEALS for June 24-30

Screen Shot 2014-06-24 at 6.01.06 AM

Click here to see the Weekly Deals from Stampin’ Up! in my online store.  The Weekly Deals are only while supplies last and only available at these great prices through June 30.


Stampin’ Up! items used to create today’s project:

If you would like to order any of the products featured in today’s project, click the images below to order from my online store.

Bridal Shower Wine Charms – Stampin’ Up!

I’m back today with another project for my sister’s bridal shower.  As young adults, whenever we would have dinner parties at my mom’s house, my sister would run to the printer and print out the guests’ names on strips of paper and tape them around the stem of all the wine glasses.  This was of course before there were a gazillion cute wine charms on the market (yes, that is an official number… I’m a math teacher, I should know).  Anyway, when I started planning this shower, I knew I would have to create some cute wine charms just for her special occasion.  Mine are a bit fancier than paper taped to the bottom of the glass though. 🙂

Girls' Night OUt (8 of 10)

I had some scraps of paper from my local craft store leftover from another project, which I used to make these wine charms.  However, as I describe the project, I will tell you the Stampin’ Up! products that would make perfect substitutions. (I’ve also listed those in the supply list at the bottom of the post.)


For this project, I purchased some 1/2″ Loose Leaf Rings from Amazon.com.  They are the perfect size for wine charms, and they open and close so you can easily put them on and switch out the charm for your next occasion.

Girls' Night OUt (6 of 10)

For each charm I punched one Scallop Oval Punch from Silver Glimmer Paper, and one Modern Label Punch from Silver Foil.  I printed the names of all the guests on a sheet of Whisper White card stock and punched them out using the Word Window Punch.  (For those who are interested, the font I used is called Centeria Script Demo.)  I layered the three punches together with Stampin’ Dimensionals and punched a hole in one end using the 1/4″ Circle Handheld Punch.

Girls' Night OUt (10 of 10)

Finally, I punched a flower from Dazzling Diamonds Glimmer Paper using the Itty Bitty Accents Punch Pack.  I added a rhinestone to the center and added it to the end of my charm with a glue dot.  Didn’t this project just turn out to be adorable?  I know my sister will love this extra detail at her party.  These were really easy to do and the colors could be changed to match any occasion.  So next time you are entertaining and want to “WOW” your guests with all the extra little details you put into the event, this project is for you.

I love Pinterest, don’t you?  You should pin this project so you can remember it next time you are planning a party.  You will find a “pin it” button at the bottom of this post below the supply list and card stock cuts.  Also, please subscribe to my blog via email by clicking on the “follow” button if you are a fan of my work.

Girls' Night OUt (9 of 10)

I hope you will consider selecting me as your demonstrator for your stamping needs.  I offer free catalogs to all of my customers.  If you are my customer or want to be my customer, please email me your name and mailing address.  I’ll be more than happy to send you the gorgeous 2014 Annual Catalog.  You can email me at handcraftingheather@icloud.com.

Also, don’t forget… it is not too late to sign up for my one-to-one card swap!  The details and registration link can be found below.

If you need any supplies you can shop now in my online store!  Feel free to drop me an email if you have any questions or if you would like a catalog.  I’m here to help!

Happy Stamping!

Heather

  • Visit my online store here.
  • Shop the Clearance Rack here.

Last Week to Sign Up for Only $50!

This is the last week to take advantage of the $50 sign up special from Stampin’ Up!  If you have at least $50 worth of products you would like to purchase from the new annual catalog you should really consider joining.  There are many benefits of becoming a demonstrator including a great discount and access to advanced products.  Did you know you could order several of the Stampin’ Blendabilities marker sets now if you were a Stampin’ Up! Demonstrator?

Now is a great time to join my team!  I welcome Hobbyist Demonstrators, and during the month of June, new recruits can join Stampin’ Up! at one of two great prices. Stampin’ Up! will continue to offer their traditional starter kit priced at $99 ($125 product value + FREE Shipping), but only during the month of June they will also be offering a reduced priced starter kit at the low price of $50 ($55 product value + FREE Shipping).  Drop me a note at handcraftingheather@icloud.com if you have any questions or if you’d like additional details.  I’d love to have you on my team!  You can read more information about the benefits of being a Demonstrator here.


2014 Annual Catalog One-to-One Swap

Just a reminder about my one-to-one swap.  I hope you will join in the fun!  It is so great when I get to actually connect with all of you and this is a wonderful way for us to share our inspiration and creativity with each other.  To participate, you will send me one card created with current Stampin’ Up! products (no retired items please) and a self-addressed stamped envelope.  Once all the swaps have arrived, I will send you someone else’s card in the mail.  It’s that easy!  If you have questions, please feel free to contact me at handcraftingheather@icloud.com.

To participate, please register for the event by clicking on the button below.   Once registration is complete, you will receive an email with specific instructions (including the address for where to send your swaps).  Projects are due in hand by July 10, 2014.  I can’t wait to see what you create!  Happy Stamping!

Eventbrite - 2014 Annual Catalog One-to-One Swap


WEEKLY DEALS for June 24-30

Screen Shot 2014-06-24 at 6.01.06 AM

Click here to see the Weekly Deals from Stampin’ Up! in my online store.  The Weekly Deals are only while supplies last and only available at these great prices through June 30.


Stampin’ Up! items used to create today’s project:

If you would like to order any of the products featured in today’s project, click the images below to order from my online store.

Project Life From My Heart – Stampin’ Up!

It’s Thursday, and that means Amy Koenders and I are here with more projects created with Project Life by Stampin’ Up!  As I was flipping through my Project Life cards this week, I noticed that the circle on this gray polka dot card looked a lot like the border on the friendship stamp in the From My Heart stamp set from Stampin’ Up!  With that little realization, inspiration was born and I was off and running.

From My Heart Project Life (3 of 7)

This card was another one that was super quick and easy!  Gotta love that!  I started by stamping my image inside the circle of my Project Life card using Stazon ink and my Stamp-a-ma-jig for placement.

From My Heart Project Life (6 of 7)

Then I added some black candy dots to the corners and mounted my card on a panel of Basic Black card stock.  I wrapped a length of Silver Satin Ribbon around a panel of DSP from the Back to Black DSP pack and adhered it using Fast Fuse adhesive.  Then I glued the DSP panel to a Basic Black card base using multipurpose liquid glue.

From My Heart Project Life (7 of 7)

I attached my Project Life panel to the front of the card with Stampin’ Dimensionals and added a little knot of ribbon to the top with a glue dot.

From My Heart Project Life (4 of 7)

Finally, I finished off the inside of my card by adding a strip of DSP mounted on Basic Black card stock to the bottom of a Whisper White panel.  Wasn’t that simple?  The whole thing was designed and put together in a just a few minutes.  I love it!

I also love Pinterest, don’t you?  Please pin this project if you love it as much as I do.  You will find a “pin it” button at the bottom of this post below the supply list and card stock cuts.  Also, please subscribe to my blog via email by clicking on the “follow” button if you are a fan of my work.

From My Heart Project Life (2 of 7)

Now that you’ve seen what I created using Project Life today, check out how Amy Koenders of Stamp with Amy K used Project Life for her creation.

I hope you will consider selecting me as your demonstrator for your stamping needs.  I offer free catalogs to all of my customers.  If you are my customer or want to be my customer, please email me your name and mailing address.  I’ll be more than happy to send you the gorgeous 2014 Annual Catalog.  You can email me at handcraftingheather@icloud.com.

Also, it is not too late to sign up for my one-to-one card swap.  The details and registration link are below.

If you need any supplies you can shop now in my online store!  Feel free to drop me an email if you have any questions or if you would like a catalog.  I’m here to help!

Happy Stamping!

Heather

  • Visit my online store here.
  • Shop the Clearance Rack here.

Last Week to Sign Up for Only $50! Deal Ends June 30th.

This is the last week to take advantage of the $50 sign up special from Stampin’ Up!  If you have at least $50 worth of products you would like to purchase from the new annual catalog you should really consider joining.  There are many benefits of becoming a demonstrator including a great discount and access to advanced products.  Did you know you could order several of the Stampin’ Blendabilities marker sets now if you were a Stampin’ Up! Demonstrator?

Now is a great time to join my team!  I welcome Hobbyist Demonstrators, and during the month of June, new recruits can join Stampin’ Up! at one of two great prices. Stampin’ Up! will continue to offer their traditional starter kit priced at $99 ($125 product value + FREE Shipping), but only during the month of June they will also be offering a reduced priced starter kit at the low price of $50 ($55 product value + FREE Shipping).  Drop me a note at handcraftingheather@icloud.com if you have any questions or if you’d like additional details.  I’d love to have you on my team!  You can read more information about the benefits of being a Demonstrator here.


2014 Annual Catalog One-to-One Swap

Just a reminder about my one-to-one swap.  I hope you will join in the fun!  It is so great when I get to actually connect with all of you and this is a wonderful way for us to share our inspiration and creativity with each other.  To participate, you will send me one card created with current Stampin’ Up! products (no retired items please) and a self-addressed stamped envelope.  Once all the swaps have arrived, I will send you someone else’s card in the mail.  It’s that easy!  If you have questions, please feel free to contact me at handcraftingheather@icloud.com.

To participate, please register for the event by clicking on the button below.   Once registration is complete, you will receive an email with specific instructions (including the address for where to send your swaps).  Projects are due in hand by July 10, 2014.  I can’t wait to see what you create!  Happy Stamping!

Eventbrite - 2014 Annual Catalog One-to-One Swap


WEEKLY DEALS for June 24-30

Screen Shot 2014-06-24 at 6.01.06 AM

Click here to see the Weekly Deals from Stampin’ Up! in my online store.  The Weekly Deals are only while supplies last and only available at these great prices through June 30.


Stampin’ Up! items used to create today’s project:

If you would like to order any of the products featured in today’s project, click the images below to order from my online store.


Card Stock Cuts

Card Base: Whisper White – 4-1/4″ x 11″

Panels:  Silver Foil – 4-1/8″ x 5-3/8″ panel; Dazzling Diamonds Glimmer Paper – 4″ x 5-1/4″ panel; Shimmery White – 3-3/4″ x 4-7/8″ panel

Sentiment & Die Cuts:  Banner Framelits die cut (3rd from center).


Girls’ Night Out Bridal Shower Invitation – Stampin’ Up!

My sister is getting married in a couple of weeks and I am throwing her a bridal shower.  I’m having such a blast creating all the details to make this event special.  You can expect to see several wedding themed posts coming in the near future!  For today’s project, I used the Girls’ Night Out stamp set from Stampin’ Up! to create this elegant invitation for the bridal shower.

Girls' Night OUt (2 of 10)

I just love how this turned out.  You can’t really see it well in the picture, but the Silver Foil and the Dazzling Diamonds Glimmer Paper add a lovely sparkle to this card.  I just know the guests will love getting this one in the mail.

Girls' Night OUt (3 of 10)

I dry embossed a panel of Shimmery White card stock using the Beautifully Baroque embossing folder to give the card face an added element of elegance.  Then I stamped the bride image from Girls’ Night Out using Versamark ink and heat embossed it with Silver Stampin’ Emboss Powder.  I cut out the sentiment using the Banner Framelits Die and my Big Shot.  Then I added it to the front of my card with Stampin’ Dimensionals.

Girls' Night OUt (4 of 10)

I added a length of Silver Satin Ribbon, which is just glorious!  Then I punched some flowers using the Dazzling Diamonds Glimmer paper and my Petite Petals Punch and the Itty Bitty Accents Punch Pack.  Finally, I glitzed them up a bit more with some Rhinestone accents, which tied everything together just perfectly.

Girls' Night OUt (1 of 10)

I know my sister and her friends are going to love this invitation.  It is the perfect start to what I hope will be a really fun evening with my favorite bride!

I love Pinterest, don’t you?  Please pin this project if you love it as much as I do.  You will find a “pin it” button at the bottom of this post below the supply list and card stock cuts.  Also, please subscribe to my blog via email by clicking on the “follow” button if you are a fan of my work.

I hope you will consider selecting me as your demonstrator for your stamping needs.  I also offer free catalogs to all of my customers.  If you are my customer or want to be my customer, please email me your name and mailing address.  I’ll be more than happy to send you the gorgeous book.  You can email me at handcraftingheather@icloud.com.

Also, it is not too late to sign up for my one-to-one card swap.  The details and registration link are below.

If you need any supplies you can shop now in my online store!  Feel free to drop me an email if you have any questions or if you would like a catalog.  I’m here to help!

Happy Stamping!

Heather

  • Visit my online store here.
  • Shop the Clearance Rack here.

Last Week to Sign Up for Only $50!

This is the last week to take advantage of the $50 sign up special from Stampin’ Up!  If you have at least $50 worth of products you would like to purchase from the new annual catalog you should really consider joining.  There are many benefits of becoming a demonstrator including a great discount and access to advanced products.  Did you know you could order several of the Stampin’ Blendabilities marker sets now if you were a Stampin’ Up! Demonstrator?

Now is a great time to join my team!  I welcome Hobbyist Demonstrators, and during the month of June, new recruits can join Stampin’ Up! at one of two great prices. Stampin’ Up! will continue to offer their traditional starter kit priced at $99 ($125 product value + FREE Shipping), but only during the month of June they will also be offering a reduced priced starter kit at the low price of $50 ($55 product value + FREE Shipping).  Drop me a note at handcraftingheather@icloud.com if you have any questions or if you’d like additional details.  I’d love to have you on my team!  You can read more information about the benefits of being a Demonstrator here.


2014 Annual Catalog One-to-One Swap

Just a reminder about my one-to-one swap.  I hope you will join in the fun!  It is so great when I get to actually connect with all of you and this is a wonderful way for us to share our inspiration and creativity with each other.  To participate, you will send me one card created with current Stampin’ Up! products (no retired items please) and a self-addressed stamped envelope.  Once all the swaps have arrived, I will send you someone else’s card in the mail.  It’s that easy!  If you have questions, please feel free to contact me at handcraftingheather@icloud.com.

To participate, please register for the event by clicking on the button below.   Once registration is complete, you will receive an email with specific instructions (including the address for where to send your swaps).  Projects are due in hand by July 10, 2014.  I can’t wait to see what you create!  Happy Stamping!

Eventbrite - 2014 Annual Catalog One-to-One Swap


WEEKLY DEALS for June 24-30

Screen Shot 2014-06-24 at 6.01.06 AM

Click here to see the Weekly Deals from Stampin’ Up! in my online store.  The Weekly Deals are only while supplies last and only available at these great prices through June 30.


Stampin’ Up! items used to create today’s project:

If you would like to order any of the products featured in today’s project, click the images below to order from my online store.


Card Stock Cuts

Card Base: Whisper White – 4-1/4″ x 11″

Panels:  Silver Foil – 4-1/8″ x 5-3/8″ panel; Dazzling Diamonds Glimmer Paper – 4″ x 5-1/4″ panel; Shimmery White – 3-3/4″ x 4-7/8″ panel

Sentiment & Die Cuts:  Banner Framelits die cut (3rd from center).


Updates & Weekly Deals from Stampin’ Up! – June 24, 2014

Last Week to Sign Up for Only $50!

This is the last week to take advantage of the $50 sign up special from Stampin’ Up!  If you have at least $50 worth of products you would like to purchase from the new annual catalog you should really consider joining.  There are many benefits of becoming a demonstrator including a great discount and access to advanced products.  Did you know you could order several of the Stampin’ Blendabilities marker sets now if you were a Stampin’ Up! Demonstrator and the remaining colors will be available to demonstrators on July 1, 2014!

Now is a great time to join my team!  I welcome Hobbyist Demonstrators, and during the month of June, new recruits can join Stampin’ Up! at one of two great prices. Stampin’ Up! will continue to offer their traditional starter kit priced at $99 ($125 product value + FREE Shipping), but only during the month of June they will also be offering a reduced priced starter kit at the low price of $50 ($55 product value + FREE Shipping).  Drop me a note at handcraftingheather@icloud.com if you have any questions or if you’d like additional details.  I’d love to have you on my team!  You can read more information about the benefits of being a Demonstrator here.


2014 Annual Catalog One-to-One Swap

It’s not to late to get in on my one-to-one swap.  I hope you will join in the fun!  It is so great when I get to actually connect with all of you and this is a wonderful way for us to share our inspiration and creativity with each other.  To participate, you will send me one card created with current Stampin’ Up! products (no retired items please) and a self-addressed stamped envelope.  Once all the swaps have arrived, I will send you someone else’s card in the mail.  It’s that easy!  If you have questions, please feel free to contact me at handcraftingheather@icloud.com. To participate, please register for the event by clicking on the button below.   Once registration is complete, you will receive an email with specific instructions (including the address for where to send your swaps).  Projects are due in hand by July 10, 2014.  I can’t wait to see what you create!  Happy Stamping! Eventbrite - 2014 Annual Catalog One-to-One Swap


Great news!  Stampin’ Up! has announced that the following Blendabilities products will be available on July 1, 2014.  The remaining colors listed in the catalog will be available to the public on August 1, 2014.

  • Cherry Cobbler (item #130995)
  • Coastal Cabana (item #131000)
  • Daffodil Delight (item #130998)
  • Old Olive (item #130999)
  • Pumpkin Pie (item #130997)
  • Rich Razzleberry (item #131003)
  • Skin Tone Assortment (item #129370)

In addition, the following accessories will also be available:

  • Memento Ink Pad (item #132708)
  • Memento Ink Refill (item #133456)
  • Color Lifter (item #129369)

WEEKLY DEALS for June 24-30

Screen Shot 2014-06-24 at 6.01.06 AM

Click here to see the Weekly Deals from Stampin’ Up! in my online store.  The Weekly Deals are only while supplies last and only available at these great prices through June 30.


Newest Digital Downloads from Stampin’ Up!

Click here to see all the latest digital downloads for My Digital Studio from Stampin’ Up!


Other Stampin’ Up! Links & Promotions

  • Visit my online store here.
  • Shop the Clearance Rack here.

Happy Stamping! Heather