Hey, Valentine You’re a Treasure! – Stampin’ Up!

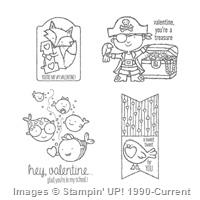
The first time I flipped through the Stampin’ Up! 2015 Occasions catalog, I was with my son.  As soon as I got to the page with the Hey, Valentine stamp set on it, he said, “I want the pirate one!”  I knew then that I would use that stamp for my sweet little Valentine boy!

Hey, Valentine Pirate (1 of 4)

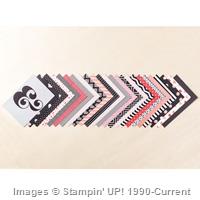
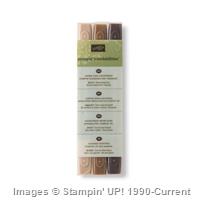
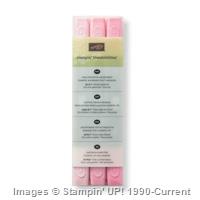
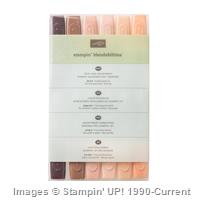
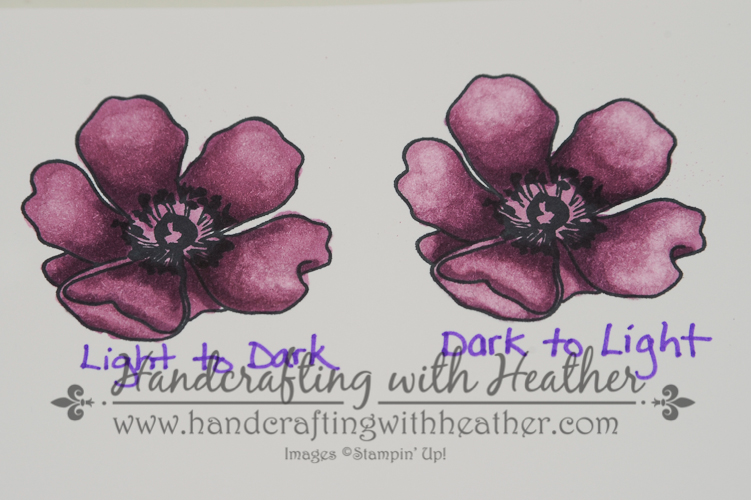
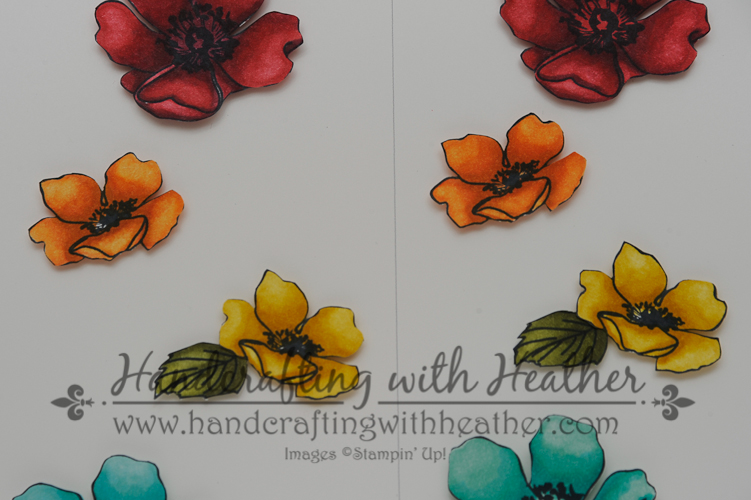
The design of this card was CASED from Angie Britt.  I just loved how she colored the image and combined it with the DSP from the Stacked with Love Paper Stack.  The Blendabilities markers worked perfectly for this little guy!  Did you know that you can earn FREE Stampin’ Blendabilities with every $50 purchase during Sale-A-Bration through March 31, 2015.  You can choose from 12 different color options!

Hey, Valentine Pirate (3 of 4)

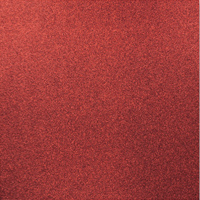
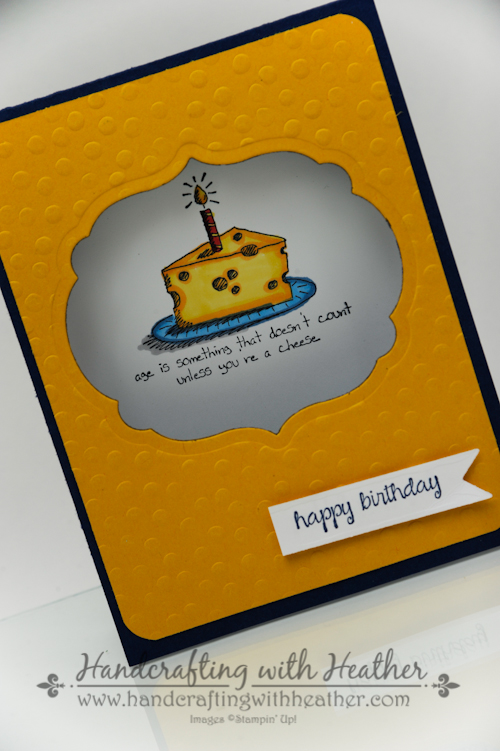
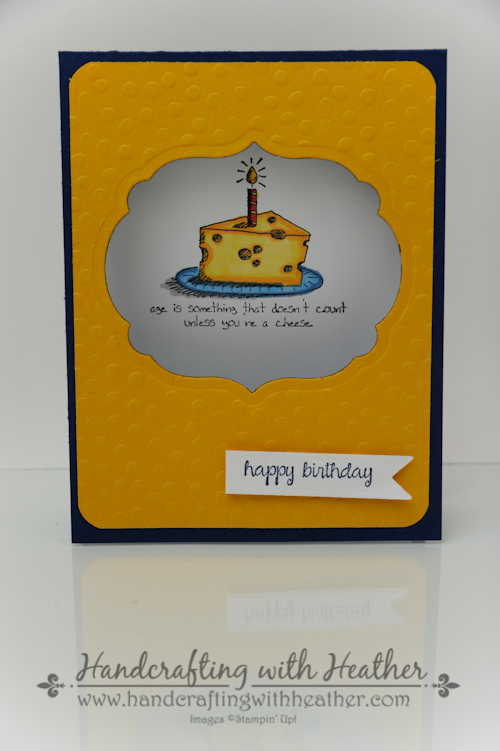
Although I stayed pretty faithful to the original card design, I did add a few little extra details to make it my own.  I wanted to add a little extra pizzaz, so I mounted my image on Red Glimmer Paper, and a pirate’s booty wouldn’t be complete without diamonds… the perfect opportunity for some rhinestones, I’d say!

Hey, Valentine Pirate (4 of 4)

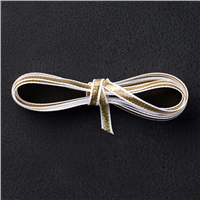
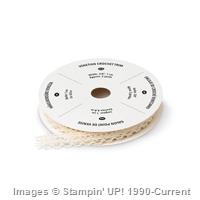
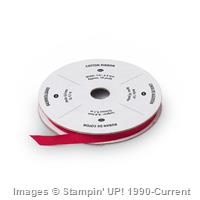
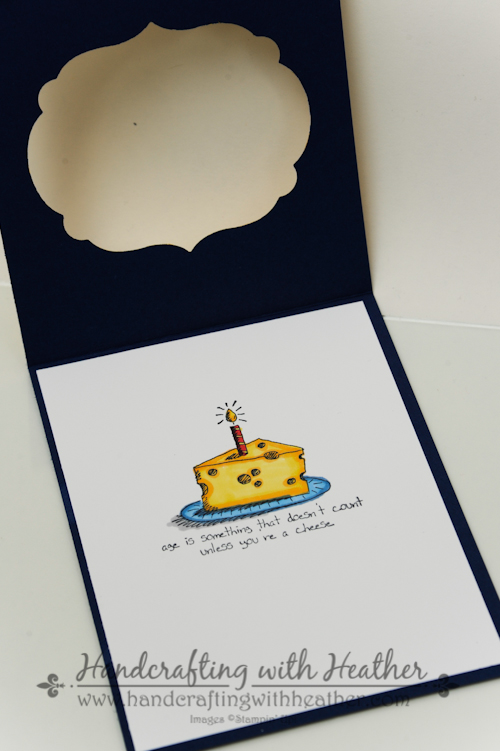
Finally, I added some Real Red 1/4″ Cotton Ribbon to the front and a few little hearts and a strip of DSP to the inside to finish it off.

Hey, Valentine Pirate (2 of 4)

I know Carter is going to love getting this card on Valentine’s day…. now, I just have to decide what I’m going to give him to go with it!  If you are a fan of this project, I hope you will pin it to Pinterest for me.  You will find a “pin it” button at the very bottom of this post following the supply list.

I hope you will consider selecting me as your demonstrator for your stamping needs.  If you need any supplies you can shop now in my online store!  Feel free to drop me an email if you have any questions or if you would like a catalog.  I’m here to help!

Happy Stamping!

Heather

  • Visit my online store here.
  • Shop the Clearance Rack here.

Handcrafting with Heather Creativity Clubhouse

Creativity Credit copy

Don’t forget about my customer loyalty program when you place your orders.  I’m offering double Creativity Credits during Sale-A-Bration!  Click here to read more about the Creativity Credits program, my buyer reward program where you earn free Stampin’ Up! merchandise.

Let me know if you have any questions, have fun shopping!

January 29 – February 16 Hostess Code:  XN46DEBT

Use this hostess code when you order and receive a set of rhinestones from me!  If your order is over $150, please do not use this code, but you’ll still get the free gift.


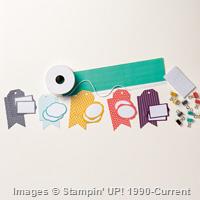
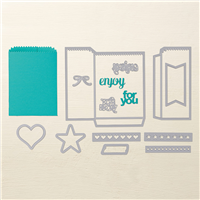
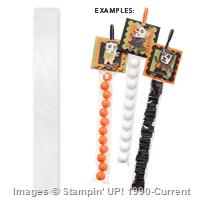
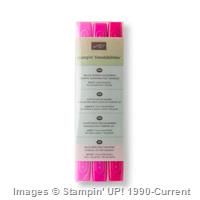
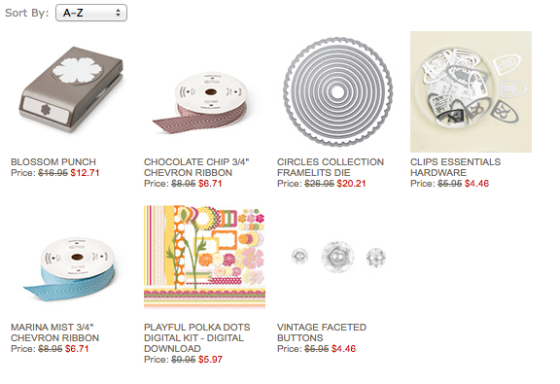
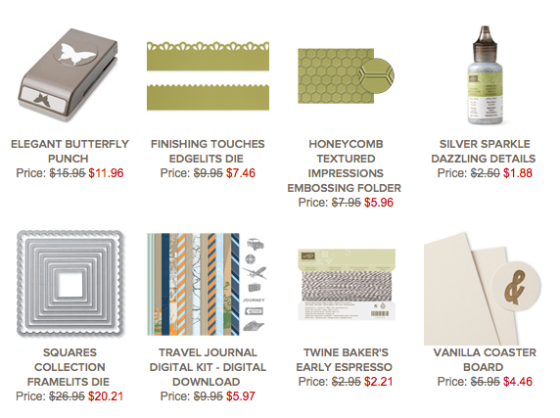
New Weekly Deals From Stampin’ Up! February 10-16

Click the images below to order the weekly deal products from my online store.  The Weekly Deals are only while supplies last and only available at these great prices through February 16th.

133736

Sale: $18.71

Price: $24.95

127012

Sale: $20.21

Price: $26.95

133728

Sale: $28.46

Price: $37.95

134583

Sale: $3.71

Price: $4.95

134581

Sale: $5.21

Price: $6.95

Supply List

Built for Free Using:  My Stampin Blog


Stampin’ Up! Supplies Used for Today’s Project

If you would like to order any of the products featured in today’s project, click the images below to order from my online store.

Supply List

Built for Free Using:  My Stampin Blog

Advertisement

Hey, Valentine! A Sweet Tweet for You! – Stampin’ Up!

Valentine’s Day is fast approaching, and I’m so excited about the Hey, Valentine stamp set from Stampin’ Up!  This year will be my son’s first year in a school environment for Valentine’s Day, and I am thrilled with how cute the valentines for his class have turned out!

Hey, Valentine Candy Treats (2 of 3)

Aren’t those just adorable!  I used the “a sweet tweet for YOU” stamp from the Hey, Valentine stamp set and colored them with my Stampin’ Blendabilities Markers.  I love how they turned out!  And, did you know that with every $50 purchase, you can choose a set of Blendabilities for FREE during Sale-A-Bration!  There are 12 different color sets to choose from, and the sale goes until March 31, 2015.

Hey, Valentine Candy Treats (1 of 3)

After coloring in all my cute little birds, I cut them out using the coordinating die from the Mini Treat Bag Thinlits Dies.  Then I filled 1″ x 8″ cellophane bags with jelly beans and stapled the tag to the top.  I used some leftover bakers twine from my January Paper Pumpkin Kit to add a little bow on top of the staple (but you could use Blushing Bride or Cherry Cobbler Baker’s Twine as a substitute).

Hey, Valentine Candy Treats (3 of 3)

I punched out a 1″ circle in Pink Pirouette card stock and wrote “from Carter” on the back of each treat.  I just know he is going to love giving these out to his friends at school.  Every time he sees the treats stacked on the counter in my crafting studio he asks when he gets to give out his “beans.”

Hey, Valentine Candy Treats (2 of 3)

The moment I saw the Hey, Valentine stamp set in the catalog, I knew I was going to use it for Carter’s class treats.  I couldn’t be happier with how these turned out!  If you are a fan of this project, I hope you will pin it to Pinterest for me.  You will find a “pin it” button at the very bottom of this post following the supply list.

I hope you will consider selecting me as your demonstrator for your stamping needs.  If you need any supplies you can shop now in my online store!  Feel free to drop me an email if you have any questions or if you would like a catalog.  I’m here to help!

Happy Stamping!

Heather

  • Visit my online store here.
  • Shop the Clearance Rack here.

Handcrafting with Heather Creativity Clubhouse

Creativity Credit copy

Don’t forget about my customer loyalty program when you place your orders.  I’m offering double Creativity Credits during Sale-A-Bration!  Click here to read more about the Creativity Credits program, my buyer reward program where you earn free Stampin’ Up! merchandise.

Let me know if you have any questions, have fun shopping!

January 29 – February 15 Hostess Code:  XN46DEBT

Use this hostess code when you order and receive a set of rhinestones from me!  If your order is over $150, please do not use this code, but you’ll still get the free gift.


New Weekly Deals From Stampin’ Up! February 3-9

Click the images below to order the weekly deal products from my online store.  The Weekly Deals are only while supplies last and only available at these great prices through February 9th.

135315

Sale: $3.71

Price: $4.95

133724

Sale: $32.21

Price: $42.95

133784

Sale: $11.96

Price: $15.95

137416

Sale: $17.21

Price: $22.95

133786

Sale: $11.96

Price: $15.95

133629

Sale: $5.96

Price: $7.95

Supply List

Built for Free Using:  My Stampin Blog


Stampin’ Up! Supplies Used for Today’s Project

If you would like to order any of the products featured in today’s project, click the images below to order from my online store.

Supply List

Built for Free Using:  My Stampin Blog

Giggle Greetings… Age Only Counts if You’re a Cheese! – Stampin’ Up!

Today’s project is a silly birthday card featuring the Giggle Greetings stamp set from Stampin’ Up!  I just love the goofy sentiments in this set.  They are perfect for putting a smile on anyone’s face.

Giggle Greetings - Cheese (5 of 4)

I decided to use my Labels Collection Framelits Dies to create a window in the front of my card.  I like how this technique allows the stamped image to be the focal point of the front of the card as well as the inside.

Giggle Greetings - Cheese (6 of 4)

Giggle Greetings - Cheese (3 of 4)

I colored this image using my Stampin’ Blendabilities markers.  The coloring only took a couple of minutes, but it really makes the card pop!

Giggle Greetings - Cheese (4 of 4)

I hope you are a fan of this project and will pin it to Pinterest for me.  You will find a “pin it” button at the bottom of this post below the supply list and card stock cuts.  Also, please subscribe to my blog via email by clicking on the “follow” button if you enjoy reading my posts.

I hope you will consider selecting me as your demonstrator for your stamping needs.  I also offer free catalogs to all of my customers.  If you are my customer or want to be my customer, please email me your name and mailing address.  I’ll be more than happy to send you a copy of our catalogs.  You can email me at handcraftingheather@icloud.com.

If you need any supplies you can shop now in my online store!  Feel free to drop me an email if you have any questions or if you would like a catalog.  I’m here to help!

Happy Stamping!

Heather

  • Visit my online store here.
  • Shop the Clearance Rack here.

WEEKLY DEALS for August 26 – September 1

Screen Shot 2014-08-26 at 7.19.28 AM

Click here to see the Weekly Deals from Stampin’ Up! in my online store.  The Weekly Deals are only while supplies last and only available at these great prices through September 1.


Stampin’ Up! items used to create today’s project:

If you would like to order any of the products featured in today’s project, click the images below to order from my online store.


Card Stock Cuts

Card Base – Night of Navy – 4-1/4″ x 11″ scored at 5-1/2″

Panels – Crushed Curry – 4″ x 5-1/4″ panel with corners rounded using envelope punch board; Whisper White – 4″ x 5-1/4″ panel inside of card.

Giggle Greetings… Sometimes Life is the Pits! – Stampin’ Up!

Lately life has handed me more than my fair share of bad news, so it seemed like the perfect time to have a laugh.  Giggle Greetings is the perfect stamp set to put a little bit of joy into life when life is the pits!

Giggle Greetings (5 of 6)

I don’t mean to sound negative.  My life is full of wonderful blessings too (my new job, a loving family, and most importantly my precious son).  This card is my way of focusing on the positive and bringing some humor to the situation.  I created two different versions of this card because I just couldn’t make my mind up on the design.  Which is your favorite?

Giggle Greetings (3 of 6)

For the green and yellow version, I wanted to add a bow, but I didn’t have any Cherry Cobbler ribbon.  So, I used my Cherry Cobbler Stampin’ Write Marker to die a scrap of white satin ribbon.  It was super easy and did the trick perfectly!

Giggle Greetings (7 of 6)

I stamped the cherry bowl image on the inside of the card in Memento black ink.  I used a post it note to mask the greeting above and below the image.  I liked the simple sketched appearance of the stamped image, so I decided not to color it in on the inside of the card.

Giggle Greetings (8 of 6)

I like how these cards turned out.  I had fun coloring them with my Stampin’ Blendabilities markers, and as always, creating something fun took my mind off of other things.  I just love Stamping!

Please pin this project to Pinterest if you are a fan of this card.  You will find a “pin it” button at the bottom of this post below the supply list and card stock cuts.  Also, please subscribe to my blog via email by clicking on the “follow” button if you enjoy reading my posts.

I hope you will consider selecting me as your demonstrator for your stamping needs.  I also offer free catalogs to all of my customers.  If you are my customer or want to be my customer, please email me your name and mailing address.  I’ll be more than happy to send you a copy of our catalogs.  You can email me at handcraftingheather@icloud.com.

If you need any supplies you can shop now in my online store!  Feel free to drop me an email if you have any questions or if you would like a catalog.  I’m here to help!

Happy Stamping!

Heather

  • Visit my online store here.
  • Shop the Clearance Rack here.

Don’t Miss Out! Get $150 worth of products for only $99!… Time is Running out!

join_1

Whether you are a hobbyist or someone interested in building your own business, this week will be a great time to join Stampin’ Up!  For one week only from August 21-28  for only $99 you will get your choice of $150 worth of product.  In addition, during the month of August you can order from the new Holiday catalog before it is available to the public (on August 28).  If you have at least $99 worth of product on your wish list, you really should consider this opportunity.  Being a demonstrator has SO MANY awesome benefits and the opportunity has zero risk!  If you are interested in learning more please contact me at handcraftingheather@icloud.com or click here fore more information.


WEEKLY DEALS for August 19-25

 Screen Shot 2014-08-19 at 6.18.15 AM

Click here to see the Weekly Deals from Stampin’ Up! in my online store.  The Weekly Deals are only while supplies last and only available at these great prices through August 25.


Stampin’ Up! items used to create today’s project:

If you would like to order any of the products featured in today’s project, click the images below to order from my online store.

Blendabilities, Blog Candy, a Sale and More from Stampin’ Up! – July 1, 2014

Blog Candy Winner!

Dixie is the lucky winner for this week’s blog candy!  One of these lovely notepads will be heading your way as soon, Dixie!  Please send me an email with your mailing address.

Choose Happiness Pads (6 of 6)


Stampin’ Blendabilities Now Available for Order!

Great news!  Today is the day!  The following Stampin’ Blendabilities sets are now available for purchase!  Click here to view a brochure about all the great features of Blendabilities.  The remaining colors listed in the catalog will be available to the public on August 1, 2014.  Click here to shop online now!

  • Cherry Cobbler (item #130995)
  • Coastal Cabana (item #131000)
  • Daffodil Delight (item #130998)
  • Old Olive (item #130999)
  • Pumpkin Pie (item #130997)
  • Rich Razzleberry (item #131003)
  • Skin Tone Assortment (item #129370)

In addition, the following accessories are also now available:

  • Memento Ink Pad (item #132708)
  • Memento Ink Refill (item #133456)
  • Color Lifter (item #129369)

Designer Series Paper Sale!

Click the image above to shop for Designer Series Paper in my online store.


2014 Annual Catalog One-to-One Swap – (Deadline July 10, 2014)

There are still 10 days left in my one-to-one swap!  It is not too late for you to get in on the action!  I hope you will join in the fun!  It is so great when I get to actually connect with all of you and this is a wonderful way for us to share our inspiration and creativity with each other.  To participate, you will send me one card created with current Stampin’ Up! products (no retired items please) and a self-addressed stamped envelope.  Once all the swaps have arrived, I will send you someone else’s card in the mail.  It’s that easy!  If you have questions, please feel free to contact me at handcraftingheather@icloud.com. To participate, please register for the event by clicking on the button below.   Once registration is complete, you will receive an email with specific instructions (including the address for where to send your swaps).  Projects are due in hand by July 10, 2014.  I can’t wait to see what you create!  Happy Stamping!

Eventbrite - 2014 Annual Catalog One-to-One Swap


WEEKLY DEALS for July 1 – 7

Screen Shot 2014-07-01 at 6.54.36 AM

Click here to see the Weekly Deals from Stampin’ Up! in my online store.  The Weekly Deals are only while supplies last and only available at these great prices through July 7.


Newest Digital Downloads from Stampin’ Up!

Click here to see all the latest digital downloads for My Digital Studio from Stampin’ Up!


Other Stampin’ Up! Links & Promotions

  • Visit my online store here.
  • Shop the Clearance Rack here.

Happy Stamping! Heather

Perfect Peacock Watercolor Card – Stampin’ Up!

I am so excited about today’s project!  It may be one of my favorites of all time!  The name of this stamp from Stampin’ Up! just says it all… Perfect Peacock!  I am in love with how elegant this gorgeous peacock turned out… and you won’t believe how easy it was to achieve.

Perfect Peacock (4 of 5)

This card looks like it would take hours to color, but it is actually a trick achieved with a cool watercoloring technique and some minimal coloring.  I’ve created this video tutorial to show you just how this is done.

Although this technique requires a few steps with some drying time in between.  It is actually really simple and people will be oh so impressed by you artistic prowess!  I hope you will give it a try!

Perfect Peacock (5 of 5)

If you are a fan of this project, please pin it to Pinterest and leave me a comment.  You will find a “pin it” button at the very bottom of this post below the supply list.  Also, if you like my work, why not subscribe to my blog via email.  All you have to do is click on “follow” in the sidebar.

If you haven’t gotten your very own copy of the new 2014 Annual Stampin’ Up! catalog yet, now is the perfect time.  There are so many great new items available for purchase.  I offer free catalogs to all of my customers.  If you are my customer or want to be my customer, please email me your name and mailing address.  I’ll be more than happy to send you the gorgeous book.  You can email me at handcraftingheather@icloud.com.

I hope you will consider selecting me as your demonstrator for your stamping needs.  If you need any supplies you can shop now in my online store!  Feel free to drop me an email if you have any questions or if you would like a catalog.  I’m here to help!

Happy Stamping!

Heather

  • Visit my online store here.
  • Shop the Clearance Rack here.

2014 Annual Catalog One-to-One Swap

Just a reminder about my one-to-one swap.  I hope you will join in the fun!  It is so great when I get to actually connect with all of you and this is a wonderful way for us to share our inspiration and creativity with each other.  To participate, you will send me one card created with current Stampin’ Up! products (no retired items please) and a self-addressed stamped envelope.  Once all the swaps have arrived, I will send you someone else’s card in the mail.  It’s that easy!  If you have questions, please feel free to contact me at handcraftingheather@icloud.com.

To participate, please register for the event by clicking on the button below.   Once registration is complete, you will receive an email with specific instructions (including the address for where to send your swaps).  Projects are due in hand by July 10, 2014.  I can’t wait to see what you create!  Happy Stamping!

Eventbrite - 2014 Annual Catalog One-to-One Swap


Demonstrator Sign Up Special Available through June 30th!


Have you ever considered joining Stampin’ Up! as a Demonstrator? Do you have at least $50 worth of products on your wish list?  Would you like to get Blendabilities Markers before they are available to the public?  If so, now is a great time to join.  Between now and June 30, new recruits can join Stampin’ Up! at one of two great prices. Stampin’ Up! will continue to offer their traditional starter kit priced at $99 ($125 product value), but for the month of June only they will also be offering a reduced priced starter kit at the low price of $50 ($55 product value).  Drop me a note at handcraftingheather@icloud.com if you have any questions or if you’d like additional details.  I’d love to have you on my team whether you are a hobbyist or if you are interested in building your own business!  You can read more information about the benefits of being a Demonstrator here.


WEEKLY DEALS for June 17-23

Screen Shot 2014-06-17 at 7.41.09 AM

Click here to see the Weekly Deals from Stampin’ Up! in my online store.  The Weekly Deals are only while supplies last and only available at these great prices through June 23.


Stampin’ Up! items used to create today’s project:

If you would like to order any of the products featured in today’s project, click the images below to order from my online store.


Card Stock Cuts

Card Base: Old Olive – 4-1/4″ x 11″

Panels:  Night of Navy – 4″ x 5-1/4″ panel; Very Vanilla – 3-7/8″ x 5-1/8″ panel.

Focal Point:  Watercolor Paper – one peacock

Finish My Card Collaboration… We’re “In This Together” – Stampin’ Up!

Finish My Card Collaboration – Part 1

My friend and fellow Stampin’ Up! Demonstrator, Amy Koenders, helped me to create a fun collaborative project for you today.  Each one of us created an art piece and sentiment for a card.  I chose to use the new In This Together stamp set from Stampin’ Up! for my piece. Once our focal points were finished, we traded and finished each other’s card.  For my post today, I will be showing you my art piece, but you will have to link over to Amy’s blog, Stamp with Amy K, to see the finished product.  Part 2 of this collaboration will be coming soon, so you can see what I created using Amy’ art piece as my focal point.

In This Together (6 of 7)

I love the scenes of girlfriends from the In This Together stamp set from Stampin’ Up! However, I’m not a fan of the sentiments.  For my project today I chose the darling image of the girl with a cocktail and I masked over the sentiment with a post-it note when I inked it up.  I used memento ink because I wanted to color my image with Stampin’ Blendabilities alcohol markers (available soon).

In This Together (7 of 7)

I decided to create my own sentiment using the Endless Birthday Wishes photopolymer stamp set.  I love this set.  It is so versatile; and because the photopolymer stamps are completely clear, it makes it easy to combine the images to create your own custom sentiments.  As a finishing touch, I added some rhinestones around the sentiment, which I colored with my Blendabilities markers.  Finally, I inked around the edges of my Whisper White panel with Baked Brown Sugar ink and a stamping sponge.

Note:  I just learned that the Endless Birthday Wishes stamp set has sold out and is temporarily unavailable.  If you missed out on this wonderful set, don’t worry, it will be back soon.  In the meantime, there are lots of other stamp sets that would make nice substitutions.  The Sumthin’ Sumthin’ stamp set or Remembering Your Birthday set are a couple of options you might consider.  I particularly like the “Let’s Celebrate” sentiment from the Sumthin’ Sumthin’ stamp set, which is brand new with the 2014 Annual Catalog that went live just this week!

In This Together (6 of 7)
This collaborative project was really fun to do.  To see the finished card, click here to go to Amy’ blog.

If you are a fan of this project, please pin it to Pinterest and leave me a comment.  You will find a “pin it” button at the very bottom of this post below the supply list.  Also, if you like my work, why not subscribe to my blog via email.  All you have to do is click on “follow” in the sidebar.

The new catalog is finally live!  If you haven’t gotten your very own copy of the new catalog yet, now is the perfect time.  There are so many great new items available for purchase.  I offer free catalogs to all of my customers.  If you are my customer or want to be my customer, please email me your name and mailing address.  I’ll be more than happy to send you the gorgeous book.  You can email me at handcraftingheather@icloud.com.

I hope you will consider selecting me as your demonstrator for your stamping needs.  If you need any supplies you can shop now in my online store!  Feel free to drop me an email if you have any questions or if you would like a catalog.  I’m here to help!

Happy Stamping!

Heather

  • Visit my online store here.
  • Shop the Clearance Rack here.

WEEKLY DEALS for June 3 – 9

Screen Shot 2014-06-03 at 7.51.44 AM

Click here to see the Weekly Deals from Stampin’ Up! in my online store.  The Weekly Deals are only while supplies last and only available at these great prices through June 9.


Stampin’ Up! items used to create today’s project:

If you would like to order any of the products featured in today’s project, click the images below to order from my online store.

Watercolor Wonder Tri-fold Banner Card – Stampin’ Up!

I absolutely adore the patterns in the Watercolor Wonder Designer Series Paper pack.  I am bound and determined not to let this gorgeous paper go to waste, so you will probably see lots of it in the next couple of weeks (along with the Retro Fresh DSP).  Remember, there is only a short time left to order your retiring products, so act now!

Watercolor Wonder dozen thoughts (1 of 8)

Although, I’m sad to see this beautiful paper being retired, I’m excited about all the new designs that will be available with the new catalog on June 2nd.  If you haven’t gotten your very own copy of the new catalog yet, now is a great time.  I offer free catalogs to all of my customers.  If you are my customer or want to be my customer, please email me your name and mailing address.  I’ll be more than happy to send you the gorgeous book.  You can email me at handcraftingheather@icloud.com.

Watercolor Wonder dozen thoughts (2 of 8)

I had a great time playing around with all the different patterns from Watercolor Wonder for these cards.  I began with card bases in Island Indigo and Tangelo Twist.  I scored these to create a tri-fold effect.  Then I added panels of Watercolor Wonder DSP to the front flaps.  I used my Banner Framelits Dies to cut three banners from Wild Wasabi and Daffodil Delight card stock for each card.  For these banners, I wanted them to be narrower than the die, so I cut strips of card stock 1-1/4″ wide and then centered the die over my strips.  This allowed me to have a perfect angle on the banner to mat my smaller banner, without the mat being too big.  Next, I cut banners from my DSP using the 2nd die from the center.  I glued my banner layers together with multipurpose liquid adhesive and then added them to the front of the card.  I put two banners on the right flap, and the banner in the center on the left flap.  This creates a cool “interlocking” closure effect, which adds a lot of interest to the card design.

Watercolor Wonder dozen thoughts (6 of 8)

Next, I stamped three flowers from the Petite Petals stamp set in Island Indigo and Tangelo Twist ink.  I used a sponge to ink around the edges of the flower, which really made them pop.  Then I colored a pearl using my Stampin’ Blendabilities markers in Coastal Cabana and Daffodil delight and placed it in the center of each flower.  I popped up the petals of the flowers and added them to the banners using mini glue dots.

Watercolor Wonder dozen thoughts (4 of 8)

For my sentiment, I chose the “Just Because” stamp from A Dozen Thoughts.  I love the curly script of this greeting.  I stamped the greeting in Island Indigo and Tangelo Twist, using my stamp-a-ma-jig for perfect placement.  Then I embellished with some more pearls.

Watercolor Wonder dozen thoughts (8 of 8)

I played around with different combinations of the DSP for my panels to create slightly different versions of my card.  As you can see, the possibilities for this design are endless!

Watercolor Wonder dozen thoughts (5 of 8)

I finished off the inside of my card by adding panels of Watercolor Wonder DSP on the inside.  I inked around the edges of the top layer to give some added contrast with the mat.

Watercolor Wonder dozen thoughts (3 of 8)

I love the cheerful colors of these cards.  I also like the contrast between the soft florals and the geometric design of the banners.  I am looking forward to sending these out when those “just because” moments arise in life.  I hope you have enjoyed today’s project as well.  As always, if you find inspiration from my work, please pin this project to Pinterest and leave me a comment.  You will find a “pin it” button at the very bottom of this post below the supply list and cards stock cuts.  Also, if you like my work, why not subscribe to my blog via email.  All you have to do is click on “follow” in the sidebar.

I hope you will consider selecting me as your demonstrator for your stamping needs.  If you need any supplies or want to grab some retiring products before they are gone, you can shop now in my online store!  Also, remember that I’ve got a stack of brand new catalogs hot off the presses waiting for you.  Feel free to drop me an email if you have any questions or if you would like a catalog.  I’m here to help!

Happy Stamping!

Heather

  • Visit my online store here.
  • Shop the Clearance Rack here.

WEEKLY DEALS for May 20-26

Screen Shot 2014-05-20 at 6.06.42 AM

Click here to see the Weekly Deals from Stampin’ Up! in my online store.  The Weekly Deals are only while supplies last and only available at these great prices through May 26.


Stampin’ Up! items used to create today’s project:

If you would like to order any of the products featured in today’s project, click the images below to order from my online store. (Keep in mind that some sneak peek items will not be available for purchase until June 2, 2014.)

Card Base: Island Indigo and Tangelo Twist – 5-1/2″ x 8-1/2″ scored at 2-1/2″ and 6-3/4″

Panels: Watercolor Wonder – (front of card) two panels 2-1/4″ x 5-1/4″ and 1-1/2″ x 5-1/4″; (inside of card) two panels 4″ x 5-1/4″ and 3-3/4″ x 5-1/4″

Sentiment & Die Cuts: Whisper White – 3 petite petals punches; Watercolor Wonder DSP – 3 small banners per card; Wild Wasabi and Daffodil Delight – 3 banners per card.


Blended Bloom Meets Work of Art – Stampin’ Up!

When I first saw the Work of Art stamp set at the Stampin’ Up! 2014 Annual Catalog Premiere, I’ll be honest, I wasn’t sure about it.  But, I love a free gift, so I was excited to try it out when we received it at the end of the night.  Boy, was my first impression wrong!  I have really enjoyed working with that set!  And, the Blended Bloom stamp is quickly becoming a favorite!  I think it is going to give my Blooming with Kindness stamp set a run for its money when it comes to “ink time.”  If you are a regular reader of my blog, you know I love that Blooming with Kindness flower! LOL.

Blended Bloom & Work of Art (2 of 9)

It has been so much fun playing with all my new items from the 2014 annual catalog pre-order.  If you haven’t seen the new catalog yet, now is a great time to get your hands on one so you can get your wish list ready for the official launch on June 2nd.  I will be mailing out complimentary copies to all my customers who place an order of $25 or more during the month of May.

Blended Bloom & Work of Art (5 of 9)I chose a Blackberry Bliss card base for my project today.  It is one of the new In Colors, and I am totally in love with this dark, regal shade of purple.  Next, I stamped the Blended Bloom stamp in the corner of a panel of Whisper Whisper white card stock using Memento Tuxedo Black Ink.  While I was at it, I also stamped a second flower on another sheet of card stock.  Blended Bloom & Work of Art (3 of 9)

Next,  I stamped the leaf image from the Summer Silhouettes stamp set along the edges of my Whisper White panel using Mossy Meadow ink (another new In Color).  For some of the images, I stamped off then stamped on the card, to give greater range of color in my card design.  Then, I stamped the paint splotches (yes, that is a technical term) in Wisteria Wonder and Hello Honey.  For the Hello Honey “paint” I stamped off once before stamping on my card to give the color a little softer effect.

Blended Bloom & Work of Art (9 of 9)

I just love the “You are a Fabulous Work of Art” sentiment from the Work of Art stamp set. The font is whimsical, and I adore the affirming message.  I used Blackberry Bliss ink and my stamp-a-ma-jig to make sure I got the placement just perfect.  Then it was time for some coloring!

Blended Bloom & Work of Art (6 of 9)

I used my new Stampin’ Blendabilities markers (release date TBD) in Rich Razzleberry, Daffodil Delight, and Pumpkin Pie to color in my flower images.  I used the “dark to light” method (click here to see my video tutorial) to achieve the beautifully blended contrast and shading.  Once my flowers were both colored, I cut out the second flower I had stamped and set it aside until my card front was finished.

Blended Bloom & Work of Art (5 of 9)

I added a panel of Designer Series Paper from the Moonlight Paper Stack to the bottom of my stamped panel using SNAIL.  I ran SNAIL adhesive across the place where my two panels joined on the front of the card, leaving a 1″ gap where I wanted to put my knot.   Then I added a length of Hello Honey 3/8″ Stiched Satin Ribbon to my combined panel and anchored it on the back with SNAIL.  I slid a shorter piece of the ribbon under that one (where I had left a space in my adhesive) and tied it in a knot.  I have found that this method saves on materials, because  you don’t have to wrap the ribbon all the way around the panel.

Blended Bloom & Work of Art (9 of 9)

Finally, I added my flower to the bottom of the card using Stampin’ Dimensionals, and added some rhinestones that I colored using the Stampin’ Blendabilties.  For the inside of my card, I created an abstract design using the paint splotches from Work of Art.

Blended Bloom & Work of Art (8 of 9)

Blended Bloom & Work of Art (7 of 9)

I am really happy with how this card turned out.  I hope you like it too.  As always, if you are a fan, please pin this project to Pinterest and leave me a comment.  You will find a “pin it” button at the very bottom of this post below the supply list and cards stock cuts.  Also, if you like my work, why not subscribe to my blog via email.  All you have to do is click on “follow” in the sidebar.

I hope you will consider selecting me as your demonstrator for your purchases of these great new products and all your other stamping supplies.  If you need any stamping supplies you can shop now in my online store!  Also, remember that I’ve got a stack of brand new catalogs hot off the presses waiting for you.  If you place an order of $25 or more during the month of May, I will send you your very own copy free of charge!  Feel free to drop me an email if you have any questions.  I’m here to help!

Happy Stamping!

Heather

  • Visit my online store here.
  • Shop the Clearance Rack here.

WEEKLY DEALS for May 13-19

weekly deals 5-13

Click here to see the Weekly Deals from Stampin’ Up! in my online store.  The Weekly Deals are only while supplies last and only available at these great prices through May 19.


Stampin’ Up! items used to create today’s project:

If you would like to order any of the products featured in today’s project, click the images below to order from my online store. (Keep in mind that some sneak peek items will not be available for purchase until June 2, 2014.)

Card Base: Blackberry Bliss – 4-1/4″ x 11″

Panels: Whisper White – 4″ x 3-1/2″ panel (front), 4″ x 5-1/4″ panel (inside); Moonlight DSP – 4″ x 1-3/4″ panel

Coloring with the New Blendabilities Markers…. They’ll Be Here Soon from Stampin’ Up!

I’ve really been enjoying learning how to use alcohol markers as I play with my new Stampin’ Blendabilities.  These markers are a new line of product that will be introduced with the 2014 annual catalog on June 2nd. Unfortunately, there has been a delay for their initial release, so they will not be available for purchase right away, but I’m so excited about them that I wanted to show some of the wonderful effects you can achieve with these fantastic markers.  I will keep you updated about exactly when they will be available.  In the meantime, I’ve created a video tutorial for you that compares two different coloring techniques for alcohol based markers.

Blendabilties Techniques (3 of 6)

There isn’t a right or wrong way to use these markers.  Some people recommend coloring your lightest shade first and then moving to the darkest, others recommend going dark to light.  It is really a matter of personal preference.  As I explored with these markers this week, I tried both techniques out with each color set.  Here you can see the results.

Blendabilties Techniques (1 of 6)I have found that the darker the color, the more difference you can see between the two techniques.  I prefer coloring the darkest shade first because I think I am able to get greater contrast in my colors using that method.  Let me show you what I mean.

Blendabilties Techniques (4 of 6)

Blendabilties Techniques (5 of 6)

Blendabilties Techniques (6 of 6)

 What Sets Blendabilities Apart:

  • The Stampin’ Up! rectangular barrel keeps your markers from rolling away!
  • Flat storage helps to maintain the life of each marker.
  • Each marker comes with a tip on each end: brush and fine.
  • Marker tips are made of nylon, which is superior to polyester which can fray.
  • Color coded caps.
  • Stampin’ Up! markers coordinate wonderfully with our cardstock, and can be used with transparent sheets.
  • Blendabilities are alcohol based, which makes them colorfast and allows them to blend with each other beautifully.
  • You can color on anything… rhinestones, buttons, window sheets, etc.
  • Blendabilities marker sets, come in a 3-pack of light, medium and dark shades (of the same color )
  • Blendabilties provide your projects a more saturated look with blended colors

Blended Bloom (1 of 10)

I hope you have enjoyed my tutorial today.  I certainly had fun exploring all the different ways to color with my Blendabilties!  If you like this post, please pin it to Pinterest and leave me a comment.  You will find a “pin it” button at the very bottom of this post.

If you find inspiration from this blog, one way you can show your support is by selecting me as your personal Stampin’ Up! Demonstrator.  If you need any stamping supplies you can shop now in my online store!  I’ve received the new annual catalogs from Stampin’ Up! and I will be mailing out complimentary copies to all my customers who place an order of $25 or more during the month of May!  Feel free to drop me an email if you have any questions.  I’m here to help!

Happy Stamping!

Heather

  • Visit my online store here.
  • Shop the Clearance Rack here.

WEEKLY DEALS for May 13-19

weekly deals 5-13

Click here to see the Weekly Deals from Stampin’ Up! in my online store.  The Weekly Deals are only while supplies last and only available at these great prices through May 12.


Retiring Products- Less than Two Weeks Left!

There are only two weeks left to get retiring products before they’re gone for good! Be sure to order now in my online store so you don’t miss out on these great products!  Many of the retiring products from Stampin’ Up! have already sold out!  Be sure to check out the links below to check to see which items are still available.  Stampin’ Up! is updating these lists daily to tell us which items are gone.  The last column has a little “x” next to the products that are no longer available.  If you want any of the products on the retiring list, be sure to order soon, so you don’t miss out!

  • Retiring Stamps (Available April 21-June 4, 2014, or while supplies last)
  • Retiring Accessories (Available April 21-June 4, 2014, or while supplies last)

If you need any stamping supplies, I’d be very happy to be your Demonstrator.  Just click on Order Stampin’ Up! Online Now in the main menu or in the sidebar to go directly to my online store or drop me an email if you have any questions.