Seasonally Scattered Valentine’s Card – Stampin’ Up!

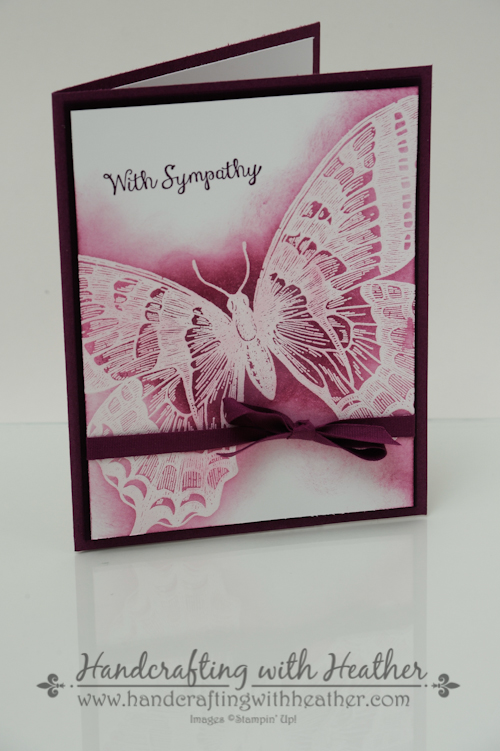
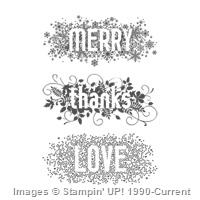
I rarely use retired products in my cards, but I couldn’t resist using the recently retired Seasonally Scattered “love” sentiment for at least one Valentine’s card this season.  I think it pairs just perfectly with the Hello You Thinlits Dies, don’t you?

Seasonally Scattered Valentine (1 of 6)
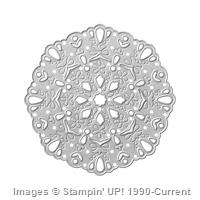
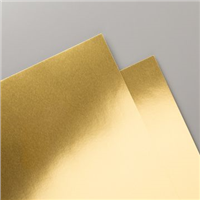
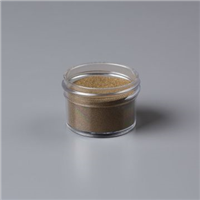
It is rare that a card design arrives in my brain fully formed, but this was one of those instances.  I could instantly picture how great the Seasonally Scattered image would look in gold embossing powder (which doesn’t photograph well, here… bummer!).

Seasonally Scattered Valentine (3 of 6)

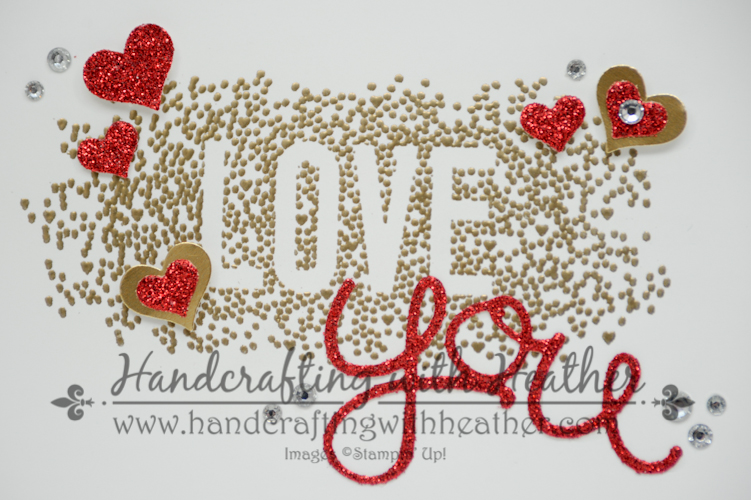
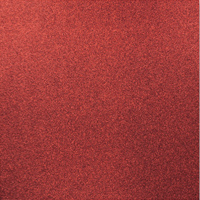
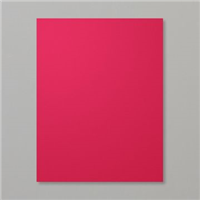
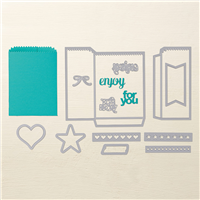
The Red Glimmer Paper was the perfect partner for the Hello You Thinlits Dies too!  Throw on a few hearts, and some rhinestones, and voila!  Some of you may have noticed that I used two different sizes of small hearts…. you might be wondering where I got that cute little tiny heart shape.  For those of you who were paying attention, it is from the Mini Treat Bag Thinlits Dies.  That set has so many cute little extras!  I haven’t actually used it to make a treat bag just yet, but those little hearts have come in handy on several projects!

Seasonally Scattered Valentine (4 of 6)

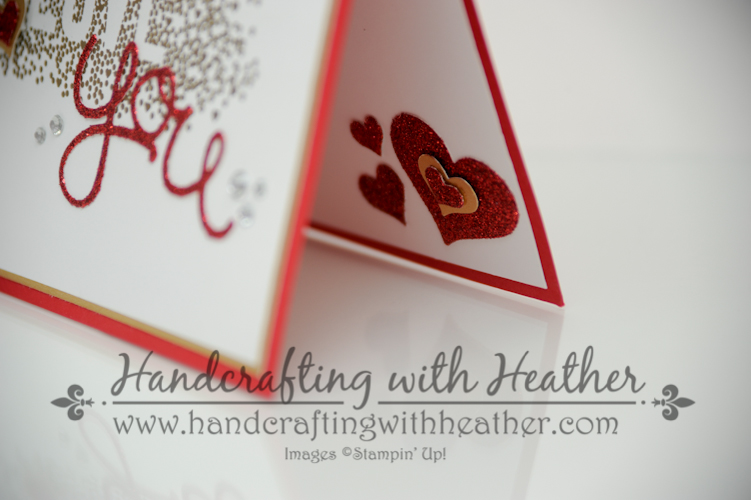
Of course you know that I don’t like to leave the inside of a card naked, so I used a few hearts on the inside to finish things off.

Seasonally Scattered Valentine (5 of 6)

I love how this card turned out, and it was so quick & easy to make! If you are a fan of this project, I hope you will pin it to Pinterest for me.  You will find a “pin it” button at the very bottom of this post following the supply list.

I hope you will consider selecting me as your demonstrator for your stamping needs.  If you need any supplies you can shop now in my online store!  Feel free to drop me an email if you have any questions or if you would like a catalog.  I’m here to help!

Happy Stamping!

Heather

  • Visit my online store here.
  • Shop the Clearance Rack here.

Handcrafting with Heather Creativity Clubhouse

Creativity Credit copy

Don’t forget about my customer loyalty program when you place your orders.  I’m offering double Creativity Credits during Sale-A-Bration!  Click here to read more about the Creativity Credits program, my buyer reward program where you earn free Stampin’ Up! merchandise.

Let me know if you have any questions, have fun shopping!

January 29 – February 16 Hostess Code:  XN46DEBT

Use this hostess code when you order and receive a set of rhinestones from me!  If your order is over $150, please do not use this code, but you’ll still get the free gift.


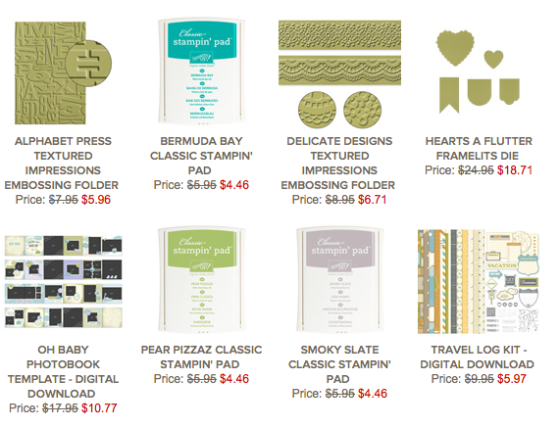
New Weekly Deals From Stampin’ Up! February 10-16

Click the images below to order the weekly deal products from my online store.  The Weekly Deals are only while supplies last and only available at these great prices through February 16th.

133736

Sale: $18.71

Price: $24.95

127012

Sale: $20.21

Price: $26.95

133728

Sale: $28.46

Price: $37.95

134583

Sale: $3.71

Price: $4.95

134581

Sale: $5.21

Price: $6.95

Supply List

Built for Free Using:  My Stampin Blog


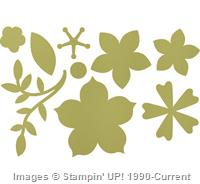
Stampin’ Up! Supplies Used for Today’s Project

If you would like to order any of the products featured in today’s project, click the images below to order from my online store.

Price: $29.95

Supply List

Built for Free Using:  My Stampin Blog

Advertisement

Everything Eleanor & Beauty of the Season Ornaments – Stampin’ Up!

This week, I have been drawing much inspiration from my friend Amy Koenders.  Last week, Amy posted a project where she stamped on ceramic ornaments purchased from the local craft store.  I was spurred on to see what other media would be good to stamp on.  I started by creating this wooden ornament featuring the Beauty of the Season stamp set from Stampin’ Up!

Beauty of the Season Ornament (2 of 2)

I stamped the image using black Memento Ink, which bled a little on the wood surface, but I found that I wasn’t bothered by the effect.  Next, I colored the image with my Blendabilities markers and added some snow with my Stampin’ Chalk Marker.  I finished things off with a little red bow.  I’m pretty pleased with how it turned out, even if the stamping isn’t as crisp as it would be on paper.

Everything Eleanor Joy (1 of 1)

This was my next foray into the unknown… What happens when you try to heat emboss a porcelain ornament?  Well, it turns out just beautifully.  For this ornament, I used the flourish stamp from Everything Eleanor from Stampin’ Up!  I stamped the image with versamark ink and sprinkled it with Gold Stampin’ Emboss Powder.  I used a small paint brush to eliminate the extra powder that stuck to the porcelain, and then I embossed it using my heat tool.  It took longer to melt than it does on paper, but the end result is really beautiful.  I embellished with some gold foil stars and rhinestones, and VOILA!

I had a lot of fun seeing what would happen if I stamped on surfaces I had never tried before.  I purchased a few other items that I haven’t experimented yet, so stay tuned for the results.  If you like this project, I hope you will pin it to Pinterest for me. You will find a “pin it” button at the end of this post below the supply list.

Also, Please consider selecting me as your demonstrator for your stamping needs.  I would love the opportunity to earn your business.  If you need any supplies you can shop now in my online store!  Feel free to drop me an email if you have any questions or if you would like a catalog.  I’m here to help!

Happy Stamping!

Heather

  • Visit my online store here.
  • Shop the Clearance Rack here.


New Weekly Deals From Stampin’ Up! Nov. 11-17

Screen Shot 2014-11-11 at 7.04.21 AM

Click here to see the Weekly Deals from Stampin’ Up! in my online store.  The Weekly Deals are only while supplies last and only available at these great prices through November 17th.


Stampin’ Up! Products Used for Today’s Projects

If you would like to order any of the products featured in today’s project, click the images below to order from my online store.

Swallowtail Sympathy Card – Stampin’ Up!

Today’s project is a clean and simple sympathy card featuring the Swallowtail stamp from Stampin’ Up!  This card was created in honor of my dear friend who passed away last week.  My thoughts and prayers go out to her husband and the rest of her family.  I hope that this card will bring a small moment of comfort to them as they deal with their loss.

Swallowtail Sympathy Card (5 of 5)I started this card by adhering a panel of Blackberry Bliss to a Rich Razzleberry card base.  You can’t see that very well in the picture, but in person the blackberry bliss mat for the butterfly panel adds a little extra contrast.  next I stamped the Swallowtail image on a panel of Whisper White card stock using Versamark ink and heat embossed it with white embossing powder.

Swallowtail Sympathy Card (4 of 5)I used the resist technique to sponge over my embossed design with Rich Razzleberry ink.  Then I wiped the embossed image with a paper towel to remove the ink that had stuck to the embossing.  Next, I stamped the “With Sympathy” sentiment from the Bloom with Hope stamp set (hostess reward) in Blackberry Bliss ink.

Swallowtail Sympathy Card (3 of 5)

Finally, I tied a bow with Rich Razzleberry 1/4″ cotton ribbon around my white panel and adhered it to the front of the card using Stampin’ Dimensionals.

Swallowtail Sympathy Card (6 of 5)

For the inside of my card, I stamped the sentiment from Bloom with Hope in Blackbery Bliss ink.  Then I added some butterflies from the Papillon Potpourri stamp set in Rich Razzleberry and Blackberry Bliss ink.  I used the same stamps to add some butterflies to the envelope too.

Swallowtail Sympathy Card (7 of 5)

I think the image of a butterfly is perfect for a sympathy card.  Butterflies are a symbol of transformation.  This card brings me a little peace as I think about the passage from this life into the next.  I know my friend is in a place of love and serenity now.

Please pin this project to Pinterest if you are a fan of this card.  You will find a “pin it” button at the bottom of this post below the supply list and card stock cuts.  Also, please subscribe to my blog via email by clicking on the “follow” button if you enjoy reading my posts.

I hope you will consider selecting me as your demonstrator for your stamping needs.  I also offer free catalogs to all of my customers.  If you are my customer or want to be my customer, please email me your name and mailing address.  I’ll be more than happy to send you a copy of our catalogs.  You can email me at handcraftingheather@icloud.com.

If you need any supplies you can shop now in my online store!  Feel free to drop me an email if you have any questions or if you would like a catalog.  I’m here to help!

Happy Stamping!

Heather

  • Visit my online store here.
  • Shop the Clearance Rack here.

WEEKLY DEALS for August 5-11

 Screen Shot 2014-08-05 at 5.30.32 AM

Click here to see the Weekly Deals from Stampin’ Up! in my online store.  The Weekly Deals are only while supplies last and only available at these great prices through August 11.


Stampin’ Up! items used to create today’s project:

If you would like to order any of the products featured in today’s project, click the images below to order from my online store.


Card Stock Cuts

Card Base: Rich Razzleberry – 5-1/2″ x 8-1/2″ scored at 4-1/4″

Panels:  Blackberry Bliss – 4″ x 5-1/4″; Whisper White – 3-7/8″ x 5-1/8″ (front of card), 4″ x 5-1/4″ (inside of card)

Lovely as a Tree Birthday Wishes – Stampin’ Up!

Today’s card is masculine birthday card featuring the Lovely as a Tree and Four You stamp sets from Stampin’ Up!  I love how well this set lends itself to water coloring.  The tree image can be a beautiful springtime card, or a fall beauty depending on the colors you choose.

Lovely as a Tree (1 of 8) The Lovely as a Tree stamp set has withstood the test of time, and it is easy to see why.  I would love to hear how you have used this stamp set in you creations.  Also, if you are a fan of my work, why not have my posts delivered to your inbox automatically.  Just click on the “follow” button in the sidebar.

Lovely as a Tree (2 of 8)

I started my card today with an Old Olive card base, which I heat embossed using the leaf stamp from Lovely as a Tree.  I used Versamark ink and clear Stampin’ Emboss Powder to create the lovely tone-on-tone leaf pattern for my background.

Lovely as a Tree (8 of 8)

Next, I stamped the tree image on water color paper using Stazon Black ink.  I used my Classic Stampin’ Pads in Soft Suede, Old Olive, and Tempting Turquoise and my aqua painter to color the stamped image.  I’ll let you in on a little secret, I accidentally got a smudge of tempting turquoise ink on the edge of my panel… so I used my Tempting Turquoise Stampin’ Write Marker to color around the edge of the panel to cover it up!  Remember, there are no mistakes in stamping, only happy accidents. LOL.

Lovely as a Tree (3 of 8)

Once my art piece was finished, I layered it on panels of Pistachio Pudding and Soft Suede card stock and adhered it to the front of the card using multipurpose liquid glue.  Then I punched two ovals in Soft Suede using the word window punch.  I punched them a second time to shorten them, then I added candy dots from the neutrals collection.  I used a Stampin’ Dimensional on the left side of the punch and liquid glue on the right side because my layered panels were quite thick.

Lovely as a Tree (4 of 8)

For my sentiment, I chose the “Birthday Wishes” greeting from the Four You stamp set.  I stamped it on a scrap of Very Vanilla card stock using Soft Suede ink and then used my hexagon punch to create a banner.  I inked around the edges of the sentiment using my sponge dauber and Soft Suede ink.  Next, I adhered the greeting to the card using Stampin’ Dimensionals and multipurpose liquid glue on the portion that overlapped the stamped panel.

Lovely as a Tree (6 of 8)

Lovely as a Tree (7 of 8)

To finish off the inside of my card, I stamped the tree image from Lovely as a Tree on a panel of Very Vanilla card stock using Soft Suede ink.

Lovely as a Tree (5 of 8)

This card is going to be perfect for my dad’s birthday in a couple of weeks.  He loves the outdoors and admires all the old trees around the lake near his house when we go for walks together.  I hope you have enjoyed today’s project.  If so, please pin it to Pinterest.  If you scroll to the bottom of this post, you will find a complete list of supplies used to make today’s project, including the dimensions for the card stock cuts. Below the supply list, you will find a “pin it” button.  I would appreciate your help in spreading the word about my work.

If you find inspiration from this blog, one way you can show your support is by selecting me as your personal Stampin’ Up! Demonstrator.  If you are interested in purchasing the Lovely as a Tree or Four You stamp sets from Stampin’ Up! you can shop now in my online store!

If you need any stamping supplies or have any questions, I would love to help you out.  Just click on Order Stampin’ Up! Online Now in the main menu or in the sidebar to go directly to my online store.  Feel free to drop me an email if you have any questions.  I’m here to help!

Happy Stamping!

Heather

  • Visit my online store here.
  • Shop the Clearance Rack here.

WEEKLY DEALS for April 29 – May 5

 Weekly Deals

Click here to see the Weekly Deals from Stampin’ Up! in my online store.  The Weekly Deals are only while supplies last and only available at these great prices through May 5.


Stampin’ Up! items used to create today’s project:

If you would like to order any of the products featured in today’s project, click the images below to order from my online store.

Card Base:  Old Olive – 5-1/2″ x 8-1/2″

Panels:  Soft Suede – 3-3/8″ x 3-3/8″ panel; Pistachio Pudding – 3-1/8″ x 3-1/8″ panel; Water Color Paper – 3″ x 3″ panel; Very Vanilla – 4″ x 5-1/4″ panel (inside of card)

Sentiment/Die Cuts: Very Vanilla – banner for greeting


Fabulous Florets Triple Time Thank You Card – Stampin’ Up!

Today’s project is a lovely floral card that features the Fabulous Florets and Summer Silhouettes stamp sets from Stampin’ Up!  I saw this card design on Pinterest, and knew I just had to CASE (copy and share everything) it!

Fabulous Florets (6 of 7)

I changed the orientation and the sentiment, but everything else on the front of the card is exactly as Sandi MacIver designed it to be.  I just loved her choice of colors, and the beauty achieved by the resist technique paired with the layered panels.  Sandi has a great video tutorial that shows exactly how to create this card.  She gives wonderful step by step instructions about how to achieve all the techniques in this project.  I have provided a link for her video tutorial at the bottom of this post after the supply list.  If you are interested in the details of how to create this card, I would definitely recommend watching Sandi’s video.

Fabulous Florets (7 of 7)

I just love the “Triple Time” layered panel technique of this card.  It gives an added element of interest to the card design.  Please leave me a comment to tell me what you think about it.  During the month of April, I will be doing a drawing each Sunday.  One lucky winner will receive one of the featured products from Sale-a-bration.  So, if you missed out on the free items during the sale, now is your chance to win one!  Also, if you enjoy reading my posts, why not have them delivered to your inbox automatically.  Just click on the “follow” button in the sidebar.

Fabulous Florets (1 of 7)

I needed to stock up on some extra thank you cards, so I chose the “Thanks So Much” greeting from simply sketched for my card today.  I also decided to stamp my envelope and add some extra design elements to the inside of my card.  You know me, I don’t like to leave the inside of my card “naked.”

Fabulous Florets (4 of 7)

Fabulous Florets (5 of 7)

I don’t normally re-create the work of someone else almost exactly, but I just loved the design of this one.  There wasn’t much I wanted to change.  As we head into spring, my dogwood trees and azaleas are starting to bloom.  This card reminds me of the beauty of this season.  I hope you have enjoyed this lovely card too!  If so, I hope you will pin it to Pinterest for me.  If you scroll to the bottom of this post, you will find a complete list of supplies used to make today’s project, including the dimensions for the card stock cuts.  Below the supply list, you will find a “pin it” button.  I would appreciate your help in spreading the word about my work.  Also, don’t forget to leave me a comment for your chance to win a free stamp set from Sale-a-bration!

If you find inspiration from this blog, one way you can show your support is by selecting me as your personal Stampin’ Up! Demonstrator.  If you are interested in purchasing the Fabulous Florets or Summer Silhouettes stamp sets from Stampin’ Up! you can shop now in my online store!  If you need any stamping supplies or have any questions, I would love to help you out.  Just click on Order Stampin’ Up! Online Now in the main menu or in the sidebar to go directly to my online store.  Feel free to drop me an email if you have any questions.  I’m here to help!

Happy Stamping!

Heather

  • Visit my online store here.
  • Shop the Clearance Rack here.

WEEKLY DEALS for April 15-21

 Weekly Deals

Click here to see the Weekly Deals from Stampin’ Up! in my online store.  The Weekly Deals are only while supplies last and only available at these great prices through April 21.


Stampin’ Up! items used to create today’s project:

If you would like to order any of the products featured in today’s project, click the images below to order from my online store.


Card Stock Cuts

Card Base:  Crumb Cake – 5-1/2″ x 8-1/2″

Panels:  Very Vanilla – 2″ x 3-1/4″ panel, 3″ x 4-1/4″ panel,  two panels 4″ x 5-1/4″ (front and inside of card); Crumb Cake – 2-1/4″ x 3-1/2″ panel, 3-1/4″ x 3-1/2″ panel

Sentiment/Die Cuts:  N/A

Video Tutorial:  Click here to view Sandi MacIver’s video tutorial for this card.