On Sunday, I shared an elegant Stamp-a-Stack featuring the Serene Silhouettes stamp set from Stampin’ Up! Today’s project is another set of cards; this one featuring the Sweet Sorbet Designer Series Paper from Sale-a-Bration. When you sign up for my Stamp-a-Stack class on May 3rd from 7:00 – 9:00 p.m. you will get the opportunity to make both of these lovely card sets. If you live in the Atlanta area and would be interested in attending my class, please contact me to sign up. The cost of the class is $15 and includes all consumable materials and use of my stamping supplies. What’s even better is that I do all the prep work, so you can just come and enjoy the fun! You can’t beat that! I would love to connect with some of you face to face for an opportunity to truly create together!

If you like this project as much as I do, I would love to hear from you. Please leave me a comment and I will enter you into my drawing. During the month of April, I will be doing a drawing each Sunday. One lucky winner will receive one of the featured products from Sale-a-bration. So, if you missed out on the free items during the sale, now is your chance to win one! Also, if you enjoy reading my posts, why not have them delivered to your inbox automatically. Just click on the “follow” button in the sidebar.
Sweet Sorbet Birthday Card with Tag Topper Closure (Card #1)


Stampin’ Up! items used to create card #1:
Stamp Sets: Label Love (130622); Petal Parade (133602)
Dies, Punches, & Embossing Folders: Artisan Label Punch (1309210); Scalloped Tag Topper Punch (133324)
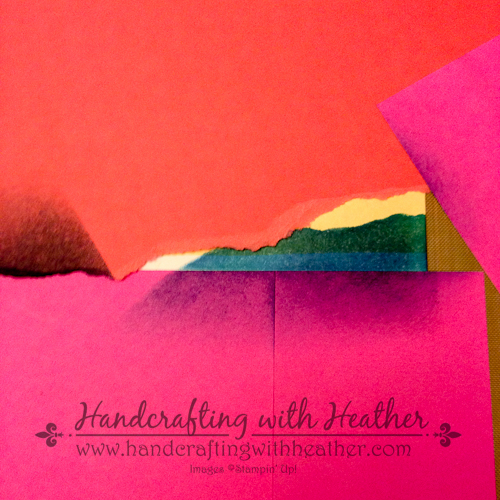
Card Stock & DSP: Crumb Cake (120953) – 5-1/2″ x 8-1/2″ card base; Crisp Canteloupe DSP (from Sweet Sorbet Pack – Sale-a-Bration) – 2-1/4″ x 5-1/4″ panel; Floral Sweet Sorbet DSP (Sale-a-Bration) – 2″ x 5″ panel; Whisper White (100730) – 4″ x 5-1/4″ panel (inside of card), one artisan label punch; Pool Party (122924) – one artisan label punch
Markers & Ink: Pool Party Classic Stampin’ Pad (126982); Crisp Canteloupe Classic Stampin’ Pad (131176); Pistachio Pudding Classic Stampin’ Pad (131177)
Embellishments: Pool Party twine (Sale-a-bration)
Tools: N/A
Adhesive: Stampin’ Dimensionals (104430); SNAIL Adhesive (104332)
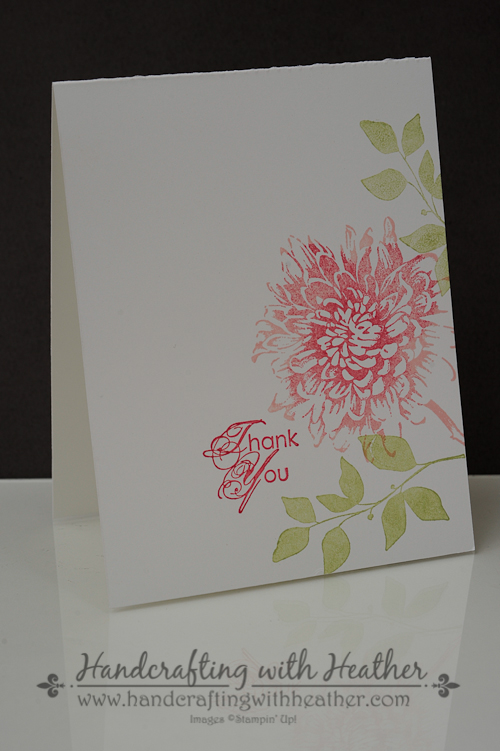
Sweet Sorbet Thank You Card (Card #2)


Stampin’ Up! items used to create card #2:
Stamp Sets: Label Love (130622); Petal Parade (133602); A Round Array (129090)
Dies, Punches, & Embossing Folders: Artisan Label Punch (1309210); 7/8″ Scalloped Circle Punch (129404)
Card Stock & DSP: Crumb Cake (120953) – 4-1/4″ x 11″ card base; Crisp Canteloupe DSP (from Sweet Sorbet Pack – Sale-a-Bration) – 4-1/4″ x 3″ panel; Floral Sweet Sorbet DSP (Sale-a-Bration) – 4-1/4″ x 2-3/4″ panel; Whisper White (100730) – 4″ x 5-1/4″ panel (inside of card), one artisan label punch, one scalloped circle punch
Markers & Ink: Pool Party Classic Stampin’ Pad (126982); Crisp Canteloupe Classic Stampin’ Pad (131176); Pistachio Pudding Classic Stampin’ Pad (131177)
Embellishments: Crisp Canteloupe Stretch Ruffle Trim (130021)
Tools: N/A
Adhesive: Stampin’ Dimensionals (104430); SNAIL Adhesive (104332)
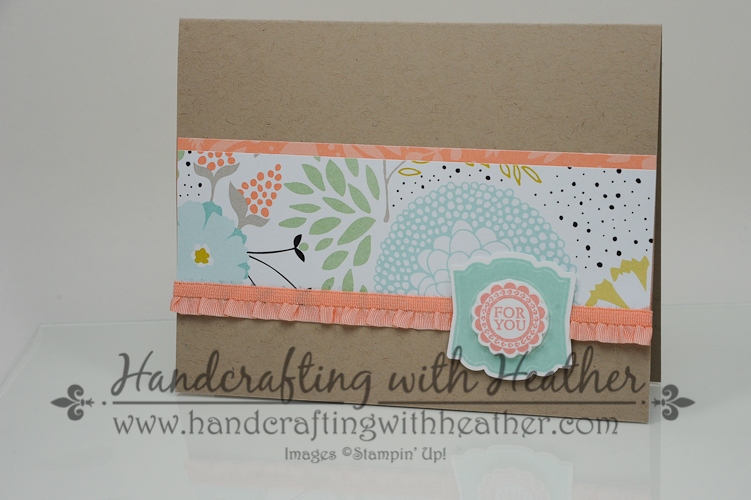
Sweet Sorbet For You (Card #3)

Stampin’ Up! items used to create card #3:
Stamp Sets: Label Love (130622); Petal Parade (133602); A Round Array (129090)
Dies, Punches, & Embossing Folders: Artisan Label Punch (1309210); 7/8″ Scalloped Circle Punch (129404)
Card Stock & DSP: Crumb Cake (120953) – 5-1/2″ x 8-1/2″ card base; Crisp Canteloupe DSP (from Sweet Sorbet Pack – Sale-a-Bration) – 5-1/2″ x 2″ panel; Floral Sweet Sorbet DSP (Sale-a-Bration) – 5-1/2″ x 1-3/4″ panel; Whisper White (100730) – 4″ x 5-1/4″ panel (inside of card), one artisan label punch, one scalloped circle punch
Markers & Ink: Pool Party Classic Stampin’ Pad (126982); Crisp Canteloupe Classic Stampin’ Pad (131176); Pistachio Pudding Classic Stampin’ Pad (131177)
Embellishments: Crisp Canteloupe Stretch Ruffle Trim (130021)
Tools: N/A
Adhesive: Stampin’ Dimensionals (104430); SNAIL Adhesive (104332)
Sweet Sorbet & Label Love Just for You (Card #4)
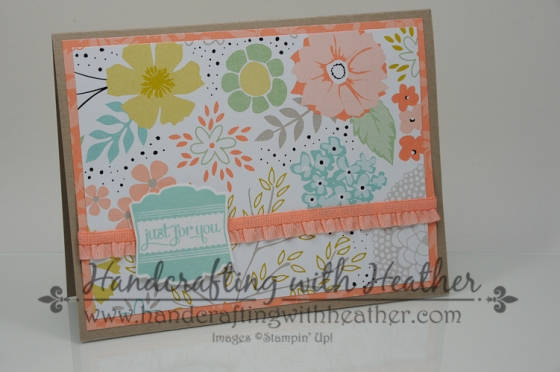
Stampin’ Up! items used to create card #4:
Stamp Sets: Label Love (130622); Petal Parade (133602)
Dies, Punches, & Embossing Folders: Artisan Label Punch (1309210)
Card Stock & DSP: Crumb Cake (120953) – 5-1/2″ x 8-1/2″ card base; Crisp Canteloupe DSP (from Sweet Sorbet Pack – Sale-a-Bration) – 5-1/4″ x 4″ panel; Floral Sweet Sorbet DSP (Sale-a-Bration) – 5″ x 3-3/4″ panel; Whisper White (100730) – 4″ x 5-1/4″ panel (inside of card), one artisan label punch
Markers & Ink: Pool Party Classic Stampin’ Pad (126982); Crisp Canteloupe Classic Stampin’ Pad (131176); Pistachio Pudding Classic Stampin’ Pad (131177)
Embellishments: Crisp Canteloupe Stretch Ruffle Trim (130021)
Tools: N/A
Adhesive: Stampin’ Dimensionals (104430); SNAIL Adhesive (104332)
If you enjoyed my post today, please pin it to Pinterest for me. You will find a “pin it” button at the very bottom of the post. Also, don’t forget to leave me a comment for your chance to win a free stamp set from Sale-a-bration! And, most importantly, sign up for my Stamp-a-Stack class on May 3rd where we will make both of these beautiful card sets! Space is limited, so be sure to reserve your spot today!
____________________________________________________________
WEEKLY DEALS for April 8 – 14
Click here to see the Weekly Deals from Stampin’ Up! in my online store. The Weekly Deals are only while supplies last and only available at these great prices through April 14.
______________________________________________________________________________________
If you need any stamping supplies, I’d be very happy to be your Demonstrator. Just click on Order Stampin’ Up! Online Now in the main menu or in the sidebar to go directly to my online store or drop me an email if you have any questions.
Happy Stamping!
Heather
- Visit my online store here.
- Shop the Clearance Rack here.