Variations on Wild about Flowers for the Happy Stampers Blog Hop – Stampin’ Up!

NEW Blog Hop Header
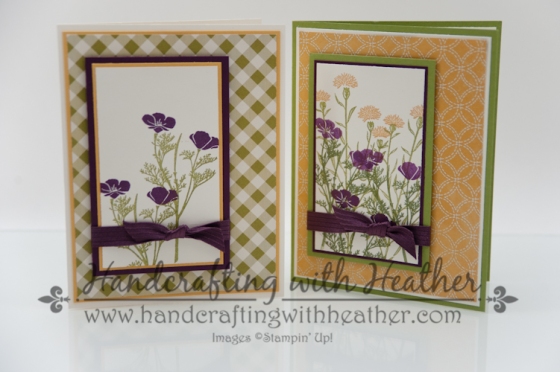
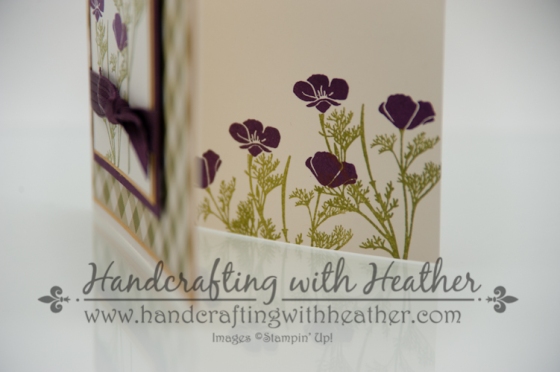
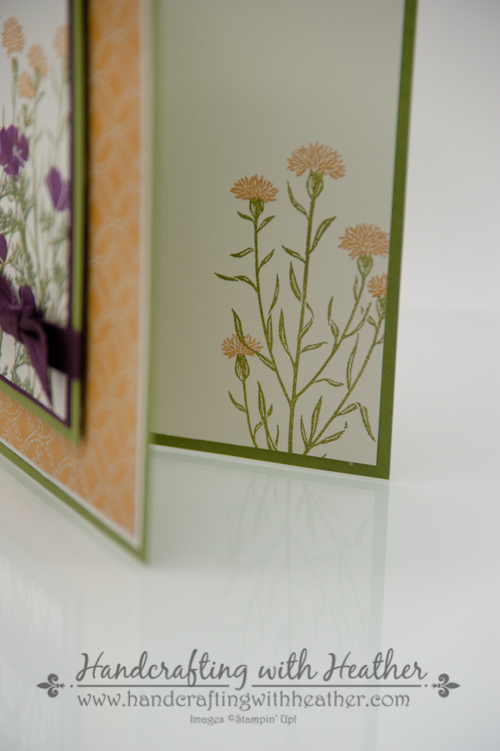
My card share for the Happy Stampers Blog Hop today shows two different variations of the card I shared with you last week featuring the Wild about Flowers stamp set from Stampin’ Up!  If you missed that post, you can see it here.  I thought it would be fun to show you how you can change the look of a card by simply using a different piece of designer series paper.

2016-jan-feb-blog hop-9

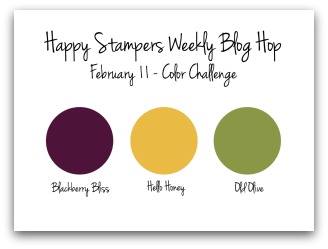
This week’s color challenge is Blackberry Bliss, Hello Honey, and Old Olive.

02112016 color challenge

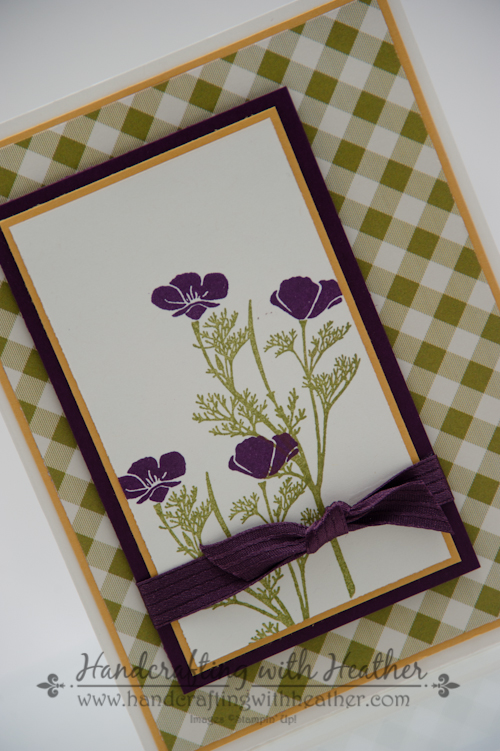
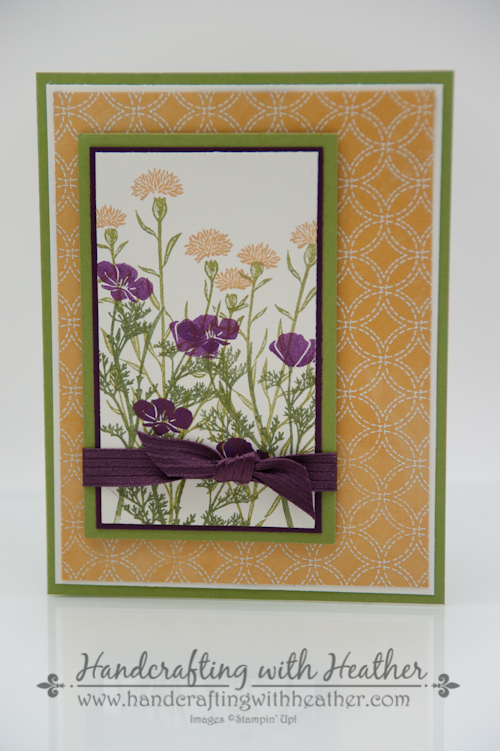
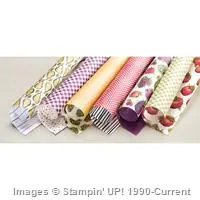
I used the Farmers Market DSP for each of my cards, but by changing the stamping a little, and switching up the colors of the layered panel, you get several pretty looks.

2016-jan-feb-blog hop-12

2016-jan-feb-blog hop-15

Card Recipe and Tips:

Card Base: 5-1/2″ x 8-1/2″, scored and folded at 4-1/4″

Layers: Very Vanilla 4″ x 5-1/4″ (two, front of card and inside panel), Farmers Market DSP 3-7/8″ x 5-1/8″, Blackberry Bliss/Old Olive 2-5/8″ x 4-1/4″, Hello Honey/Blackberry Bliss 2-3/8″ x 4″

Art Piece: Very Vanilla 2-1/4″ x 3-7/8″

  • Stamp the images on Very Vanilla card stock.  Vary the height of the flowers to add visual interest.
  • Stamp just a few flowers, or layer them to look like a field of wild flowers.
  • Layer the panels for the art piece and then tie with ribbon.  I run adhesive across the back of the panel to help hold the ribbon in place.  Putting a mini-glue dot behind where you want the knot to be helps to tie neatly.
  • I used Stampin’ Dimensionals to raise up the art piece and give the card more depth.
  • Don’t forget to finish the inside of your card for an extra special touch.

2016-jan-feb-blog hop-13

2016-jan-feb-blog hop-17

Now that you’ve seen what I created for today’s color challenge, head on over to see the rest of the Happy Stampers’ interpretations.  Click the button below to check out what Amy Koenders has created for you today on the next stop of the journey.

Blog Hop Next Blog

If you happen to get lost, or want to go back and check out one of the posts, here is a list for you – and don’t forget to leave a little sweet comment on each blog.  We love to hear from you!

I hope you will consider selecting me as your demonstrator for your stamping needs.  If you need any supplies you can shop now in my online store!  Feel free to drop me an email if you have any questions or if you would like a catalog.  I’m here to help!

Happy Stamping!

Heather

  • Visit my online store here.
  • Shop the Clearance Rack here.

Stampin’ Up! Supplies Used for Today’s Project

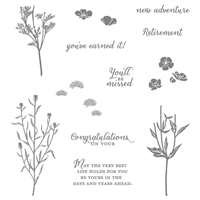
If you would like to order any of the products featured in today’s project, click the images below to order from my online store.


Handcrafting with Heather Creativity Clubhouse

Creativity Credit copy

Don’t forget about my customer loyalty program when you place your orders.  I’m offering double Creativity Credits during Sale-A-Bration!  Click here to read more about the Creativity Credits program, my buyer reward program where you earn free Stampin’ Up! merchandise.

Let me know if you have any questions, have fun shopping!

Jan. 25 – Feb. 25 Hostess Code: 9KHWRZ79

Use this hostess code when you order and receive a set of rhinestones from me!  If your order is over $150, please do not use this code, but you’ll still get the free gift.


Weekly Deals From Stampin’ Up! February 9th-15th

Click the images below to order the weekly deal products from my online store.  The Weekly Deals are only while supplies last and only available at these great prices through February 15th.

Sale: $24.75

Price: $33.00

Sale: $3.75

Price: $5.00

Sale: $13.50

Price: $18.00

Supply List

Built for Free Using: My Stampin Blog

Fabulous Florets Layered Panel Birthday Card – Stampin’ Up!

Hello stampers! Today’s birthday card features the Fabulous Florets, En Francais, and Build-a-Cupcake stamp sets from Stampin’ Up!  These are three of the sets that will be retiring on June 4th and are available only while supplies last.  I absolutely adore these sets!  If you don’t have them in your collection, please consider getting them before they are gone.

Fabulous Florets Razzleberry Birthday (1 of 8)

Today’s color scheme was inspired by the Dynamic Duos Color Challenge #99

Fabulous Florets Razzleberry Birthday (5 of 8)

Fabulous Florets Razzleberry Birthday (3 of 8)For this card, I decided to try making a video tutorial.  This is my first foray into the world of video demonstration, so I would love your feedback.  Please let me know what you like about it and how I could improve in the future. During the month of April, I will be doing a drawing each Sunday.  One lucky winner who left me a comment will receive one of the featured products from Sale-a-bration.  So, if you missed out on the free items during the sale, now is your chance to win one!  Also, if you enjoy reading my posts, why not have them delivered to your inbox automatically.  Just click on the “follow” button in the sidebar.

Fabulous Florets Razzleberry Birthday (8 of 8)

I like how this card turned out.  I think the combination of the Fabulous Florets and En Francais stamp sets is very elegant.  I also like the effect of the tone on tone stamping of the card base.  I hope you like this lovely card too!  If so, I hope you will pin it to Pinterest for me.  If you scroll to the bottom of this post, you will find a complete list of supplies used to make today’s project, including the dimensions for the card stock cuts.  Below the supply list, you will find a “pin it” button.  I would appreciate your help in spreading the word about my work.  Also, don’t forget to leave me a comment for your chance to win a free stamp set from Sale-a-bration!

If you find inspiration from this blog, one way you can show your support is by selecting me as your personal Stampin’ Up! Demonstrator.  If you are interested in purchasing the Fabulous Florets, En Francais, or Create-a-Cupcake stamp sets from Stampin’ Up! now is the perfect time.  These stamp sets are on the retiring list, so they are only available while supplies last through June 4th.  Also, you can enjoy FREE SHIPPING until Friday, April 25th.  Don’t miss out… shop now in my online store!  If you need any stamping supplies or have any questions, I would love to help you out.  Just click on Order Stampin’ Up! Online Now in the main menu or in the sidebar to go directly to my online store.  Feel free to drop me an email if you have any questions.  I’m here to help!

Happy Stamping!

Heather

  • Visit my online store here.
  • Shop the Clearance Rack here.

WEEKLY DEALS for April 22-28

 Screen Shot 2014-04-22 at 6.20.14 AM

Click here to see the Weekly Deals from Stampin’ Up! in my online store.  The Weekly Deals are only while supplies last and only available at these great prices through April 28.

And, don’t forget… FREE SHIPPING on all orders April 21-25!  There is no minimum order to qualify.

Screen Shot 2014-04-18 at 11.04.07 AM


Stampin’ Up! items used to create today’s project:

If you would like to order any of the products featured in today’s project, click the images below to order from my online store.


Card Stock Cuts

Card Base:  Rich Razzleberry – 5-1/2″ x 8-1/2″

Panels:  Basic Black – 3″ x 4-1/4″ panel; Very Vanilla – 2-3/4″ x 4″ panel, 4″ x 5-1/4″ panel (inside of card)

Sentiment/Die Cuts: Basic Gray – Modern Label Punch; Very Vanilla – Word Window Punch


Blooming with Kindness Tag Topper Birthday Card – Stampin’ Up!

Happy Easter everyone!  I hope that you have a wonderful day relaxing with friends and family today.  This holiday snuck up on me, so I don’t have an Easter card to share today.  However, I do have another birthday card for you featuring the Blooming with Kindness stamp set from Stampin’ Up!  If you follow my blog, you will know that it is one of my favorite stamps!

Blooming With Kindness Tag Topper (5 of 8)

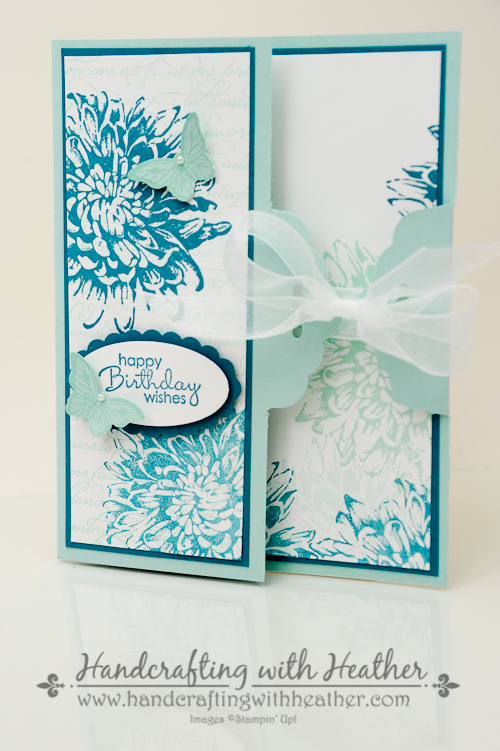
This elegant card includes a cute closure created using the Scalloped Tag Topper Punch.  I just love the special element the ribbon and closure create.  Opening the card is like opening a beautifully wrapped gift.  Please leave me a comment to tell me what you think about it.  During the month of April, I will be doing a drawing each Sunday.  One lucky winner will receive one of the featured products from Sale-a-bration.  So, if you missed out on the free items during the sale, now is your chance to win one!  Also, if you enjoy reading my posts, why not have them delivered to your inbox automatically.  Just click on the “follow” button in the sidebar.

Blooming With Kindness Tag Topper (7 of 8)

I began my card with a Pool Party card base.  To create the card closure, I bent the card in half (without creasing it) and punched through both layers along the short end of the card with the tag topper punch.  Then I cut off the excess left by the tag topper punch.  Next, I scored the card so that the inside measured 4-1/4″ x 5-1/5″.

Blooming With Kindness Tag Topper (1 of 8)

Next I cut panels of Island Indigo and Whisper White for the front and inside of my card.  I inked up the En Francais background stamp in Pool Party ink.  I stamped off on a scrap of paper before stamping my white panel.  Then I stamped the flower from Blooming with Kindness on the front panel using Island Indigo ink.  For the top bloom, I applied the ink directly, but for the bottom one, I stamped off first and then stamped again on my panel.  Next, I stamped my sentiment from the Petite Pairs stamp set onto a scrap of whisper white using Island Indigo ink.  I punched it out using the Large Oval Punch and layered it onto a Scalloped Oval in Island Indigo using Stampin’ Dimensionals.  Then, I stamped two butterflies on Pool Party card stock using the Papillon Potpourri stamp set with pool party ink.  Finally, I applied a small pearl for the head of the butterfly.  The butterflies were attached using mini glue dots.

Blooming With Kindness Tag Topper (8 of 8)

To finish off my card, I stamped the flower from Blooming with Kindness several times using Island Indigo and Pool Party ink.  For some of the blooms I stamped off on a scrap of paper first to give the image greater depth.  Once the inside of my card was finished, I tied it closed with some white ribbon to create an elegant bow.  Finally, I stamped the envelope to match.

Blooming With Kindness Tag Topper (3 of 8)

I hope you have enjoyed today’s project.  If so, I hope you will pin it to Pinterest for me.  If you scroll to the bottom of this post, you will find a complete list of supplies used to make today’s project, including the dimensions for the card stock cuts.  Below the supply list, you will find a “pin it” button.  I would appreciate your help in spreading the word about my work.  Also, don’t forget to leave me a comment for your chance to win a free stamp set from Sale-a-bration!

If you find inspiration from this blog, one way you can show your support is by selecting me as your personal Stampin’ Up! Demonstrator.  If you are interested in purchasing the Blooming with Kindness stamp set or any of the other wonderful products from Stampin’ Up! you can shop now in my online store!  If you need any stamping supplies or have any questions, I would love to help you out.  Just click on Order Stampin’ Up! Online Now in the main menu or in the sidebar to go directly to my online store.  Feel free to drop me an email if you have any questions.  I’m here to help!

Happy Stamping!

Heather

  • Visit my online store here.
  • Shop the Clearance Rack here.

WEEKLY DEALS for April 15-21

 Weekly Deals

Click here to see the Weekly Deals from Stampin’ Up! in my online store.  The Weekly Deals are only while supplies last and only available at these great prices through April 21.


Stampin’ Up! items used to create today’s project:

If you would like to order any of the products featured in today’s project, click the images below to order from my online store.


Card Stock Cuts

Card Base:  Pool Party – 5-1/2″ x 8-1/2″

Panels:  Island Indigo – 4″ x 5-1/4″ panel, 2-1/4″ x 5-1/4″ panel; Whisper White – 3-7/8″ x 5-1/8″ panel, 2-1/8″ x 5-1/8″ panel

Sentiment/Die Cuts:  Island indigo – one scalloped oval; Whisper White – One large oval, Pool Party – two bitty butterflies.

Non-Stampin’ Up Products:  White Chiffon Ribbon.  Substitute with 5/8″ Whisper White Organza Ribbon (114319).

Fabulous Florets Triple Time Thank You Card – Stampin’ Up!

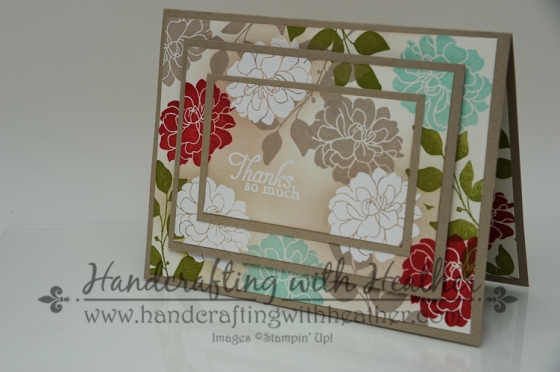
Today’s project is a lovely floral card that features the Fabulous Florets and Summer Silhouettes stamp sets from Stampin’ Up!  I saw this card design on Pinterest, and knew I just had to CASE (copy and share everything) it!

Fabulous Florets (6 of 7)

I changed the orientation and the sentiment, but everything else on the front of the card is exactly as Sandi MacIver designed it to be.  I just loved her choice of colors, and the beauty achieved by the resist technique paired with the layered panels.  Sandi has a great video tutorial that shows exactly how to create this card.  She gives wonderful step by step instructions about how to achieve all the techniques in this project.  I have provided a link for her video tutorial at the bottom of this post after the supply list.  If you are interested in the details of how to create this card, I would definitely recommend watching Sandi’s video.

Fabulous Florets (7 of 7)

I just love the “Triple Time” layered panel technique of this card.  It gives an added element of interest to the card design.  Please leave me a comment to tell me what you think about it.  During the month of April, I will be doing a drawing each Sunday.  One lucky winner will receive one of the featured products from Sale-a-bration.  So, if you missed out on the free items during the sale, now is your chance to win one!  Also, if you enjoy reading my posts, why not have them delivered to your inbox automatically.  Just click on the “follow” button in the sidebar.

Fabulous Florets (1 of 7)

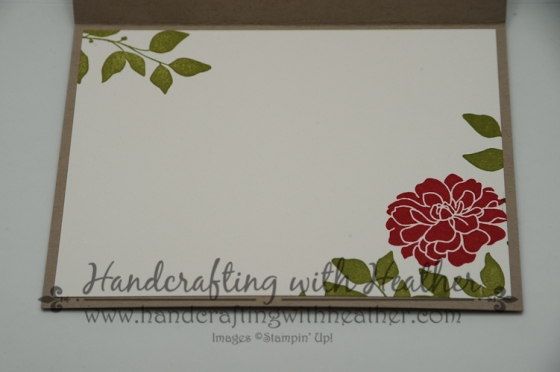
I needed to stock up on some extra thank you cards, so I chose the “Thanks So Much” greeting from simply sketched for my card today.  I also decided to stamp my envelope and add some extra design elements to the inside of my card.  You know me, I don’t like to leave the inside of my card “naked.”

Fabulous Florets (4 of 7)

Fabulous Florets (5 of 7)

I don’t normally re-create the work of someone else almost exactly, but I just loved the design of this one.  There wasn’t much I wanted to change.  As we head into spring, my dogwood trees and azaleas are starting to bloom.  This card reminds me of the beauty of this season.  I hope you have enjoyed this lovely card too!  If so, I hope you will pin it to Pinterest for me.  If you scroll to the bottom of this post, you will find a complete list of supplies used to make today’s project, including the dimensions for the card stock cuts.  Below the supply list, you will find a “pin it” button.  I would appreciate your help in spreading the word about my work.  Also, don’t forget to leave me a comment for your chance to win a free stamp set from Sale-a-bration!

If you find inspiration from this blog, one way you can show your support is by selecting me as your personal Stampin’ Up! Demonstrator.  If you are interested in purchasing the Fabulous Florets or Summer Silhouettes stamp sets from Stampin’ Up! you can shop now in my online store!  If you need any stamping supplies or have any questions, I would love to help you out.  Just click on Order Stampin’ Up! Online Now in the main menu or in the sidebar to go directly to my online store.  Feel free to drop me an email if you have any questions.  I’m here to help!

Happy Stamping!

Heather

  • Visit my online store here.
  • Shop the Clearance Rack here.

WEEKLY DEALS for April 15-21

 Weekly Deals

Click here to see the Weekly Deals from Stampin’ Up! in my online store.  The Weekly Deals are only while supplies last and only available at these great prices through April 21.


Stampin’ Up! items used to create today’s project:

If you would like to order any of the products featured in today’s project, click the images below to order from my online store.


Card Stock Cuts

Card Base:  Crumb Cake – 5-1/2″ x 8-1/2″

Panels:  Very Vanilla – 2″ x 3-1/4″ panel, 3″ x 4-1/4″ panel,  two panels 4″ x 5-1/4″ (front and inside of card); Crumb Cake – 2-1/4″ x 3-1/2″ panel, 3-1/4″ x 3-1/2″ panel

Sentiment/Die Cuts:  N/A

Video Tutorial:  Click here to view Sandi MacIver’s video tutorial for this card.

Flip Card Using Framelits and Blooming with Kindness – Stampin’ Up!

As you can tell, I am in love with the Blooming with Kindness stamp set (wood mount and clear mount) from Stampin’ Up!  This is my second card in a week that features that beautiful flower!  I just think it is so pretty and elegant.  In addition to the lovely flower, this card also uses the Circles Collection Framelits Dies to create great flip card effect.  This was a brand new technique that I learned from fellow Stampin’ Up! Demonstrator, Brandy Cox.  If you love the flip card effect, I have included a link to Brandy’s tutorial at the bottom of this post after the supply list.

Blooming with Kindness - Gray9

This card is my submission for Splitcoast Stampers Clean and Simple Challenge #262: Neutrals.  Please leave me a comment to let me know what you think of this creation.  I would love to hear from you.  On March 31st, I will do a drawing and one lucky person who left me a comment will receive a beautiful handcrafted card in the mail!  Also, if you enjoy reading my posts, why not have them delivered to your inbox automatically.  Just click on the “follow” button in the sidebar.

Blooming with Kindness - Gray6

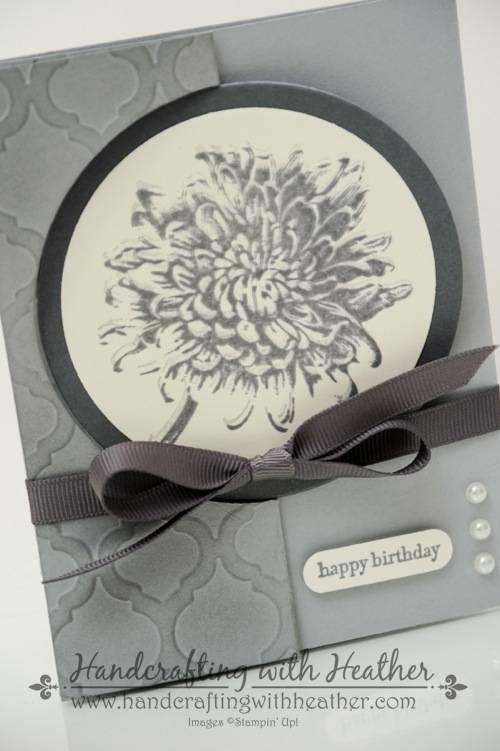
I love the flip card design, but I wanted to be able to write on the inside of my card without having it visible when the card was closed.  Therefore, I extended the length of my card base to make a tri-fold style flip card.  I began with a Smoky Slate card base (5-1/2″ x 11″) which I scored at 2-1/8″, 4-1/4″, and 8-1/2″.  I followed the instructions in Brandy’s video tutorial to cut half of a circle on the front of my card using the the third largest Circle Framelits Die (counting from the outside in toward the middle).  Then I dry embossed the front of my card using the Modern Mosaic textured impressions embossing folder and my Big Shot.  Next, I folded back the front flap, created with my framelits, and used a sponge dauber to apply ink from my Smoky Slate Classic Stampin’ Pad to the left side of my card.  I wanted to pick up the detail of the embossing and provide some contrast on the front of my card.  I used a scrap piece of card stock to cover the parts of my card that I did not want affected.

Blooming with Kindness - Gray4

For the focal point of my card, I stamped the flower from the Blooming with Kindness stamp set onto Very Vanilla card stock using Smoky Slate ink.  I wanted to stamp the flower twice, overlapping the two images to provide depth, but I have found that this works best when the first image is very light.  Therefore, I inked up my stamp and stamped it onto a scrap piece of card stock before stamping it on my Very Vanilla panel.  Then I used my Stamp-a-ma-jig to stamp the image a second time using my Basic Gray Classic Stampin’ Pad.  I offset the two images just slightly.  This gives the flower the illusion of depth and really makes it pop!

Blooming with Kindness - Gray3

Once my flower was complete, I used the fourth largest Circles Collection Framelits Die (counting from the outside in toward the middle) to cut out my flower.  Then, I cut a circle of Basic Gray card stock using the third largest circle die.  I layered the two circles together and adhered them to the card front using SNAIL Adhesive.  For my senitment I chose the “Happy Birthday” greeting from the Teeny Tiny Wishes stamp set (wood mount and clear mount).  I stamped it in Basic Gray ink and punched it out using the Word Window Punch. I needed my sentiment to be a little narrower than the word window punch, so I punched it so that the edge of the words were near the end of the punch.  Then I attached a post-it-note to the punched sentiment and punched it a second time, trimming off the extra length that I did not need.  I used Stampin’ Dimensionals to adhere my sentiment to the front of the card, and added three Basic Pearl Jewel Accents for a finishing touch.

Blooming with Kindness - Gray2

This card was really coming together nicely, but I didn’t like the fact that it didn’t lie flat, so I added some gray grosgrain ribbon to tie it closed… Now it was perfect!  Finally, I finished the inside of my card by stamping one of the border stamps from the Mosaic Madness stamp set (wood mount and clear mount) along the bottom edge of a Very Vanilla card stock panel in Basic Gray ink.

Blooming with Kindness - Gray5

I have to say that I am really pleased with how this card turned out!  When I watched Brandy’s video tutorial, I could just picture how elegant the flower from the Blooming with Kindness stamp set would look on the front of a flip card, and the end result did not disappoint!  If you enjoyed my post, please pin it to Pinterest for me.  I am working on building up my blog following and could use your help in getting the word out!  If you scroll to the bottom of the post, you will find a “pin it” button just below my supply list for the project… and, don’t forget to leave me a comment for your chance to win a handcrafted card in the mail!

If you would like to order the Blooming with Kindness stamp set or any of the other beautiful products featured in this card, please click here to shop in my online store.  Remember it’s Sale-a-bration with Stampin’ Up! Choose from a wide variety of FREE items with any $50 purchase until March 31, 2014.

You can find a complete list of supplies, including card stock cuts, and Brandy Cox’s video tutorial at the very bottom of this post.

____________________________________________________________

Weekly Deals from Stampin’ Up!  March 4 – 10

Here are the new Weekly Deals from Stampin’ Up!:

Weekly Deals

Click here to see the Weekly Deals from Stampin’ Up! in my online store.  The Weekly Deals are only while supplies last and only available at these great prices through March 10.

____________________________________________________________

If you need any stamping supplies, I’d be very happy to be your Demonstrator.  Just click on Order Stampin’ Up! Online Now in the main menu or in the sidebar to go directly to my online store or drop me an email if you have any questions.

Happy Stamping!

Heather

  • It’s Sale-a-bration time!!  You’ll get a free item from Stampin’ Up! for every $50 that you purchase between now and March 31!  Click on my Stampin’ Up! Promotions page for more information!
  • Visit my online store here.
  • Shop the Clearance Rack here.

____________________________________________________________

Stampin’ Up! items used to create this project:

Stamp Sets: Blooming with Kindness (126422); Teeny Tiny Wishes (127802); Mosaic Madness (130249)

Dies, Punches, & Embossing Folders: Circles Collection Framelits Dies (130911); Modern Mosaic Textured Impressions Embossing Folder (129984); Word Window Punch (119857)

Embellishments: Basic Pearls Jewel Accents (119247)

Card Stock:  Smoky Slate (131202) – card base 5-1/2″ x 11″; Basic Gray (121044) – one circle framelits die cut; Very Vanilla (101650) – one circle framelit die cut, one word window punch, 5″ x 3-3/4″ panel (inside)

Markers & Ink:  Smoky Slate Classic Stampin’ Pad (131179); Basic Gray Classic Stampin’ Pad (126981)

Tools:  Stamp-a-ma-jig (101049); sponge daubers (102892); Big Shot (113439)

Adhesive: SNAIL (104332); Stampin’ Dimensionals (104430)

Non-Stampin’ Up! Products Used:  gray grosgrain ribbon

Flip Card Tutorial from Brandy Cox

Oh, Secret Garden, You Make me Smile! – Stampin’ Up!

Today’s card features the Secret Garden stamp set (wood mount and clear mount) from Stampin’ Up!  The inspiration for this card came from the Mojo Monday sketch challenge #335 and the Splitcoast Stampers Color Challenge #468. (The challenge calls for Raspberry Ripple, but I didn’t have that so I substituted Rose Red.)  At first I was a little stuck with my design, but I am really pleased with the end result.  I would love to hear what you think too!  On March 31st I will do a drawing and one lucky person who leaves me a comment will win a handcrafted card in the mail!  Also, if you enjoy reading my posts, why not have them delivered to your inbox automatically.  Just click on the “follow” button in the sidebar.

secret garden (3 of 13)

I didn’t have any designer series paper in the challenge colors, so I decided to create my own!  I randomly stamped a piece of Very Vanilla card stock with the Secret Garden stamp set in Rose Red, Island Indigo, and Old Olive.  I didn’t want my stamped images to be too bold and overwhelming, so I stamped the Island Indigo and Old Olive stamps on a scrap sheet of paper before stamping them on my card stock.  This gave the colors a bit of a softer effect.  I wanted to tie in the black from my card base, so I chose a stamp from the Petite Petals stamp set (wood mount and clear mount) and used my Staz On Black ink to add it to my design.  I was trying to highlight the colors of the challenge without having too many big blocks of solid color or a pattern that was so bold it became distracting.  I think my floral stamped paper did just the trick! 

secret garden (9 of 13)

Once my stamping was done, I cut the panels for my card.  I placed a panel of Island Indigo side by side with a panel of my stamped design and adhered them to a Basic Black card base using SNAIL Adhesive.  Then I cut a panel of Basic Black and embossed it using the Lacy Brocade embossing folder and my Big Shot.  I cut two small squares of card stock; one in Island Indigo and and the other from my stamped paper.  I used SNAIL to attach the Island Indigo and Black pieces to the card front.  Then I used Stampin’ Dimensionals to attach my stamped square.

secret garden (13 of 13)

Next, I added a banner cut from Rose Red card stock.  I cut a 1/2″ strip of card stock and then used the Banner Punch (Sale-a-bration item) to shape the end of the banner.  Then I stamped a flower from the Secret Garden stamp set using my Island Indigo Classic Stampin’ Pad.  I used the Secret Garden Framelits to cut out my flower and some leaves from Old Olive card stock.  I used mini glue dots to adhere the leaves and then used Stampin’ Dimensionals to add my flower.  I chose the “You make me smile” greeting from the A Round Array stamp set (wood mount and clear mount), which I stamped in Rose Red ink on Very Vanilla card stock and cut out using the 7/8″ Scalloped Circle Punch.  The sentiment was also adhered using Stampin’ Dimensionals.  Finally, I added some Basic Pearl Jewel Accents to the center of my flower and the bottom left corner of my card for a finishing touch.

secret garden (8 of 13)
Of course, you may have noticed that I always like to finish the inside of my card with a coordinating accent.  I used the Secret Garden and Petite Petals stamp sets to mirror the design from the front of my card on a panel of Very Vanilla and adhered it to the inside of the card using SNAIL.  

I hope you have enjoyed today’s creation.  It was a great creative challenge for me and I really enjoyed putting it together.  If you liked my post today, I would appreciate it if you could help me out by pinning it to Pinterest.  I am still working on building up my blog following and I need all the help I can get to spread the word!  If you scroll to the bottom of the post, you will find a “pin it” button just below my supply list for the project… and, don’t forget to leave me a comment for your chance to win a handcrafted card in the mail!

If you would like to order the Secret Garden stamp set or any of the other beautiful products featured in this card, please click here to shop in my online store.  I would love to help you in your creative journey by becoming your personal Stampin’ Up! Demonstrator.  Remember it’s Sale-a-bration with Stampin’ Up! Choose from a wide variety of FREE items with any $50 purchase until March 31, 2014.

You can find a complete list of supplies, including card stock cuts at the very bottom of this post.

____________________________________________________________

Weekly Deals from Stampin’ Up!  March 4 – 10

Here are the new Weekly Deals from Stampin’ Up!:

Weekly Deals

Click here to see the Weekly Deals from Stampin’ Up! in my online store.  The Weekly Deals are only while supplies last and only available at these great prices through March 10.

____________________________________________________________

If you need any stamping supplies, I’d be very happy to be your Demonstrator.  Just click on Order Stampin’ Up! Online Now in the main menu or in the sidebar to go directly to my online store or drop me an email if you have any questions.

Happy Stamping!

Heather

  • It’s Sale-a-bration time!!  You’ll get a free item from Stampin’ Up! for every $50 that you purchase between now and March 31!  Click on my Stampin’ Up! Promotions page for more information!
  • Visit my online store here.
  • Shop the Clearance Rack here.

____________________________________________________________

Stampin’ Up! items used to create this project:

Stamp Sets: A Round Array (129090); Secret Garden (129144); Petite Petals (133155)

Dies, Punches, & Embossing Folders: Secret Garden Framelits Dies (129372); Lacy Brocade Textured Impressions Embossing Folder (127819); 7/8″ Scallop Circle Punch (129404); Banner Punch (Sale-a-bration item)

Embellishments: Basic Pearls Jewel Accents (119247)

Card Stock:  Basic Black (121045) – card base 4-1/4″ x 11″, 3-1/4″ x 3-1/2″ panel; Island Indigo (122923) – 1-3/4″ x 5-1/4″ panel, 2-1/4″ x 2-1/4″ square; Very Vanilla (101650) – 2-1/2″ x 5-1/4″ panel (stamped), 2″ x 2″ square (stamped), 4″ x 5-1/4″ panel (inside), one flower die cut, one 7/8″ scalloped circle punch (sentiment); Old Olive (100702) – one leaf die cut (Secret Garden Framelits); Rose Red (102544) – one banner.

Markers & Ink:  Rose Red Classic Stampin’ Pad (126954); Island Indigo Classic Stampin’ Pad (126986); Old Olive Classic Stampin’ Pad (126953); Stazon Black (101406)

Tools:  Big Shot (113439)

Adhesive: SNAIL (104332); Stampin’ Dimensionals (104430); Mini Glue Dots (103683)


Blooming with Kindness and Elegance – Stampin’ Up!

Today’s card is my first step into the world of card challenges.  I created this card using the Blooming with Kindness stamp set from Stampin’ Up! (wood mount and clear mount), which I absolutely adore!  I think the bloom from that stamp set is simply gorgeous.  I can’t wait to send this one to someone special.  If you enjoy this card, please leave me a comment.  I would love to hear what you think.  On March 31st, I will do a drawing and one lucky person who left me a comment will receive a beautiful handcrafted card in the mail!  Also, if you enjoy reading my posts, why not have them delivered to your inbox automatically.  Just click on the “follow” button in the sidebar.

Blooming with Kindness4

This card combines three challenges in one:  Freshly Made Sketches #124, Clean and Simple #261, and Color Challenge #467

Screen Shot 2014-03-01 at 9.12.44 PM

I began my card with a Soft Sky card base, and layered it with panels of Midnight Muse and Very Vanilla card stock using SNAIL adhesive.   Then I used my Stamp-a-ma-jig to place the flower from the Blooming with Kindness stamp set. I stamped the image twice; first with my Soft Sky Classic Stampin’ Pad and then with Bermuda Bay.  I offset the two stamps just slightly to give the image some added depth.

Blooming with Kindness8

Next, I stamped the “Just for You” greeting from the Teeny Tiny Wishes stamp set (wood mount and clear mount) in Bermuda Bay ink and punched it out using the Word Window Punch.  I layered that onto a piece of Soft Sky card stock, cut out with the Modern Label Punch, and added two small Basic Pearl Jewel Accents on either side of the sentiment. I used Stampin’ Dimensionals to adhere my sentiment to a Large Oval in Midnight muse, and layered that onto an Extra Large Scalloped Oval in Bermuda Bay.  I adhered the whole combination to the front of the card using Stampin’ Dimensionals.

Blooming with Kindness3

Finally, I finished the inside of my card by stamping one of the border stamps from the Mosaic Madness stamp set (wood mount and clear mount) along the bottom edge of a Very Vanilla card stock panel.

Blooming with Kindness6

I love how this card came together.  The simple design and elegance of the flower make it special in my mind.  If you enjoyed my post, please pin it to Pinterest for me.  I am working on building up my blog following and could use your help in getting the word out!  If you scroll to the bottom of the post, you will find a “pin it” button just below my supply list for the project… and, don’t forget to leave me a comment for your chance to win a handcrafted card in the mail!

If you would like to order the Blooming with Kindness stamp set or any of the other beautiful products featured in this card, please click here to shop in my online store.  Remember it’s Sale-a-bration with Stampin’ Up! Choose from a wide variety of FREE items with any $50 purchase until March 31, 2014.

You can find a complete list of supplies, including card stock cuts, and the very bottom of this post.

____________________________________________________________

Weekly Deals from Stampin’ Up! February 25 – March 3

Here are the new Weekly Deals from Stampin’ Up!:

Click here to see the Weekly Deals from Stampin’ Up! in my online store.  The Weekly Deals are only while supplies last and only available at these great prices through March 3.

____________________________________________________________

If you need any stamping supplies, I’d be very happy to be your Demonstrator.  Just click on Order Stampin’ Up! Online Now in the main menu or in the sidebar to go directly to my online store or drop me an email if you have any questions.

Happy Stamping!

Heather

  • It’s Sale-a-bration time!!  You’ll get a free item from Stampin’ Up! for every $50 that you purchase between now and March 31!  Click on my Stampin’ Up! Promotions page for more information!
  • Visit my online store here.
  • Shop the Clearance Rack here.

____________________________________________________________

Stampin’ Up! items used to create this project:

Stamp Sets: Blooming with Kindness (126422); Teeny Tiny Wishes (127802); Mosaic Madness (130249)

Dies, Punches, & Embossing Folders: Word Window Punch (119857); Modern Label Punch (119849); Extra Large Scalloped Oval Punch (119856); Large Oval Punch (119855)

Embellishments: Basic Pearls Jewel Accents (119247)

Card Stock:  Soft Sky (131203) card base – 5-1/2″ x 8-1/2″, one modern label punch; Midnight Muse (126843) – 4-3/4″ x 3-1/2″ panel, large oval punch; Very Vanilla (101650) – 4-3/8″ x 3-1/8″ panel (front of card), 5″ x 3-3/4″ panel (inside), one word window punch; Bermuda Bay (131197) – Extra Large Scalloped Oval Punch

Markers & Ink:  Bermuda Bay Classic Stampin’ Pad (131171); Soft Sky Classic Stampin’ Pad (131181)

Tools:  Stamp-a-ma-jig (101049)

Adhesive: SNAIL (104332); Stampin’ Dimensionals (104430)