Watercolor Wonder Good Thoughts – Stampin’ Up!

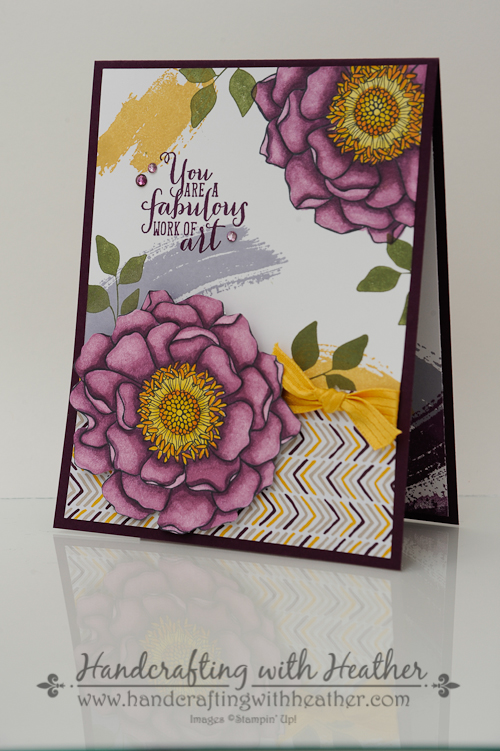
I recently learned that a former co-worker of mine has been diagnosed with breast cancer.  I made this get well card featuring a sentiment from Perfect Pennants and the beautiful flowers from the Watercolor Wonder Designer Series Paper pack for her in an attempt to lift her spirits.  It is never fun to have the occasion to make this type of card, but I hope that it will brighten her day a little to know that she is not alone and that I am sending good thoughts her way!

Watercolor Wonder & Perfect Pennants (1 of 9)

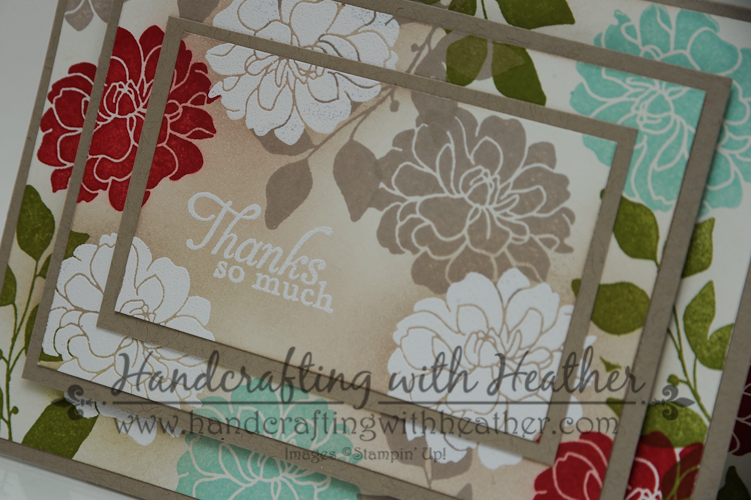
This card was pretty quick and very simple to create.  I started with a Whisper White card base and layered on two different panels from Watercolor Wonder.  I inked around the edges of the panels with Tangerine Tango ink to add a little definition to the layers.

Watercolor Wonder & Perfect Pennants (3 of 9)

Next, I stamped the leaf image from Summer Silhouettes three times in Old Olive on the yellow and orange watercolor wash design from the DSP pack.  I cut out three flowers from a sheet of the rose design paper in the Watercolor Wonder pack and added them to the front of my card using Stampin’ Dimensionals.

Watercolor Wonder & Perfect Pennants (6 of 9)

Finally, I stamped the “Sending Good Thoughts Your Way” greeting on to a piece of polka-dot DSP and cut it out using my banner framelits dies.  I inked around the edges of the banner with Tangerine Tango ink.

Watercolor Wonder & Perfect Pennants (4 of 9)

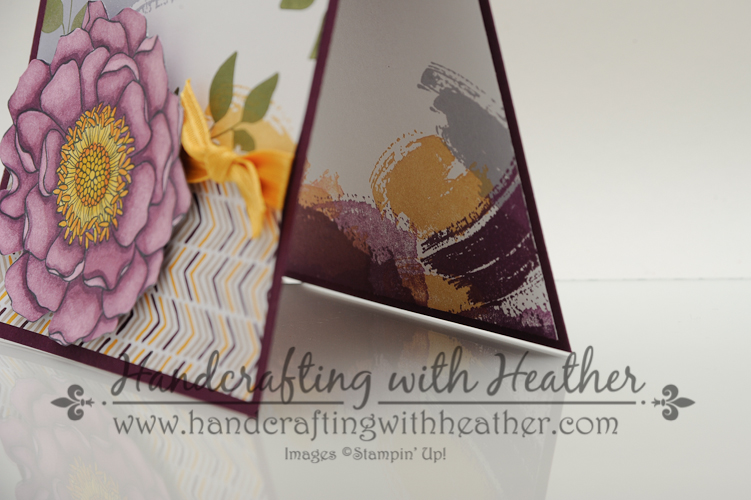
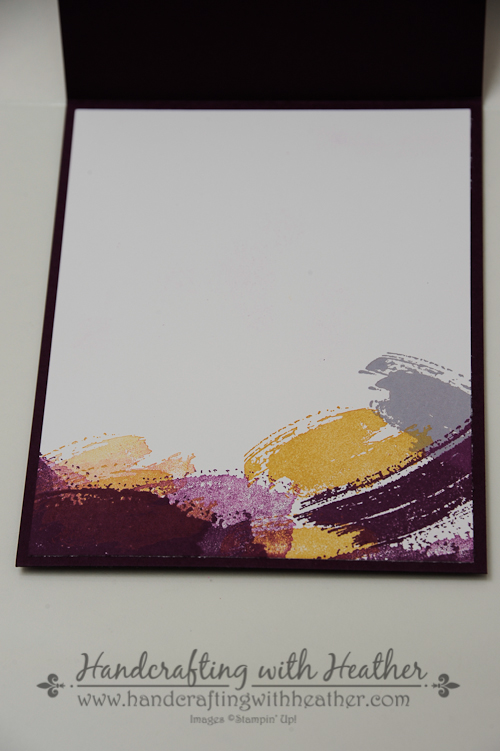
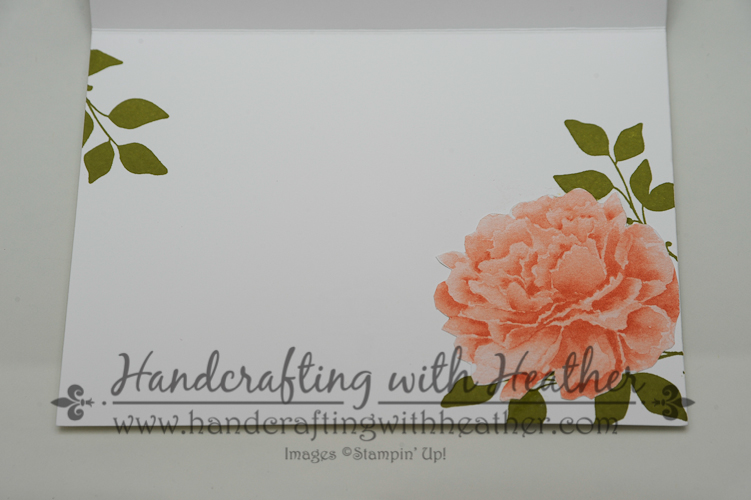
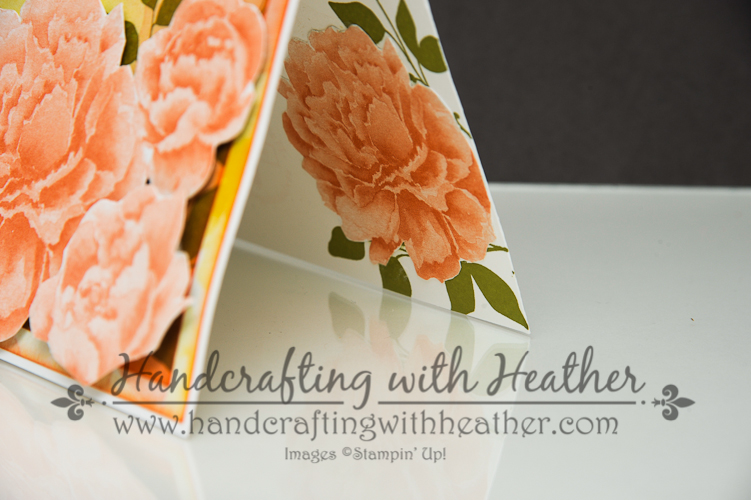
I finished the inside of my card with the leaf motif and another rose from the Watercolor Wonder DSP.

Watercolor Wonder & Perfect Pennants (8 of 9)

Watercolor Wonder & Perfect Pennants (7 of 9)

I hope that this card is able to lift my friend’s spirits.  If you are a fan of this card, please pin this project to Pinterest and leave me a comment.  You will find a “pin it” button at the very bottom of this post below the supply list and cards stock cuts.  Also, if you like my work, why not subscribe to my blog via email.  All you have to do is click on “follow” in the sidebar.

Although, I’m sad to see this beautiful paper being retired, I’m excited about all the new designs that will be available with the new catalog on June 2nd.  If you haven’t gotten your very own copy of the new catalog yet, now is a great time.  I’ve got a stack of them hot off the presses waiting for you. I offer free catalogs to all of my customers.  If you are my customer or want to be my customer, please email me your name and mailing address.  I’ll be more than happy to send you the gorgeous book.  You can email me at handcraftingheather@icloud.com.

I hope you will consider selecting me as your demonstrator for your stamping needs.  If you need any supplies or want to grab some retiring products before they are gone, you can shop now in my online store!  Remember, the Stampin’ Up! Retiring Products are 20%-50% off while supplies last!  Feel free to drop me an email if you have any questions or if you would like a catalog.  I’m here to help!

Happy Stamping!

Heather

  • Visit my online store here.
  • Shop the Clearance Rack here.

WEEKLY DEALS for May 20-26

Screen Shot 2014-05-20 at 6.06.42 AM

Click here to see the Weekly Deals from Stampin’ Up! in my online store.  The Weekly Deals are only while supplies last and only available at these great prices through May 26.


Stampin’ Up! items used to create today’s project:

If you would like to order any of the products featured in today’s project, click the images below to order from my online store.

Card Stock Cuts

Card Base: Whisper White – 5-1/2″ x 8-1/2″

Panels: Watercolor Wonder – (front of card) two panels 5-3/8″ x 4-1/8″ and 5″ x 3-3/4″

Sentiment & Die Cuts: Watercolor Wonder DSP – 1 banner


Advertisement

Blended Bloom Meets Work of Art – Stampin’ Up!

When I first saw the Work of Art stamp set at the Stampin’ Up! 2014 Annual Catalog Premiere, I’ll be honest, I wasn’t sure about it.  But, I love a free gift, so I was excited to try it out when we received it at the end of the night.  Boy, was my first impression wrong!  I have really enjoyed working with that set!  And, the Blended Bloom stamp is quickly becoming a favorite!  I think it is going to give my Blooming with Kindness stamp set a run for its money when it comes to “ink time.”  If you are a regular reader of my blog, you know I love that Blooming with Kindness flower! LOL.

Blended Bloom & Work of Art (2 of 9)

It has been so much fun playing with all my new items from the 2014 annual catalog pre-order.  If you haven’t seen the new catalog yet, now is a great time to get your hands on one so you can get your wish list ready for the official launch on June 2nd.  I will be mailing out complimentary copies to all my customers who place an order of $25 or more during the month of May.

Blended Bloom & Work of Art (5 of 9)I chose a Blackberry Bliss card base for my project today.  It is one of the new In Colors, and I am totally in love with this dark, regal shade of purple.  Next, I stamped the Blended Bloom stamp in the corner of a panel of Whisper Whisper white card stock using Memento Tuxedo Black Ink.  While I was at it, I also stamped a second flower on another sheet of card stock.  Blended Bloom & Work of Art (3 of 9)

Next,  I stamped the leaf image from the Summer Silhouettes stamp set along the edges of my Whisper White panel using Mossy Meadow ink (another new In Color).  For some of the images, I stamped off then stamped on the card, to give greater range of color in my card design.  Then, I stamped the paint splotches (yes, that is a technical term) in Wisteria Wonder and Hello Honey.  For the Hello Honey “paint” I stamped off once before stamping on my card to give the color a little softer effect.

Blended Bloom & Work of Art (9 of 9)

I just love the “You are a Fabulous Work of Art” sentiment from the Work of Art stamp set. The font is whimsical, and I adore the affirming message.  I used Blackberry Bliss ink and my stamp-a-ma-jig to make sure I got the placement just perfect.  Then it was time for some coloring!

Blended Bloom & Work of Art (6 of 9)

I used my new Stampin’ Blendabilities markers (release date TBD) in Rich Razzleberry, Daffodil Delight, and Pumpkin Pie to color in my flower images.  I used the “dark to light” method (click here to see my video tutorial) to achieve the beautifully blended contrast and shading.  Once my flowers were both colored, I cut out the second flower I had stamped and set it aside until my card front was finished.

Blended Bloom & Work of Art (5 of 9)

I added a panel of Designer Series Paper from the Moonlight Paper Stack to the bottom of my stamped panel using SNAIL.  I ran SNAIL adhesive across the place where my two panels joined on the front of the card, leaving a 1″ gap where I wanted to put my knot.   Then I added a length of Hello Honey 3/8″ Stiched Satin Ribbon to my combined panel and anchored it on the back with SNAIL.  I slid a shorter piece of the ribbon under that one (where I had left a space in my adhesive) and tied it in a knot.  I have found that this method saves on materials, because  you don’t have to wrap the ribbon all the way around the panel.

Blended Bloom & Work of Art (9 of 9)

Finally, I added my flower to the bottom of the card using Stampin’ Dimensionals, and added some rhinestones that I colored using the Stampin’ Blendabilties.  For the inside of my card, I created an abstract design using the paint splotches from Work of Art.

Blended Bloom & Work of Art (8 of 9)

Blended Bloom & Work of Art (7 of 9)

I am really happy with how this card turned out.  I hope you like it too.  As always, if you are a fan, please pin this project to Pinterest and leave me a comment.  You will find a “pin it” button at the very bottom of this post below the supply list and cards stock cuts.  Also, if you like my work, why not subscribe to my blog via email.  All you have to do is click on “follow” in the sidebar.

I hope you will consider selecting me as your demonstrator for your purchases of these great new products and all your other stamping supplies.  If you need any stamping supplies you can shop now in my online store!  Also, remember that I’ve got a stack of brand new catalogs hot off the presses waiting for you.  If you place an order of $25 or more during the month of May, I will send you your very own copy free of charge!  Feel free to drop me an email if you have any questions.  I’m here to help!

Happy Stamping!

Heather

  • Visit my online store here.
  • Shop the Clearance Rack here.

WEEKLY DEALS for May 13-19

weekly deals 5-13

Click here to see the Weekly Deals from Stampin’ Up! in my online store.  The Weekly Deals are only while supplies last and only available at these great prices through May 19.


Stampin’ Up! items used to create today’s project:

If you would like to order any of the products featured in today’s project, click the images below to order from my online store. (Keep in mind that some sneak peek items will not be available for purchase until June 2, 2014.)

Card Base: Blackberry Bliss – 4-1/4″ x 11″

Panels: Whisper White – 4″ x 3-1/2″ panel (front), 4″ x 5-1/4″ panel (inside); Moonlight DSP – 4″ x 1-3/4″ panel

Home Decor… Stampin’ Up! Style!

With Mother’s Day right around the corner, I decided to show you a really simple, yet fabulous home decor project I created using Stampin’ Up! products.  I wanted elegant, but bold stamps, so I chose the following sets for my project today:  Summer Silhouettes, Fabulous Florets (retiring stamp set), Serene Silhouettes, Blooming with Kindness, and for my background En Francais (retiring stamp).

Stampin' Up! Coasters (1 of 10)

These coasters are so easy to make, and they are the perfect gift!  I made a set for mother’s day, and I also made a set for my son’s daycare provider for teacher appreciation week.  Not only are these coasters beautiful, but they are also extremely affordable (i.e. “dirt cheap”)!  I would love to hear what you think of my project today.  Please leave me a comment.  Also, if you like my work, why not have my posts delivered to your inbox automatically?  Just click on the “follow” button in the sidebar to subscribe now.

Stampin' Up! Coasters (6 of 10)

I used Stazon Black Ink for my project today because it is permanent.  I began by stamping each coaster with the En Francais background stamp.  (This stamp is retiring, but as of the time I am writing this, it is still available in clear mount.)  Then I stamped the four different coaster designs using a combination of stamp sets.  I found that stamps with a lot of solid surface area worked well for this project.  I just love the black silhouettes against the scripted font of the background.

Coaster #1: Serene Silhouettes

Stampin' Up! Coasters (5 of 10)

Coaster #2: Blooming with Kindness & Summer Silhouettes

Stampin' Up! Coasters (2 of 10)

Coaster #3: Fabulous Florets

Stampin' Up! Coasters (4 of 10)

Coaster #4:  Fabulous Florets & Summer Silhouettes

Stampin' Up! Coasters (3 of 10)

Once the coasters were stamped, I put them on a cookie sheet in a cold oven and brought the temperature up to 375 degrees.  Then I baked them for 30 minutes and let them cool in the oven.  Once everything was completely cooled, I used Minwax Paste Finishing Wax to seal in my designs.  Finally, I added felt pads to the corners on the bottom of the coaster to protect the table from scratching.

Stampin' Up! Coasters (10 of 10)

My mom is just finishing up a big renovation at her house and she is sprucing everything up.  I know she is going to love these coasters!  If you love them too, you should pin them to Pinterest!  At the bottom of this post you will find a complete list of supplies used in this project. Just below the supply list is a “pin it” button.

Stampin' Up! Coasters (9 of 10)

If you need any stamping supplies, including any of the fabulous stamp sets used in this project, I would love to help you out.  Click here to shop online now!  If you find inspiration from my blog, one way you can show your support is by selecting me as your personal Stampin’ Up! Demonstrator.  Feel free to email me if you have any questions.  I’m here to help!

Happy Stamping!

Heather


Weekly Deals from Stampin’ Up! – May 6-12

weekly deals 5-6

Click here to see the Weekly Deals from Stampin’ Up! in my online store.  The Weekly Deals are only while supplies last and only available at these great prices through May 12.


Retiring Stampin’ Up! Products – Available while supplies last until June 4, 2014

Many of the retiring products from Stampin’ Up! have already sold out!  Be sure to check out the links below to check to see which items are still available.  Stampin’ Up! is updating these lists daily to tell us which items are gone.  The last column has a little “x” next to the products that are no longer available.  If you want any of the products on the retiring list, be sure to order soon, so you don’t miss out!

  • Retiring Stamps (Available April 21-June 4, 2014, or while supplies last)
  • Retiring Accessories (Available April 21-June 4, 2014, or while supplies last)

If you need any stamping supplies, I’d be very happy to be your Demonstrator.  Just click on Order Stampin’ Up! Online Now in the main menu or in the sidebar to go directly to my online store or drop me an email if you have any questions.


Stampin’ Up! items used to create today’s project:

If you would like to order any of the products featured in today’s project, click the images below to order from my online store.


Fabulous Florets Triple Time Thank You Card – Stampin’ Up!

Today’s project is a lovely floral card that features the Fabulous Florets and Summer Silhouettes stamp sets from Stampin’ Up!  I saw this card design on Pinterest, and knew I just had to CASE (copy and share everything) it!

Fabulous Florets (6 of 7)

I changed the orientation and the sentiment, but everything else on the front of the card is exactly as Sandi MacIver designed it to be.  I just loved her choice of colors, and the beauty achieved by the resist technique paired with the layered panels.  Sandi has a great video tutorial that shows exactly how to create this card.  She gives wonderful step by step instructions about how to achieve all the techniques in this project.  I have provided a link for her video tutorial at the bottom of this post after the supply list.  If you are interested in the details of how to create this card, I would definitely recommend watching Sandi’s video.

Fabulous Florets (7 of 7)

I just love the “Triple Time” layered panel technique of this card.  It gives an added element of interest to the card design.  Please leave me a comment to tell me what you think about it.  During the month of April, I will be doing a drawing each Sunday.  One lucky winner will receive one of the featured products from Sale-a-bration.  So, if you missed out on the free items during the sale, now is your chance to win one!  Also, if you enjoy reading my posts, why not have them delivered to your inbox automatically.  Just click on the “follow” button in the sidebar.

Fabulous Florets (1 of 7)

I needed to stock up on some extra thank you cards, so I chose the “Thanks So Much” greeting from simply sketched for my card today.  I also decided to stamp my envelope and add some extra design elements to the inside of my card.  You know me, I don’t like to leave the inside of my card “naked.”

Fabulous Florets (4 of 7)

Fabulous Florets (5 of 7)

I don’t normally re-create the work of someone else almost exactly, but I just loved the design of this one.  There wasn’t much I wanted to change.  As we head into spring, my dogwood trees and azaleas are starting to bloom.  This card reminds me of the beauty of this season.  I hope you have enjoyed this lovely card too!  If so, I hope you will pin it to Pinterest for me.  If you scroll to the bottom of this post, you will find a complete list of supplies used to make today’s project, including the dimensions for the card stock cuts.  Below the supply list, you will find a “pin it” button.  I would appreciate your help in spreading the word about my work.  Also, don’t forget to leave me a comment for your chance to win a free stamp set from Sale-a-bration!

If you find inspiration from this blog, one way you can show your support is by selecting me as your personal Stampin’ Up! Demonstrator.  If you are interested in purchasing the Fabulous Florets or Summer Silhouettes stamp sets from Stampin’ Up! you can shop now in my online store!  If you need any stamping supplies or have any questions, I would love to help you out.  Just click on Order Stampin’ Up! Online Now in the main menu or in the sidebar to go directly to my online store.  Feel free to drop me an email if you have any questions.  I’m here to help!

Happy Stamping!

Heather

  • Visit my online store here.
  • Shop the Clearance Rack here.

WEEKLY DEALS for April 15-21

 Weekly Deals

Click here to see the Weekly Deals from Stampin’ Up! in my online store.  The Weekly Deals are only while supplies last and only available at these great prices through April 21.


Stampin’ Up! items used to create today’s project:

If you would like to order any of the products featured in today’s project, click the images below to order from my online store.


Card Stock Cuts

Card Base:  Crumb Cake – 5-1/2″ x 8-1/2″

Panels:  Very Vanilla – 2″ x 3-1/4″ panel, 3″ x 4-1/4″ panel,  two panels 4″ x 5-1/4″ (front and inside of card); Crumb Cake – 2-1/4″ x 3-1/2″ panel, 3-1/4″ x 3-1/2″ panel

Sentiment/Die Cuts:  N/A

Video Tutorial:  Click here to view Sandi MacIver’s video tutorial for this card.