Gorgeous Grunge and Petite Petals Boxed Card Set – Stampin’ Up!

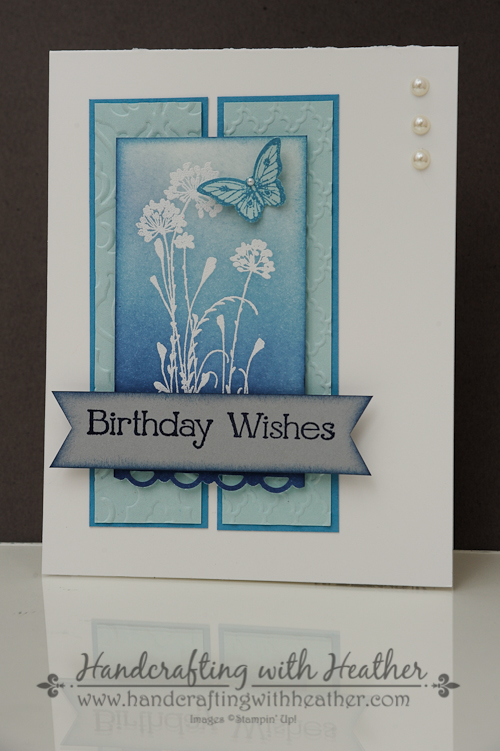
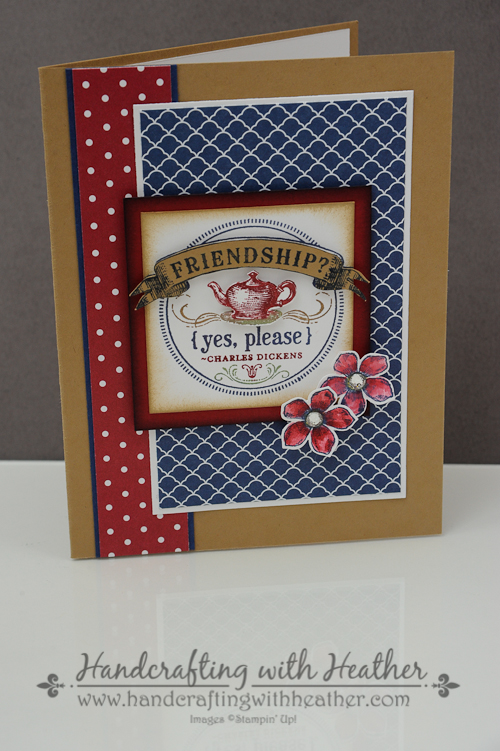
I have been having so much fun with boxed card sets lately, that I decided to create another one featuring the Gorgeous Grunge and Petite Petals stamp sets from Stampin’ Up!  The cards in this set are a total CASE from a Stampin’ Up! Demonstrator in the UK, Sam Donald from Pootles Papercraft.  Her You Tube channel is one of my favorites.  Ironically, she rarely posts videos of cards, favoring 3-D projects instead.  However, this time she posted a card, and then I turned it into a box!  Thanks for the inspiration Sam!  The only thing I changed was the color scheme. 🙂

Gorgeous Grunge & Petite Petals (1 of 18)

I would love to hear your thoughts about this project.  Today is the last day to leave me a comment for your chance to win one of the Retro Fresh Boxed Card Sets featured in my posts earlier this week.  Tomorrow, I will do the drawing and the winner will be announced on my Tuesday Updates post.


Creating the Cards

If you would like additional information about how to create design on the front of these beautiful cards, please watch Sam’s video tutorial linked above.  She does a fabulous job explaining everything step by step, and she creates gorgeous designs.  In fact, I loved this one so much that it prompted me to purchase the Gorgeous Grunge stamp set.  I had been on the fence about that one for a while, but  I had to have it once I saw this card.  Now that I’ve got it, I really like it.  I think you will be seeing more “splotchy” cards coming from me soon. LOL.

Gorgeous Grunge & Petite Petals (7 of 18)

As I said before, I loved her design so much, the only thing I changed was the color scheme.  In celebration of the new catalog launch tomorrow, I decided to feature the new 2014-2016 In Colors in my card set today.  I created the card in four different color schemes:

Gorgeous Grunge & Petite Petals (12 of 18)


Blackberry Bliss/Basic Gray/Smoky Slate

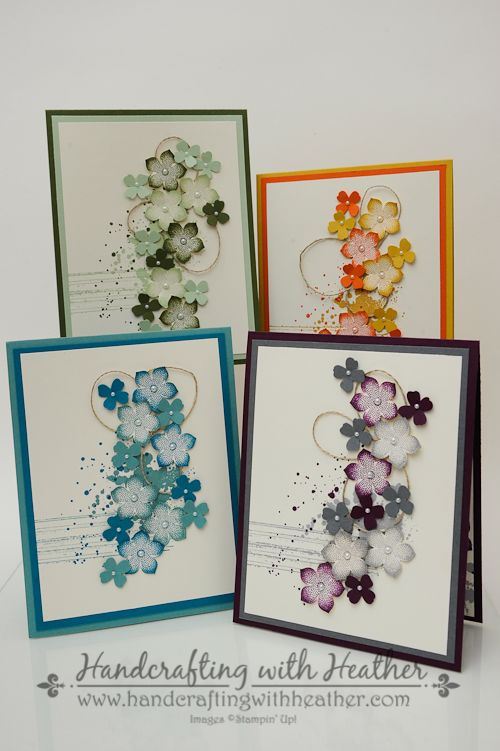
Blackberry Bliss, Basic Gray, & Smoky Slate


Lost Lagoon & Island Indigo

Lost Lagoon & Island Indigo


Mossy Meadow & Pistachio Pudding

Mossy Meadow & Pistachio Pudding


Tangelo Twist & Hello Honey

Tangelo Twist & Hello Honey

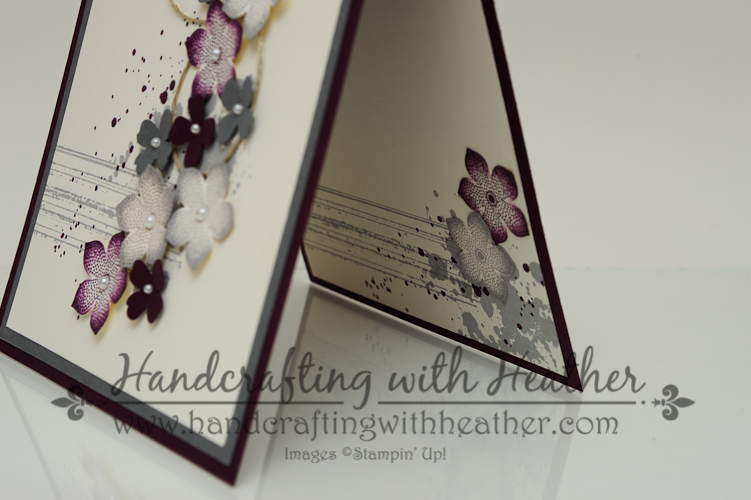
For the inside of my card, I chose to incorporate some of the same elements from the front.

Gorgeous Grunge & Petite Petals (10 of 18)

Gorgeous Grunge & Petite Petals (11 of 18)


Creating the Box

Gorgeous Grunge & Petite Petals (2 of 18)

I followed the same technique featured in Friday’s video tutorial for this box, but I adjusted the dimensions.  If you missed my post on Friday, you can view my tutorial hereTo create this box, I used a full sheet of 8-1/2″ x 11″ card stock, and scored it as follows:

With the 8-1/2″ side at the top of my Stampin’ Trimmer, I scored at:

  • 1/2″
  • 1-3/8″
  • 7-1/8″
  • 8″

Next, with the 11″ side at the top of the trimmer, score at:

  • 2-3/8″
  • 3-1/4″
  • 7-3/4″
  • 8-5/8″

The measurements for the panels on the flap are:

  • Basic Gray – 5-1/2″ x 2-1/4″ punched on two corners with the Envelope Punch Board
  • Very Vanilla – 5-1/4″ x 2-1/8″ punched on two corners with the Envelope Punch Board

Gorgeous Grunge & Petite Petals (3 of 18)

For this box, since I was using a full sheet of card stock to accommodate a 4-1/4″ x 5-1/5″ card, I did not have enough overlap to do a Velcro closure.  Instead, I created this tie closure with the gorgeous new In Color ribbon.  To create the closure, I punched two small holes close together.  I threaded the ribbon from the top of the flap through to the inside and then back up again.  I wrapped the ribbon around the box and tied it closed.  Then I hid my holes by embellishing with flowers on top.

Gorgeous Grunge & Petite Petals (1 of 18)

I am so thrilled with how this project turned out.  I think Sam’s design is beautiful with the new In Colors, and it makes a gorgeous boxed set.  I know anyone would be delighted to receive this as a gift!  Please pin this project to Pinterest if you like it as much as I do.  You will find a “pin it” button at the very bottom of this post below the supply list and cards stock cuts.  Also, if you like my work, why not subscribe to my blog via email.  All you have to do is click on “follow” in the sidebar.

The new catalog goes live tomorrow!  I know you are probably chomping at the bit to get your hands on some of the fantastic new products from Stampin’ Up! just like I am.  If you haven’t gotten your very own copy of the 2014 Annual Catalog yet, now is a great time.  I’ve got a stack of them hot off the presses waiting for you. I offer free catalogs to all of my customers.  If you are my customer or want to be my customer, please email me your name and mailing address.  I’ll be more than happy to send you the gorgeous book.  You can email me at handcraftingheather@icloud.com.

I hope you will consider selecting me as your demonstrator for your stamping needs.  If you need any supplies or want to grab some retiring products before they are gone, you can shop now in my online store!  Remember, the Stampin’ Up! Retiring Products are 20%-50% off while supplies last!  There are only a few more days left to order, so act now!  Feel free to drop me an email if you have any questions or if you would like a catalog.  I’m here to help!

Happy Stamping!

Heather

  • Visit my online store here.
  • Shop the Clearance Rack here.

Demonstrator Sign Up Special Available through June 30th!


Have you been considering joining Stampin’ Up! as a Demonstrator?  If so, now is a great time to join.  Between now and June 30, new recruits can join Stampin’ Up! at one of two great prices. Stampin’ Up! will continue to offer their traditional starter kit priced at $99 ($125 product value), but for four weeks only they will also be offering a reduced priced starter kit at the low price of $50 ($55 product value).  Drop me a note at handcraftingheather@icloud.com if you have any questions or if you’d like additional details.  I’d love to have you on my team!  You can read more information about the benefits of being a Demonstrator here.


Retiring Products – Only a few days left!

Screen Shot 2014-05-22 at 6.26.15 AM

Stampin’ Up! is offering a 25%-50% discount on many of the retiring products, but you have to act fast, as this special offer is only available until June 4, 2014 and only available while supplies last.  If you missed out on a product the first time, this is your last chance to get it before it’s gone for good!  Click here to go to my online store to start shopping!

Retiring Stamps (Available April 21-June 4, 2014, or while supplies last)

Retiring Accessories (Available April 21-June 4, 2014, or while supplies last)

If you need any stamping supplies, I’d be very happy to be your Demonstrator.  Just click on Order Stampin’ Up! Online Now in the main menu or in the sidebar to go directly to my online store or drop me an email if you have any questions.


 WEEKLY DEALS for May 27 – June 2

Screen Shot 2014-05-27 at 9.28.04 AM

Click here to see the Weekly Deals from Stampin’ Up! in my online store.  The Weekly Deals are only while supplies last and only available at these great prices through June 2.


Stampin’ Up! items used to create today’s project:

If you would like to order any of the products featured in today’s project, click the images below to order from my online store.


Card Stock Cuts (Cards)

Card Bases: Blackberry Bliss, Lost Lagoon, Mossy Meadow, & Tangelo Twist – 4-1/4″ x 11″

Panels: Basic Gray, Island Indigo, Pistachio Pudding, & Hello Honey – 4″ x 5-1/4″; Very Vanilla – 3-3/4″ x 5″ (front of card), 4″ x 5-1/4″ (inside of card).


Advertisement

Serene Silhouettes Stamp-a-Stack – Stampin’ Up!

On Friday, I shared an elegant card featuring the Serene Silhouettes stamp set (wood mount and clear mount) from Stampin’ Up!  I liked the card so much, that I decided to create a stamp-a-stack collection around it.  If you live in the Atlanta area and would be interested in making this gorgeous card set , please contact me to sign up for my Stamp-a-Stack class on Saturday, May 3rd from 7:00-9:00 p.m.  We will create this set and another one (I’ll post about that one soon).  The cost of the class is $15 and includes all consumable materials, use of my stamping supplies, and I will do all the prep work… you can’t beat that!  I would love to connect with some of you face to face for an opportunity to truly create together!

serene silhouettes (28 of 28)

If you like this project as much as I do, I would love to hear from you.  Please leave me a comment and I will enter you into my drawing.  During the month of April, I will be doing a drawing each Sunday.  One lucky winner will receive one of the featured products from Sale-a-bration.  So, if you missed out on the free items during the sale, now is your chance to win one!  Also, if you enjoy reading my posts, why not have them delivered to your inbox automatically.  Just click on the “follow” button in the sidebar.

All of the cards in this set were inspired by the Splitcoast Stampers CAS266 card challenge, which was to create a clean and simple card using three of the following colors:

I maintained the same design elements for all four cards of this set.  For details about the techniques used in this project, please click here.  Below, you will find card recipes for the specific supplies and dimensions for each card.

Serene Silhouettes Birthday Wishes (Card #1)

Serene Silhouettes (12 of 14)

Card #1 was inspired by three different challenges:  Retro Sketches #108, Splitcoast Stampers CAS266, and The Card Concept #7.

Challenge Images

Stampin’ Up! items used to create card #1:

Stamp Sets: Four You (130538); Serene Silhouettes (127324); Papillon Potpourri (123759)

Dies, Punches, & Embossing Folders: Beautifully Baroque Textured Impressions Embossing Folder (130917); Fancy Fan TIEF (127751); Bitty Butterfly Punch (129406); Hexagon Punch (130919); Scallop Trim Border Punch (118402)

Card Stock & DSP:  Whisper White (100730) – 4-1/4″ x 11″ card base; 2″ x 3-3/4″ panel; Marina Mist (119682) – 1-1/4″ x 4-1/2″ (2 panels); Soft Sky (131203) – 1-1/8″ x 4-3/8″ (2 panels), one butterfly punch; Smoky Slate (131202) – Banner for sentiment.

Markers & Ink:  Soft Sky Classic Stampin’ Pad (131181); Marina Mist Classic Stampin’ Pad (126962); Night of Navy Classic Stampin’ Pad (126970); Versamark Ink (102283)

Embellishments: White Stampin’ Emboss Powder (109132); Basic Pearls Jewel Accents (119247)

Tools:  sponge daubers (102892); Big Shot (113439); Heat Emboss Tool (129053); Embossing Buddy (103083)

Adhesive: Stampin’ Dimensionals (104430); Glue Dots (103683); Multipurpose liquid glue (110755)

Morning Meadow… “Hello” (Card #2)

serene silhouettes (16 of 28)

serene silhouettes (14 of 28)

I used Freshly Made Sketches Challenge #130 for my inspiration for card #2 of my stamp-a-stack set.  This set was created using the Morning Meadow stamp set (wood mount and clear mount) which is available as one the hostess rewards from Stampin’ Up!

Stampin’ Up! items used to create card #2:

Stamp Sets: Morning Meadow (129678); Perfect Pennants (133230)

Dies, Punches, & Embossing Folders: Fancy Fan Textured Impressions Embossing Folder (127751); Pansy Punch (130698)

Card Stock & DSP:  Whisper White (100730) – 5-1/2″ x 8-1/2″ card base; 3-1/8″ x 2-13/16″ panel (mat for stamped image), 3″ x 2-3/4″ panel (for stamped image), one pansy punch; Marina Mist (119682) – 5-1/4″ x 4″ panel; Soft Sky (131203) – 3-7/8″ x 5-1/8″ panel; Marina Mist Designer Series Paper (130135) – 3-1/2″ x 3″; Smoky Slate (131202) – Banner for sentiment.

Markers & Ink:  Soft Sky Classic Stampin’ Pad (131181); Marina Mist Classic Stampin’ Pad (126962); Night of Navy Classic Stampin’ Pad (126970); Versamark Ink (102283)

Embellishments: White Stampin’ Emboss Powder (109132); Basic Pearls Jewel Accents (119247)

Tools:  sponge daubers (102892); Big Shot (113439); Heat Emboss Tool (129053); Embossing Buddy (103083)

Adhesive: Stampin’ Dimensionals (104430); Glue Dots (103683); Multipurpose liquid glue (110755)

Serene Silhouettes Just for You (Card #3)

serene silhouettes (9 of 28)

serene silhouettes (5 of 28)

Mojo Monday sketch challenge 339, provided the inspiration for card #3.  I like the variety provided by the tall and skinny design.  This card was created using the Serene Silhouettes stamp set (wood mount and clear mount), and A Round Array for the sentiment (wood mount and clear mount).

Stampin’ Up! items used to create card #3:

Stamp Sets: Serene Silhouettes (127324); A Round Array (129090)

Dies, Punches, & Embossing Folders: Beautifully Baroque Textured Impressions Embossing Folder (130917); Fancy Fan TIEF (127751); Ovals Collection Framelits Dies (129381); 7/8″ Scallop Circle Punch (129404); 1″ circle punch (119868)

Card Stock & DSP:  Whisper White (100730) – 3-1/2″ x 11″ card base; Oval framelits die cut (for stamped image), one 7-8″ scalloped circle punch; Marina Mist (119682) – 1-1/4″ x 4″ (2 panels), 3-1/4″ x 2-1/4″ panel; Soft Sky (131203) – 1-1/8″ x 3-7/8″ (2 panels); Soft Sky Designer Series Paper (130135) – 3-1/8″ x 2-1/8″; Smoky Slate (131202) – 1″ circle punch.

Markers & Ink:  Soft Sky Classic Stampin’ Pad (131181); Marina Mist Classic Stampin’ Pad (126962); Night of Navy Classic Stampin’ Pad (126970); Versamark Ink (102283)

Embellishments: White Stampin’ Emboss Powder (109132); Basic Pearls Jewel Accents (119247)

Tools:  sponge daubers (102892); Big Shot (113439); Heat Emboss Tool (129053); Embossing Buddy (103083)

Adhesive: Stampin’ Dimensionals (104430); Multipurpose liquid glue (110755)

Serene Silhouettes Thank You (Card #4)

serene silhouettes (17 of 28)

serene silhouettes (24 of 28)

The Paper Craft Crew, sketch challenge #87, provided the inspiration for card #4.  I like the variety provided by the tall and skinny design.  This card was created using the Serene Silhouettes stamp set (wood mount and clear mount), Petite Petals (wood mount and clear mount) and Teeny Tiny Wishes for the sentiment (wood mount and clear mount).

Stampin’ Up! items used to create card #4:

Stamp Sets: Serene Silhouettes (127324); Teeny Tiny Wishes (127802); Petite Petals (133155)

Dies, Punches, & Embossing Folders: Beautifully Baroque Textured Impressions Embossing Folder (130917); Fancy Fan TIEF (127751); Ovals Collection Framelits Dies (129381); Hexagon Punch (130919); Banner Punch (133519); Modern Label Punch (119849); Word Window Punch (119857); Petite Petals Punch (133322)

Card Stock & DSP:  Whisper White (100730) – 5-1/2 x 8-1/2″ card base; 1-1/8″ x 4-1/2″ (banner), one word window punch, 4 petite petals punches, Oval framelits die cut (for stamped image); Marina Mist (119682) – 4″ x 5-1/4″ panel; Soft Sky (131203) – 3-7/8″ x 5-1/8″ panel; Marina Mist Designer Series Paper (130135) – 1-1/2″ x 4-3/4″ (banner); Smoky Slate (131202) – one modern label punch.

Markers & Ink:  Soft Sky Classic Stampin’ Pad (131181); Marina Mist Classic Stampin’ Pad (126962); Night of Navy Classic Stampin’ Pad (126970); Versamark Ink (102283)

Embellishments: White Stampin’ Emboss Powder (109132); Basic Pearls Jewel Accents (119247)

Tools:  sponge daubers (102892); Big Shot (113439); Heat Emboss Tool (129053); Embossing Buddy (103083)

Adhesive: Stampin’ Dimensionals (104430); Multipurpose liquid glue (110755)

If you enjoyed my post today, please pin it to Pinterest for me.  You will find a “pin it” button at the very bottom of the post.  Also, don’t forget to leave me a comment for your chance to win a free stamp set from Sale-a-bration!

____________________________________________________________

WEEKLY DEALS from Stampin’ Up! April 1-7

Click here to see the Weekly Deals from Stampin’ Up! in my online store.  The Weekly Deals are only while supplies last and only available at these great prices through April 7.

Screen Shot 2014-04-01 at 9.41.23 PM

________________________________________________________________________________________

If you need any stamping supplies, I’d be very happy to be your Demonstrator.  Just click on Order Stampin’ Up! Online Now in the main menu or in the sidebar to go directly to my online store or drop me an email if you have any questions.

Happy Stamping!

Heather

  • Visit my online store here.
  • Shop the Clearance Rack here.


From My Heart Friendship Card – Stampin’ Up!

Before I get to today’s card, I have to say “thank you” to my Stampin’ Up! upline, Amy Koenders (Stamp with Amy K).  Amy introduced many of you to my blog Friday, and I am so grateful for her support.  Amy, you are fabulous and your cards are too!

Now, onto today’s card, which was created using the From my Heart stamp set from Stampin’ Up! (wood mount and clear mount).  I just love the teapot image in this set.  It is so cute and different from my normal floral/nature themed cards.  It seemed the perfect choice to go with SCS color challenge 470 this week.

Friday was such an exciting blogging day for me.  I loved seeing so much blog traffic and so many new subscribers!  You have no idea how excited I get seeing the reach of my posts.  That’s where the nerdy math teacher in me comes through! LOL.  Anyway, if you like my post today, I would appreciate hearing from you.  At the end of the month, I will do a drawing and one lucky person who left me a comment will receive a free card in the mail!  If you aren’t already a subscriber, please consider following me via email.   Just click on the “follow” button in the sidebar.

From My Heart (1 of 7)

Today’s card was inspired by The Mojo Monday 337 sketch challenge & Splitcoast Stampers Color Challenge #470:

I began my card with a  Baked Brown Sugar card base.  Then I added panels of Night of Navy (my substitution for the color challenge), Cherry Cobbler DSP, Whisper White, and Night of Navy DSP (Regals DSP Stack) using SNAIL adhesive.

From My Heart (3 of 7)

Next, I colored my friendship stamp from the From my Heart stamp set using my Stampin’ Write Markers in Night of Navy, Cherry Cobbler, Wild Wasabi, & Baked Brown Sugar (In Color Markers, Subtles Collection Markers, and Regals Collection Markers).  I stamped the image on Whisper White and used my Baked Brown Sugar ink pad and a sponge dauber to ink around the edges of the panel.  Then I colored the teapot and tray again and stamped them on a scrap of Whisper White,  I cut that out using paper snips and added it to my greeting with Stampin’ Dimensionals for some added depth. I followed the same procedure, stamping the friendship banner in Night of Navy on Baked Brown Sugar card stock.  The finished greeting was layered onto a square of Cherry Cobbler card stock, which I inked with my Night of Navy Classic Stampin’ Pad.

From My Heart (2 of 7)

Finally, I stamped two flowers from the Petite Petals stamp set (wood mount and clear mount) using Night of Navy ink.  I colored my flowers using my Cherry Cobbler Classic Stampin’ Pad and my Blender Pens I punched out the flowers using the Petite Petals Punch and added Basic Rhinestones Jewel Accents to the center.  Then I added them to the front of the card using Stampin’ Dimensionals.  (Remember, the Petite Petals stamp set and punch are available as a bundle for a 15% discount, wood mount and clear mount.)

From My Heart (7 of 7)

For the finishing touches on the inside of my card I layered strips of Cherry Cobbler DSP and Night of Navy card stock and added them to the bottom of the card.

This card is not my normal kind of color scheme, but I really like the finished product.  That’s the great thing about challenges, they put you outside your comfort zone.  If you liked this card, please don’t forget to leave me a comment so you will be entered into my drawing.  Also, if you liked my post today, please pin it to Pinterest for me.  I am new to blogging and I would love your help in developing a blog following.  If you scroll to the bottom of the post, you will find a “pin it” button just below my supply list for the project.

If you would like to purchase the From my Heart  stamp set, or any of the other great products featured in this project, shop in my online store by clicking here.  Remember you can earn a FREE item with every $50 purchase through March 31st.  The final days of Sale-a-bration are fast approaching.  Don’t miss your chance to get these great products before they are gone!

You can find a complete list of supplies used for this project at the very bottom of this post.

____________________________________________________________

Weekly Deals from Stampin’ Up! March 18-24

Here are the new Weekly Deals from Stampin’ Up!:

Screen Shot 2014-03-19 at 9.55.26 PM

Click here to see the Weekly Deals from Stampin’ Up! in my online store.  The Weekly Deals are only while supplies last and only available at these great prices through March 24.

________________________________________________________________________________________

If you need any stamping supplies, I’d be very happy to be your Demonstrator.  Just click on Order Stampin’ Up! Online Now in the main menu or in the sidebar to go directly to my online store or drop me an email if you have any questions.

Happy Stamping!

Heather

  • It’s Sale-a-bration time!!  You’ll get a free item from Stampin’ Up! for every $50 that you purchase between now and March 31!  Click on my Stampin’ Up! Promotions page for more information!
  • Visit my online store here.
  • Shop the Clearance Rack here.

____________________________________________________________

Stampin’ Up! items used to create this project:

Stamp Sets: Simply Sketched (Hostess Reward – 129672)

Dies, Punches, & Embossing Folders: N/A

Card Stock & DSP:  Baked Brown Sugar (131296) – 5-1/2″ x 8-1/2″ card base, one stamped banner; Night of Navy (100867) – 5-1/2″ x 1-1/8″ strip, 4-” x 1-1/8″ strip (inside card); Cherry Cobbler DSP (130139) – 5-1/2″ x 1″ strip, 4″ x 1″ strip for inside of card; Whisper White (100730) – 2-7/8″ x 4-5/8″ panel, 2-1/2″ x 2-1/2″ square,  5-1/4″ x 4″ panel (inside of card); Night of Navy DSP (130139) – 2-3/4″ x 4-1/2″ panel.

Markers & Ink:  Baked Brown Sugar Classic Stampin’ Pad (131174); Night of Navy Classic Stampin’ Pad (126970); Cherry Cobbler Classic Stampin’ Pad (126966); Blender Pens (102845); In Color 2013-2015 Stampin’ Write Markers (131260); Regals Collection Stampin’ Write Markers (131262); Subtles Collection Stampin’ Write Markers (131263)

Embellishments: Basic Rhinestone Jewel Accents (119246)

Tools:  sponge daubers (102892)

Adhesive: SNAIL (104332); Stampin’ Dimensionals (104430)

Oh, Secret Garden, You Make me Smile! – Stampin’ Up!

Today’s card features the Secret Garden stamp set (wood mount and clear mount) from Stampin’ Up!  The inspiration for this card came from the Mojo Monday sketch challenge #335 and the Splitcoast Stampers Color Challenge #468. (The challenge calls for Raspberry Ripple, but I didn’t have that so I substituted Rose Red.)  At first I was a little stuck with my design, but I am really pleased with the end result.  I would love to hear what you think too!  On March 31st I will do a drawing and one lucky person who leaves me a comment will win a handcrafted card in the mail!  Also, if you enjoy reading my posts, why not have them delivered to your inbox automatically.  Just click on the “follow” button in the sidebar.

secret garden (3 of 13)

I didn’t have any designer series paper in the challenge colors, so I decided to create my own!  I randomly stamped a piece of Very Vanilla card stock with the Secret Garden stamp set in Rose Red, Island Indigo, and Old Olive.  I didn’t want my stamped images to be too bold and overwhelming, so I stamped the Island Indigo and Old Olive stamps on a scrap sheet of paper before stamping them on my card stock.  This gave the colors a bit of a softer effect.  I wanted to tie in the black from my card base, so I chose a stamp from the Petite Petals stamp set (wood mount and clear mount) and used my Staz On Black ink to add it to my design.  I was trying to highlight the colors of the challenge without having too many big blocks of solid color or a pattern that was so bold it became distracting.  I think my floral stamped paper did just the trick! 

secret garden (9 of 13)

Once my stamping was done, I cut the panels for my card.  I placed a panel of Island Indigo side by side with a panel of my stamped design and adhered them to a Basic Black card base using SNAIL Adhesive.  Then I cut a panel of Basic Black and embossed it using the Lacy Brocade embossing folder and my Big Shot.  I cut two small squares of card stock; one in Island Indigo and and the other from my stamped paper.  I used SNAIL to attach the Island Indigo and Black pieces to the card front.  Then I used Stampin’ Dimensionals to attach my stamped square.

secret garden (13 of 13)

Next, I added a banner cut from Rose Red card stock.  I cut a 1/2″ strip of card stock and then used the Banner Punch (Sale-a-bration item) to shape the end of the banner.  Then I stamped a flower from the Secret Garden stamp set using my Island Indigo Classic Stampin’ Pad.  I used the Secret Garden Framelits to cut out my flower and some leaves from Old Olive card stock.  I used mini glue dots to adhere the leaves and then used Stampin’ Dimensionals to add my flower.  I chose the “You make me smile” greeting from the A Round Array stamp set (wood mount and clear mount), which I stamped in Rose Red ink on Very Vanilla card stock and cut out using the 7/8″ Scalloped Circle Punch.  The sentiment was also adhered using Stampin’ Dimensionals.  Finally, I added some Basic Pearl Jewel Accents to the center of my flower and the bottom left corner of my card for a finishing touch.

secret garden (8 of 13)
Of course, you may have noticed that I always like to finish the inside of my card with a coordinating accent.  I used the Secret Garden and Petite Petals stamp sets to mirror the design from the front of my card on a panel of Very Vanilla and adhered it to the inside of the card using SNAIL.  

I hope you have enjoyed today’s creation.  It was a great creative challenge for me and I really enjoyed putting it together.  If you liked my post today, I would appreciate it if you could help me out by pinning it to Pinterest.  I am still working on building up my blog following and I need all the help I can get to spread the word!  If you scroll to the bottom of the post, you will find a “pin it” button just below my supply list for the project… and, don’t forget to leave me a comment for your chance to win a handcrafted card in the mail!

If you would like to order the Secret Garden stamp set or any of the other beautiful products featured in this card, please click here to shop in my online store.  I would love to help you in your creative journey by becoming your personal Stampin’ Up! Demonstrator.  Remember it’s Sale-a-bration with Stampin’ Up! Choose from a wide variety of FREE items with any $50 purchase until March 31, 2014.

You can find a complete list of supplies, including card stock cuts at the very bottom of this post.

____________________________________________________________

Weekly Deals from Stampin’ Up!  March 4 – 10

Here are the new Weekly Deals from Stampin’ Up!:

Weekly Deals

Click here to see the Weekly Deals from Stampin’ Up! in my online store.  The Weekly Deals are only while supplies last and only available at these great prices through March 10.

____________________________________________________________

If you need any stamping supplies, I’d be very happy to be your Demonstrator.  Just click on Order Stampin’ Up! Online Now in the main menu or in the sidebar to go directly to my online store or drop me an email if you have any questions.

Happy Stamping!

Heather

  • It’s Sale-a-bration time!!  You’ll get a free item from Stampin’ Up! for every $50 that you purchase between now and March 31!  Click on my Stampin’ Up! Promotions page for more information!
  • Visit my online store here.
  • Shop the Clearance Rack here.

____________________________________________________________

Stampin’ Up! items used to create this project:

Stamp Sets: A Round Array (129090); Secret Garden (129144); Petite Petals (133155)

Dies, Punches, & Embossing Folders: Secret Garden Framelits Dies (129372); Lacy Brocade Textured Impressions Embossing Folder (127819); 7/8″ Scallop Circle Punch (129404); Banner Punch (Sale-a-bration item)

Embellishments: Basic Pearls Jewel Accents (119247)

Card Stock:  Basic Black (121045) – card base 4-1/4″ x 11″, 3-1/4″ x 3-1/2″ panel; Island Indigo (122923) – 1-3/4″ x 5-1/4″ panel, 2-1/4″ x 2-1/4″ square; Very Vanilla (101650) – 2-1/2″ x 5-1/4″ panel (stamped), 2″ x 2″ square (stamped), 4″ x 5-1/4″ panel (inside), one flower die cut, one 7/8″ scalloped circle punch (sentiment); Old Olive (100702) – one leaf die cut (Secret Garden Framelits); Rose Red (102544) – one banner.

Markers & Ink:  Rose Red Classic Stampin’ Pad (126954); Island Indigo Classic Stampin’ Pad (126986); Old Olive Classic Stampin’ Pad (126953); Stazon Black (101406)

Tools:  Big Shot (113439)

Adhesive: SNAIL (104332); Stampin’ Dimensionals (104430); Mini Glue Dots (103683)