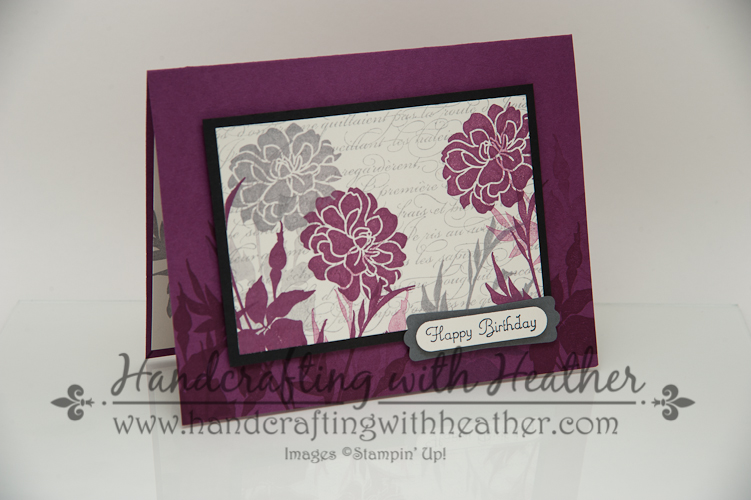
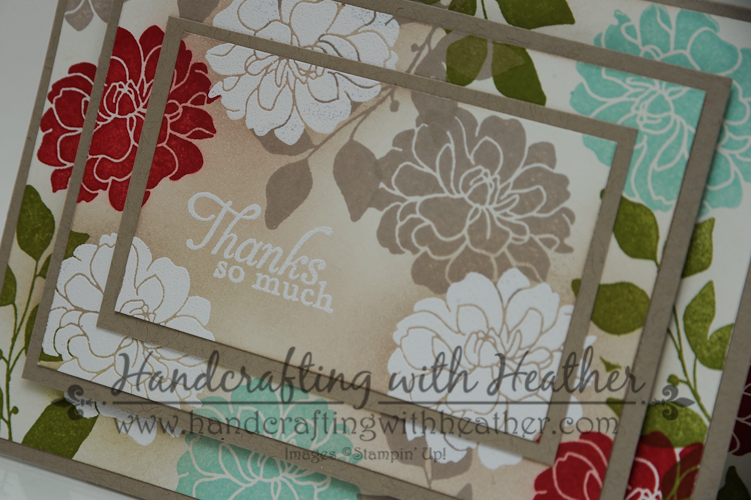
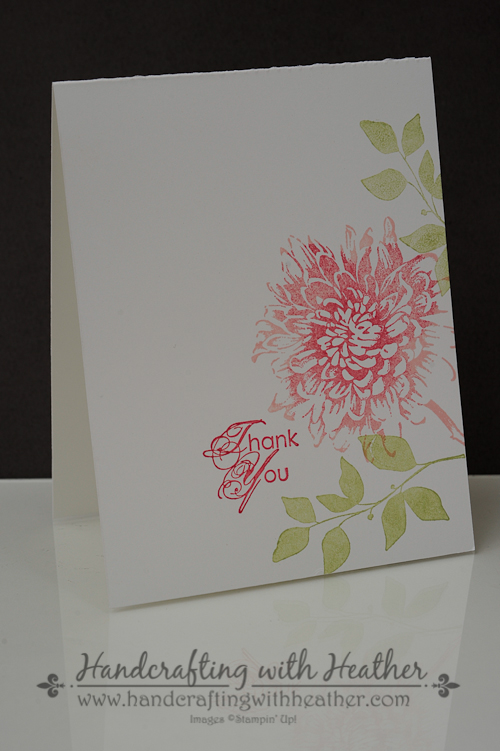
Today’s card is an elegant floral card featuring the Serene Silhouettes and Four You stamp sets from Stampin’ Up! The name of this stamp set has us focus on the beautiful silhouette of the designs, but today I wanted to show you how this stamp set can be used with color to create lovely flowers that are so quick and easy!
I love the versatility of this stamp set! I would appreciate hearing what you think about it too. What is your favorite way to use the Serene Silhouettes stamp set? I love reading all of your comments and connecting with you as we create together. Also, if you are a fan of my work, why not have my posts delivered to your inbox automatically. Just click on the “follow” button in the sidebar.

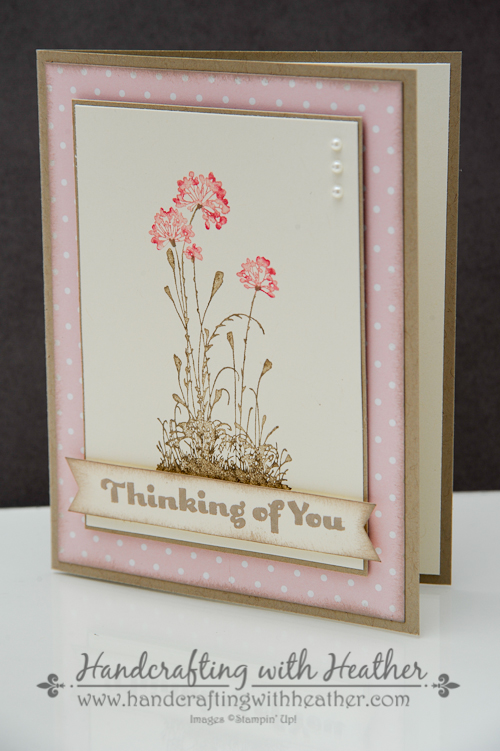
I started my card today with a Crumb Cake card base. Then I inked around the edges of a panel of Polka Dot Pink Pirouette DSP from the subtles paper stack using Crumb Cake ink. I adhered the panel to the front of my card using Multipurpose Liquid Glue.

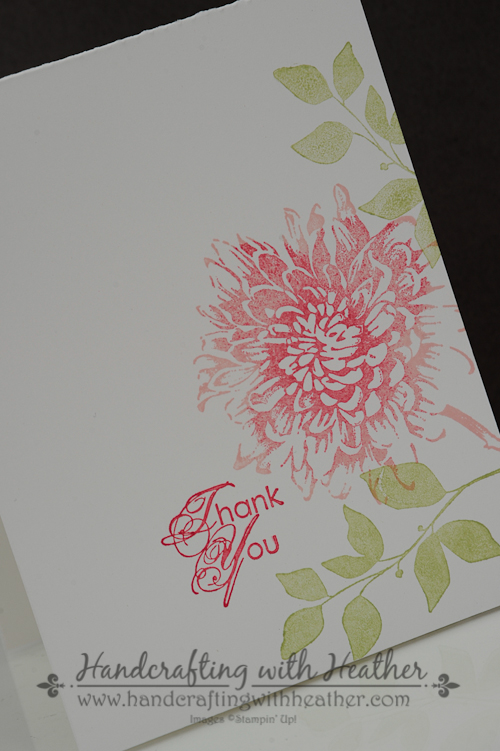
Next, I colored the floral stamp from Serene Silhouettes using my Stampin’ Write Markers. I colored all of the grass with Crumb Cake, and I colored the blooms with Blushing Bride. Then I used the “Thumping” technique to add some extra interest to my image before stamping it. I used Soft Suede on the grass and Strawberry Slush on the flowers to provide some extra depth and shading to my art piece. This video tutorial will show you just how easy it is to create beautiful images using the Thumping technique.
Once my focal point was finished, I matted it with Crumb Cake card stock and adhered it to the front of the card using Stampin’ Dimensionals. For my sentiment, I chose the “Thinking of You” greeting from the Four You stamp set. I stamped it on a scrap of Very Vanilla card stock using Crumb Cake Ink and then used my hexagon punch to create a banner. I inked around the edges of the sentiment using my sponge dauber and Crumb Cake ink. Next, I adhered the greeting to the stamped floral panel using Stampin’ Dimensionals. Finally, for a finishing touch, I added three medium pearls to the top right corner of my art piece.

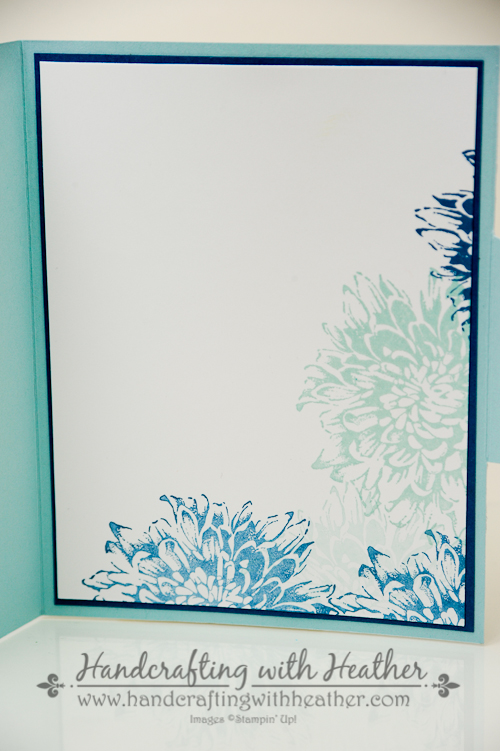
To finish off the inside of my card, I stamped the floral image from Serene Silhouettes on a panel of Very Vanilla card stock; using the same technique as I did on the front.

I am very happy with how this card turned out. I can’t wait to try the thumping technique with other stamp sets! This card would be a great design for many occasions. Simply by changing the greeting, you could use this card for nearly anything. I hope you have enjoyed my creation today. If you have, save it for later by pinning it to Pinterest. If you scroll to the bottom of this post, you will find a complete list of supplies used to make today’s project, including the dimensions for the card stock cuts. Below the supply list, you will find a “pin it” button. I would appreciate your help in spreading the word about my work.
If you find inspiration from this blog, one way you can show your support is by selecting me as your personal Stampin’ Up! Demonstrator. If you are interested in purchasing the Serene Silhouettes or Four You stamp sets from Stampin’ Up! you can shop now in my online store!
If you need any stamping supplies or have any questions, I would love to help you out. Just click on Order Stampin’ Up! Online Now in the main menu or in the sidebar to go directly to my online store. Feel free to drop me an email if you have any questions. I’m here to help!
Happy Stamping!
Heather
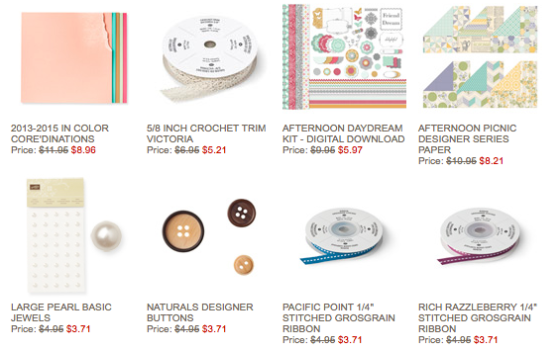
WEEKLY DEALS for April 29 – May 5

Click here to see the Weekly Deals from Stampin’ Up! in my online store. The Weekly Deals are only while supplies last and only available at these great prices through May 5.
Stampin’ Up! items used to create today’s project:
If you would like to order any of the products featured in today’s project, click the images below to order from my online store.


Card Stock Cuts
Card Base: Crumb Cake – 5-1/2″ x 8-1/2″
Panels: Pink Pirouette DSP (Subtles Paper Stack) – 4″ x 5-1/4″ panel; Crumb Cake – 3-1/4″ x 4-1/2″ panel; Very Vanilla – 3-1/8″ x 4-3/8″ panel, 4″ x 5-1/4″ panel (inside of card)
Sentiment/Die Cuts: Very Vanilla – banner for greeting