Beautiful Bunch Boxed Card Set – Stampin’ Up!

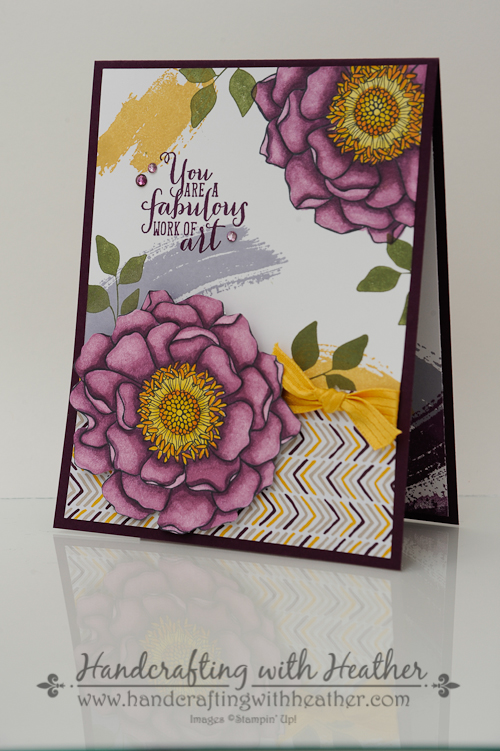
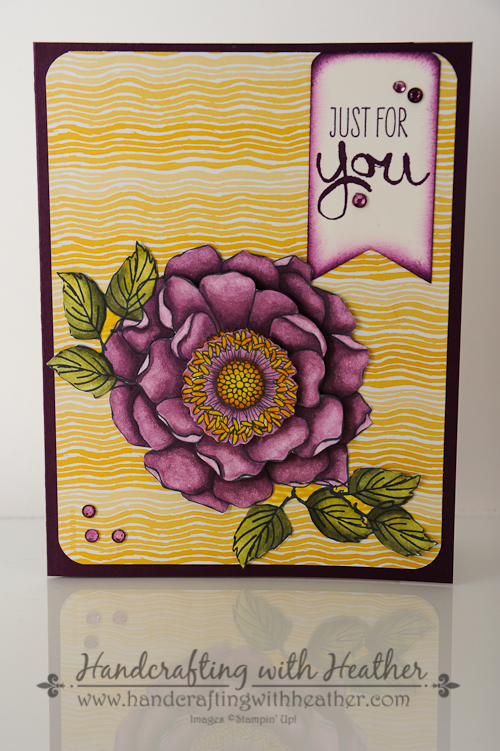
I love Pinterest for all the creative inspiration it provides.  Today’s card was one that I CASED from Pinterest, and features the Beautiful Bunch stamp set from Stampin’ Up!  To see the original card created by Beth Rush that inspired this design, click here.

Beautiful Bunch Boxed Set (5 of 10)

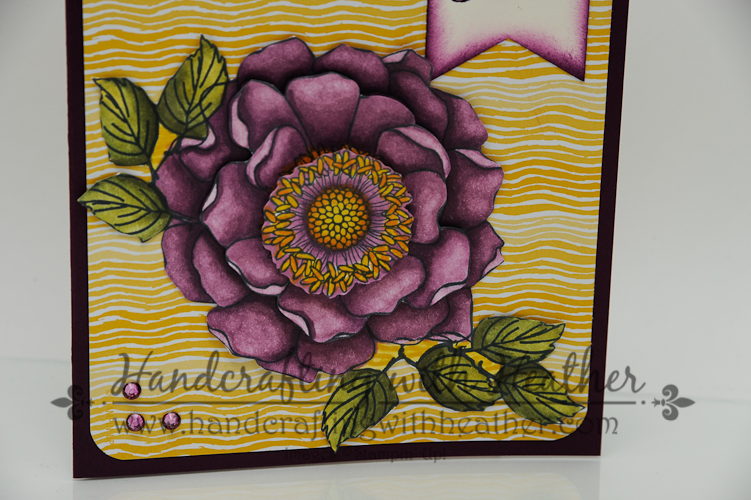
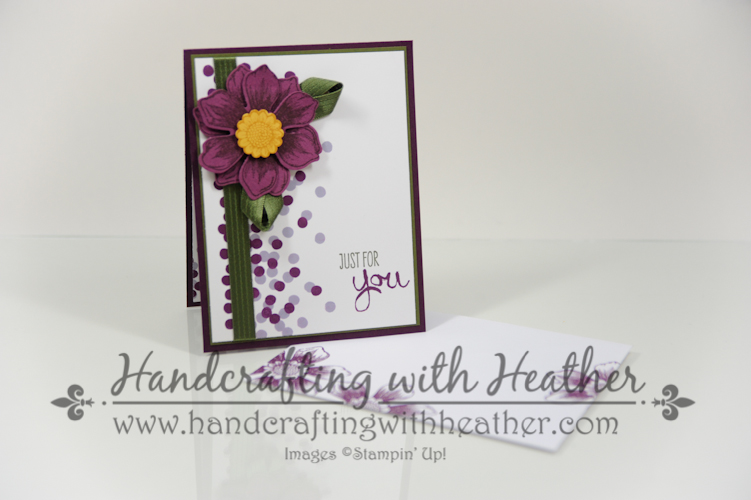
I am starting to think ahead to the holidays (which will be here before we know it), and I’ve decided to make boxed sets of cards for my son’s teachers.  Although I loved the original design of this card on Pinterest, I made a few changes.  I didn’t want to hand color all of the flowers, so I stamped them on Rich Razzleberry card stock with Blackberry Bliss ink.  I also decided to make the center yellow.

Beautiful Bunch Boxed Set (7 of 10)

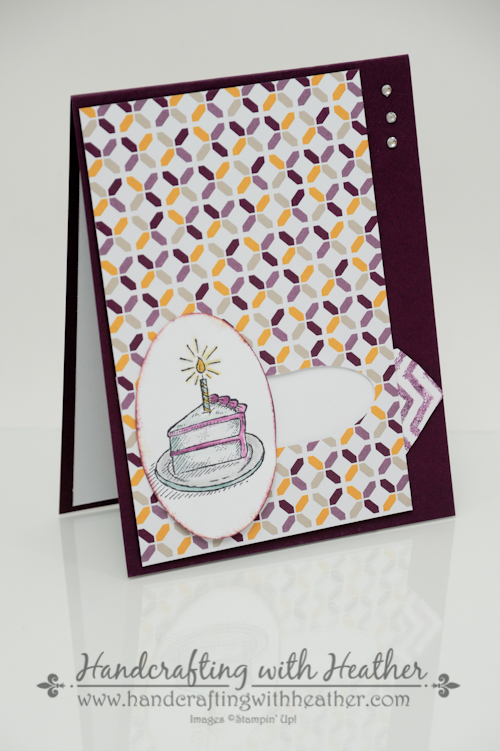
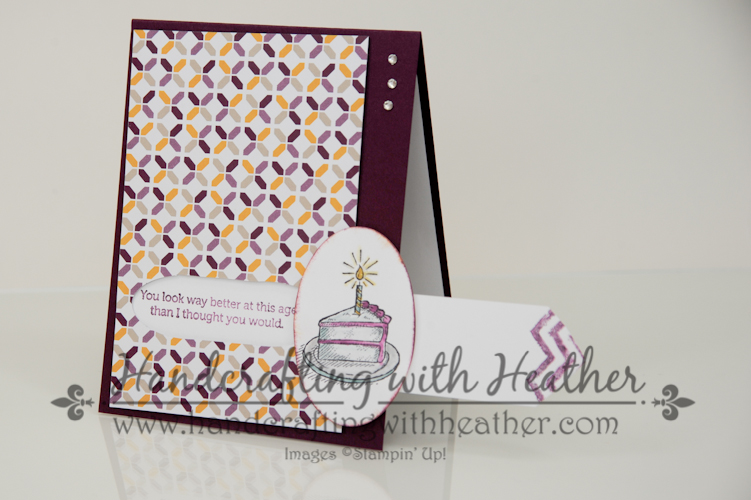
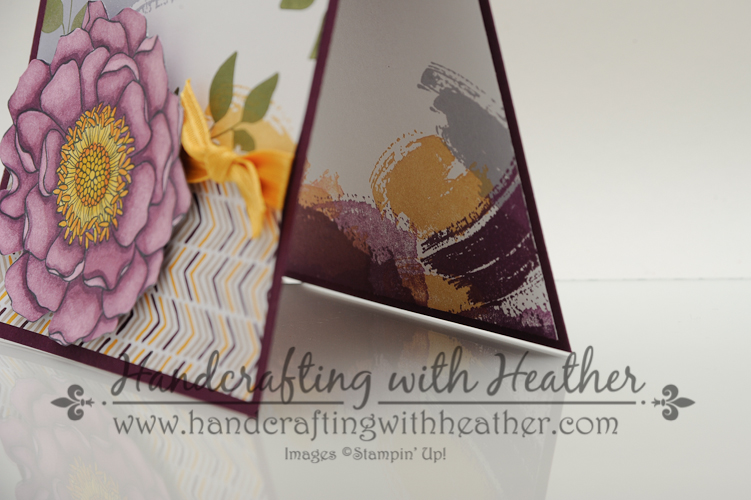
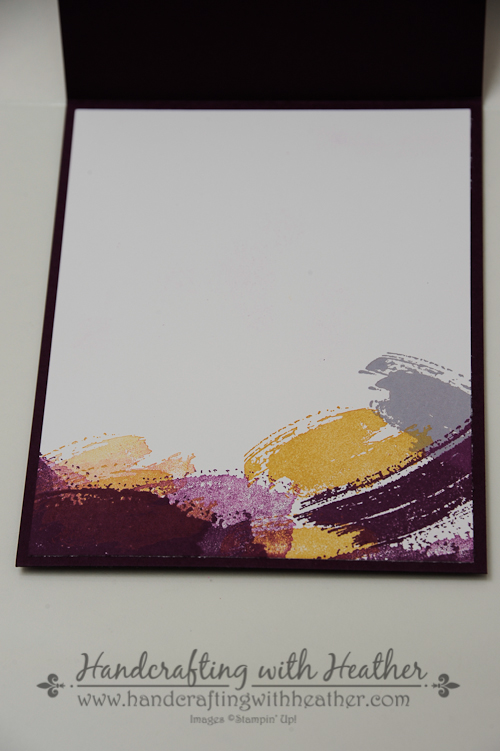
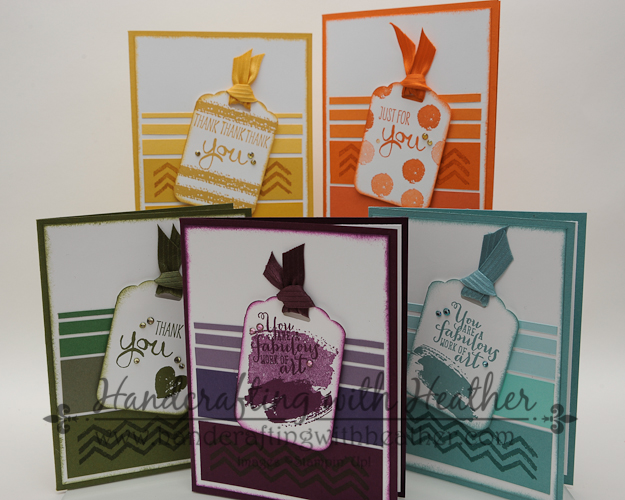
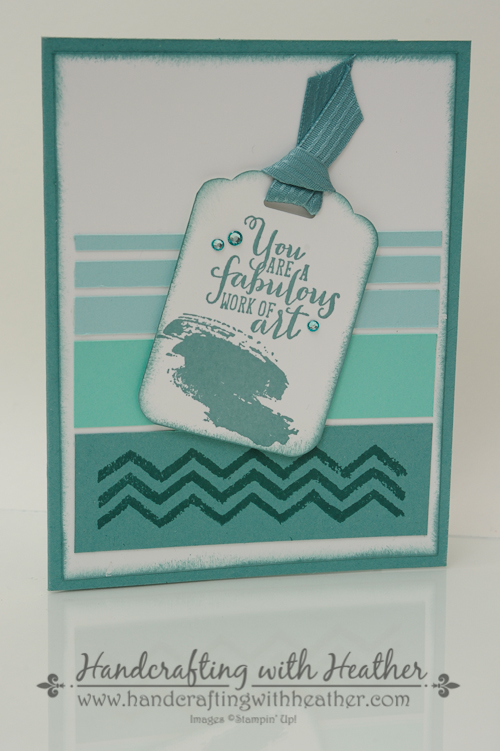
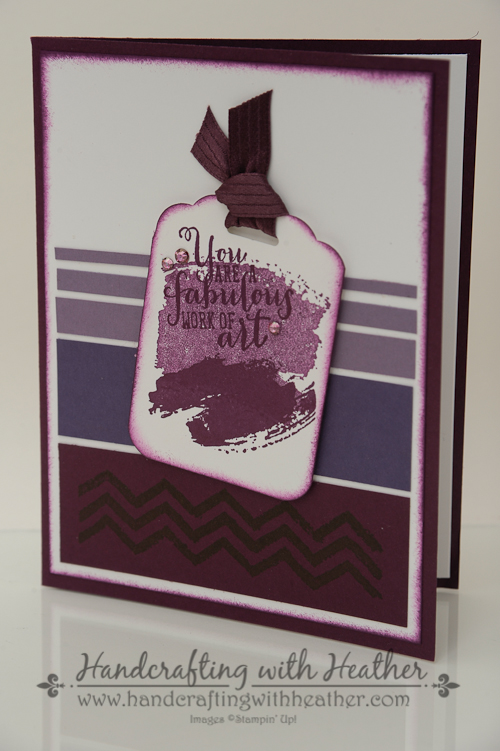
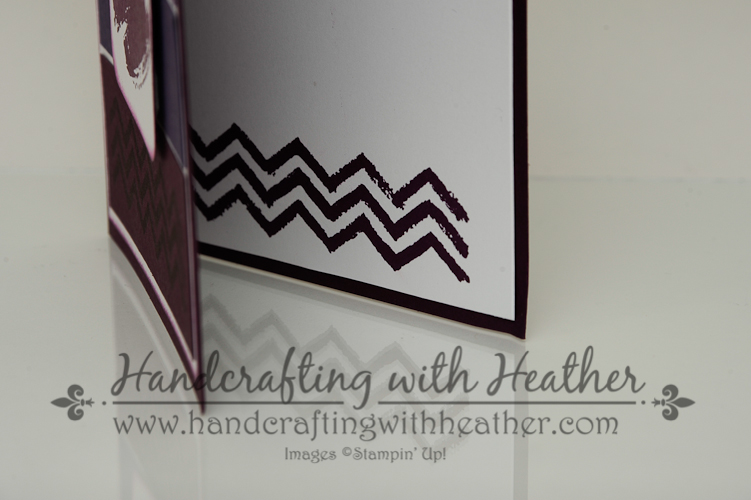
I wanted the sentiment to be one that could be used for any occasion, so I chose “Just for You” from the Work of Art stamp set from Stampin’ Up!  The background was created using the Dotty Angles photopolymer stamp set.  At first, I wasn’t sure I would get much use out of that stamp set because it only contains 2 border stamps, but I am so glad I ordered it.  It turns out that those dots are just too cute and can be used to add something special to so many cards.

Beautiful Bunch Boxed Set (9 of 10)

Finally, I made a card box with a coordinating belly band to tie everything together.  For the box, I began with a 9″ x 9″ piece of Kraft card stock.  Using the Envelope Punch Board, I punched and scored along one edge at the 3-1/2″ and 4-1/2″ score lines.  Then I turned the card 180 degrees and followed the same procedure.  For the remaining sides, I lined up my scored lines with the score guide and scored accordingly.

Beautiful Bunch Boxed Set (1 of 10)

The Belly band was created with an 11″ x 1-3/4″ strip of Mossy Meadow card stock, layered with a 1-1/2″ x 11″ strip of Whisper White.  I stamped the white piece, glued it to the green and then scored at 2-3/4″, 3-5/8″, 8″, and 8-7/8″.

Beautiful Bunch Boxed Set (2 of 10)

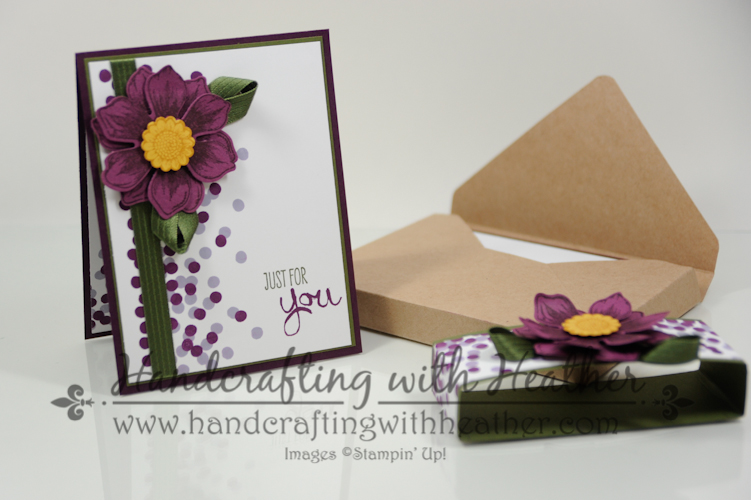
Of course, a card set wouldn’t be complete without matching envelopes, so I did a little stamping on those too!

Beautiful Bunch Boxed Set (4 of 10)

This card box will hold 4 cards and 4 matching envelopes, even with quite a bit of embellishment on the cards.

Beautiful Bunch Boxed Set (3 of 10)

I am really pleased with how this set turned out.  I know I would love to receive it as a gift, and I hope my son’s teacher agrees.  I may just have to make another set for myself!  If you like this project, I hope you will pin it to Pinterest for me. You will find a “pin it” button at the end of this post below the supply list.

Please consider selecting me as your demonstrator for your stamping needs.  I would love the opportunity to earn your business.  If you need any supplies you can shop now in my online store!  Feel free to drop me an email if you have any questions or if you would like a catalog.  I’m here to help!

Happy Stamping!

Heather

  • Visit my online store here.
  • Shop the Clearance Rack here.

Project Life by Stampin’ Up! Giveaway!

Screen Shot 2014-10-28 at 6.50.46 AM

You could win a complete Project Life by Stampin’ Up! prize pack including every product available in the product line! You could also win one of 100 Project Life by Stampin’ Up! Card & Accessory Packs.  For all of the details, visit the giveaway sign-up page here.  You can either enter your contact information or use your Facebook account to sign up.  The contest ends at 11:59:59 PM Mountain Time on November 30, 2014.

At the very bottom of the signup page, there is a spot to enter a bit.ly link if someone referred you.  If you’d like to enter my link as the referring source, here it is (just copy and paste it):  http://bit.ly/133fQ2N


New Weekly Deals From Stampin’ Up! Nov. 4-10

Capture

Click here to see the Weekly Deals from Stampin’ Up! in my online store.  The Weekly Deals are only while supplies last and only available at these great prices through November 10th.


Stampin’ Up! Products Used for Today’s Projects

If you would like to order any of the products featured in today’s project, click the images below to order from my online store.


Card Stock Cuts

Card Base:  Blackberry Bliss – 4-1/4″ x 11″

Panels:  Mossy Meadow – 4″ x 5-1/4″ panel; Whisper White – 3-7/8″ x 5-1/8″ panel; 4″ x 5-1/4″ panel (inside of card)

Card Box: Kraft – 9″ x 9″

Belly Band: Mossy Meadow – 11″ x 1-3/4″ strip; Whisper White – 11″ x 1-1/2″ strip. (Score at 2-3/4″, 3-5/8″, 8″, & 8-7/8″)

Advertisement

Slider Birthday Card One-to-One Swap from Mary Laffin – Stampin’ Up!

I have another great project for you created by one of my readers for the one-to-one swap. Today’s project is a card created by Mary Laffin from California.  Mary’s project features the Sketched Birthday stamp set from Stampin’ Up and a cool slider technique!

Card created by Mary Laffin.

Card created by Mary Laffin.

I just love the creativity of Mary’s slider card design.  It was such a wonderful surprise when I pulled the little tab!  Mary was kind enough to provide her card dimensions for this project too!  You can find them at the very bottom of this post below the supply list.

Card created by Mary Laffin.

Card created by Mary Laffin.

I hope you will consider selecting me as your demonstrator for your stamping needs.  I offer free catalogs to all of my customers.  If you are my customer or want to be my customer, please email me your name and mailing address.  I’ll be more than happy to send you the gorgeous book.  You can email me at handcraftingheather@icloud.com.

If you need any supplies you can shop now in my online store!  Feel free to drop me an email if you have any questions or if you would like a catalog.  I’m here to help!

Happy Stamping!

Heather

  • Visit my online store here.
  • Shop the Clearance Rack here.

WEEKLY DEALS for July 15-21

Screen Shot 2014-07-15 at 8.30.45 AM

Click here to see the Weekly Deals from Stampin’ Up! in my online store.  The Weekly Deals are only while supplies last and only available at these great prices through July 21.


Stampin’ Up! items used to create today’s project:

If you would like to order any of the products featured in today’s project, click the images below to order from my online store.


Card Recipe – Slider Birthday Card

Card Stock Dimensions:  Blackberry Bliss – 4-1/4″ x 11″ card base scored at 5-1/2″; Moonlight DSP stack – 3-1/2″ x 5-1/4″ panel; Whisper White – 4″ x 5-1/4″ panel (inside of card), 1-1/2″ x 3-1/2″ for sentiment, 1-1/4″ x 4″ for slider, scrap for stamped birthday cake.


2014 Annual Catalog Swaps from Stampin’ Up!

Recently, I had the privilege of participating in a card swap to highlight some of the products from the new 2014 Annual Catalog. Today, I thought I would share with you some of the cards I received. (Please note, some of the cards did not come with a card recipe attached. I have done my best to recreate this for you, but please excuse any errors in my interpretation if you notice them.)

New Catalog Swap (2 of 4)

Card design by Linda Green

Stamps: Work of Art, Gorgeous Grunge

Card Stock: Mossy Meadow, Tangelo Twist, Shimmery White

Ink: Mossy Meadow, Tangelo Twist, Hello Honey

Dies & Punches: Labels Framelits Collection

Accessories: Mossy Meadow Ribbon, Rhinestones Basic Jewels

New Catalog Swap (1 of 4)

Card design by Linda Bauwin

Stamps: Lots of Thanks

Card Stock: Mossy Meadow, Tangelo Twist, Hello Honey, Lost Lagoon, Blackberry Bliss

Ink: Blackberry Bliss

Dies & Punches: Modern Label Punch, Itty Bitty Accents Punch Pack

Card design by Angie Silva

Card design by Angie Silva

Stamps: Something to Say, Sea Street

Card Stock & Paper: Bermuda Bay (5-1/2″ x 8-1/2″), Maritime DSP (4-1/8″ x 5-3/8″), Whisper White (1-3/4″ x 5-1/2″), Coastal Cabana (1-5/8″ x 5-1/2″)

Ink: Bermuda Bay

Dies & Punches: 2″ Circle Punch

Accessories: Mini Brads

Card design by Jill Van Dieren

Card design by Jill Van Dieren

Stamps: Sea Street, Teeny Tiny Wishes

Card Stock & Paper: Very Vanilla, Blackberry Bliss, Maritime DSP

Ink: Blackberry Bliss, Tangelo Twist, Hello Honey, Mossy Meadow, Real Red

Dies & Punches: Word Window Punch, Modern Label Punch

Accessories: Vellum, Calypso Coral Stampin’ Emboss Powder

I hope you have enjoyed seeing the lovely work created by these ladies.  I’ve finished painting my craft studio, and I’m in the process of moving everything in and getting organized!  On Sunday, I will share a cute decorative project I did last night to help liven up the space and add some color and inspiration to my room.  Stay tuned next week when I unveil the completed studio with a virtual tour of my favorite new place!

Don’t forget to sign up for the one-to-one swap!  I can’t wait to see what you are creating.  Swaps are a fun way to interact and create together.  The details and registration link are below.

If you haven’t gotten your very own copy of the new 2014 Annual Stampin’ Up! catalog yet, I would love to get one to you.  I offer free catalogs to all of my customers.  If you are my customer or want to be my customer, please email me your name and mailing address.  I’ll be more than happy to send you the gorgeous book.  You can email me at handcraftingheather@icloud.com.

I hope you will consider selecting me as your demonstrator for your stamping needs.  If you need any supplies you can shop now in my online store!  Feel free to drop me an email if you have any questions or if you would like a catalog.  I’m here to help!

Happy Stamping!

Heather

  • Visit my online store here.
  • Shop the Clearance Rack here.

2014 Annual Catalog One-to-One Swap

Hello Stampers!  I am so excited about the launch of the new 2014 Annual Catalog from Stampin’ Up!  There are so many awesome products in there.  I would love the chance to see what you are creating.  Let’s do a one-to-one swap!  To participate, you will send me one card created with current Stampin’ Up! products (no retired items please) and a self-addressed stamped envelope.  Once all the swaps have arrived, I will send you someone else’s card in the mail.  It’s that easy!  The motto of Stampin’ Up! is Inspire, Create, Share.  This swap is the perfect opportunity for us to support one another and share all our creative ideas.  If you have questions, please feel free to contact me at handcraftingheather@icloud.com.

To participate, please register for the event by clicking on the button below.   Once registration is complete, you will receive an email with specific instructions (including the address for where to send your swaps).  Projects are due in hand by July 10, 2014.  I can’t wait to see what you create!  Happy Stamping!

Eventbrite - 2014 Annual Catalog One-to-One Swap


Demonstrator Sign Up Special Available through June 30th!


Do you have $50 worth of products you would like to purchase from the new annual catalog?  Do you want to purchase Stampin’ Blendabilities Markers now, without having to wait until they are available to the public?  If so, now is a great time to join my team.  During the month of June, new recruits can join Stampin’ Up! at one of two great prices. Stampin’ Up! will continue to offer their traditional starter kit priced at $99 ($125 product value + FREE Shipping), but only during the month of June they will also be offering a reduced priced starter kit at the low price of $50 ($55 product value + FREE Shipping).  Drop me a note at handcraftingheather@icloud.com if you have any questions or if you’d like additional details.  I’d love to have you on my team!  You can read more information about the benefits of being a Demonstrator here.


WEEKLY DEALS for June 10-16

Screen Shot 2014-06-10 at 7.53.54 AM

Click here to see the Weekly Deals from Stampin’ Up! in my online store.  The Weekly Deals are only while supplies last and only available at these great prices through June 16.


Finish My Card Collaboration (Part 2)… Something for Baby – Stampin’ Up!

Finish My Card Collaboration – Part 2

On Friday, I posted part 1 of a “finish my card” collaboration with my friend and fellow Stampin’ Up! Demonstrator, Amy Koenders.  If you missed that post, you can see it here.   For this collaborative project, each one of us created an art piece and sentiment for a card, then we traded to finish things up.  For her art piece, Amy created an adorable onesie using the Something for Baby stamp set from Stampin’ Up!  She also made a darling banner for the greeting featuring the “Sweet Baby” sentiment from Baby, We’ve Grown.  I just loved her creative use of the elements from these two sets!

Something for Baby (4 of 13)

As soon as I saw Amy’s pieces, I could imagine that cute outfit hanging up in a baby’s room.  I decided to build a dresser using pieces I cut from the Hardwood background stamp.  I stamped it on Soft Suede card stock with Soft Suede ink.  Then I cut the boards apart and assembled them to look like a chest of drawers.  I cut a Stampin’ Dimensional apart into tiny pieces and used them to adhere Neutrals Candy Dots for knobs on the drawers.  Then I added Amy’s onesie.

Something for Baby (8 of 13)

Next, I created the “walls” of my room by stamping a polka dot design on a panel of Whisper White card stock using the Work of Art stamp set in Blushing Bride, Pistachio Pudding, and So Saffron ink.  Then I layered a panel of So Saffron Designer Series Background Paper along the bottom and added a length of Whisper White Organza Ribbon with sticky strip along the middle to resemble a chair rail.

Something for Baby (3 of 13)

I added the dresser and Amy’s sentiment to the front of my card, but decided that the dresser needed something on top.  I used my Mosaic Punch to create a vase from Pistachio Pudding DSP.  Then, I punched some flowers in Blushing Bride card stock using the Itty Bitty Accents Punch Pack.  I inked around the edges of the flowers using Blushing Bride ink to add a little interest, then I finished them off with a little pearl in the center.  I added them to my vase using mini glue dots.

Something for Baby (10 of 13)

To finish off the inside of my card, I stamped the polka dot design along the bottom of my card and added a strip of the So Saffron DSP.

Something for Baby (11 of 13)


Finally, I created a coordinating envelope using Pistachio Pudding Background DSP and my Envelope Punch Board.  I just love that tool!  It is so versatile, and it allows me to create cards of any dimension without fear about not being able to find a suitable envelope.


Something for Baby (2 of 13)

I love the way this card turned out!  I think it is so darling!  Amy sure did give me great material to work with! Thank you Amy!  I hope you will head over to her blog to see how she created the cute baby elements, just click here.  If you are a fan of this project, please pin it to Pinterest and leave me a comment.  You will find a “pin it” button at the very bottom of this post below the supply list.  Also, if you like my work, why not subscribe to my blog via email.  All you have to do is click on “follow” in the sidebar.

If you haven’t gotten your very own copy of the new 2014 Annual Stampin’ Up! catalog yet, now is the perfect time.  There are so many great new items available for purchase.  I offer free catalogs to all of my customers.  If you are my customer or want to be my customer, please email me your name and mailing address.  I’ll be more than happy to send you the gorgeous book.  You can email me at handcraftingheather@icloud.com.

I hope you will consider selecting me as your demonstrator for your stamping needs.  If you need any supplies you can shop now in my online store!  Feel free to drop me an email if you have any questions or if you would like a catalog.  I’m here to help!

Happy Stamping!

Heather

  • Visit my online store here.
  • Shop the Clearance Rack here.

Demonstrator Sign Up Special Available through June 30th!


Have you been considering joining Stampin’ Up! as a Demonstrator?  If so, now is a great time to join.  Between now and June 30, new recruits can join Stampin’ Up! at one of two great prices. Stampin’ Up! will continue to offer their traditional starter kit priced at $99 ($125 product value), but for the month of June only they will also be offering a reduced priced starter kit at the low price of $50 ($55 product value).  Drop me a note at handcraftingheather@icloud.com if you have any questions or if you’d like additional details.  I’d love to have you on my team!  You can read more information about the benefits of being a Demonstrator here.


WEEKLY DEALS for June 3 – 9

Screen Shot 2014-06-03 at 7.51.44 AM

Click here to see the Weekly Deals from Stampin’ Up! in my online store.  The Weekly Deals are only while supplies last and only available at these great prices through June 9.


Stampin’ Up! items used to create today’s project:

If you would like to order any of the products featured in today’s project, click the images below to order from my online store.

Card Stock Cuts

Card Base:  So Saffron – 7″ x 10″

Panels:  Pistachio Pudding – 4-3/4″ x 6-3/4″; Whisper White – 4-5/8″ x 6-5/8″ panel (front of card), 4-3/4″ x 6-3/4″ panel (inside of card); So Saffron Background DSP – 4-5/8″ x 2-3/4″ panel, 1/2″ x 4-3/4″ strip (inside of card)

Sentiment & Die Cuts:  Soft Suede – Hardwood Background Stamp (x2); Blushing Bride – Itty Bitty Accents Punch Flower (x5); Pistachio Pudding Background DSP – Mosaic Punch

Envelope: Pistachio Pudding Background DSP – 9-1/2″ x 9-1/2″ scored at 4″ using the envelope punch board.

Blended Bloom Meets Work of Art – Stampin’ Up!

When I first saw the Work of Art stamp set at the Stampin’ Up! 2014 Annual Catalog Premiere, I’ll be honest, I wasn’t sure about it.  But, I love a free gift, so I was excited to try it out when we received it at the end of the night.  Boy, was my first impression wrong!  I have really enjoyed working with that set!  And, the Blended Bloom stamp is quickly becoming a favorite!  I think it is going to give my Blooming with Kindness stamp set a run for its money when it comes to “ink time.”  If you are a regular reader of my blog, you know I love that Blooming with Kindness flower! LOL.

Blended Bloom & Work of Art (2 of 9)

It has been so much fun playing with all my new items from the 2014 annual catalog pre-order.  If you haven’t seen the new catalog yet, now is a great time to get your hands on one so you can get your wish list ready for the official launch on June 2nd.  I will be mailing out complimentary copies to all my customers who place an order of $25 or more during the month of May.

Blended Bloom & Work of Art (5 of 9)I chose a Blackberry Bliss card base for my project today.  It is one of the new In Colors, and I am totally in love with this dark, regal shade of purple.  Next, I stamped the Blended Bloom stamp in the corner of a panel of Whisper Whisper white card stock using Memento Tuxedo Black Ink.  While I was at it, I also stamped a second flower on another sheet of card stock.  Blended Bloom & Work of Art (3 of 9)

Next,  I stamped the leaf image from the Summer Silhouettes stamp set along the edges of my Whisper White panel using Mossy Meadow ink (another new In Color).  For some of the images, I stamped off then stamped on the card, to give greater range of color in my card design.  Then, I stamped the paint splotches (yes, that is a technical term) in Wisteria Wonder and Hello Honey.  For the Hello Honey “paint” I stamped off once before stamping on my card to give the color a little softer effect.

Blended Bloom & Work of Art (9 of 9)

I just love the “You are a Fabulous Work of Art” sentiment from the Work of Art stamp set. The font is whimsical, and I adore the affirming message.  I used Blackberry Bliss ink and my stamp-a-ma-jig to make sure I got the placement just perfect.  Then it was time for some coloring!

Blended Bloom & Work of Art (6 of 9)

I used my new Stampin’ Blendabilities markers (release date TBD) in Rich Razzleberry, Daffodil Delight, and Pumpkin Pie to color in my flower images.  I used the “dark to light” method (click here to see my video tutorial) to achieve the beautifully blended contrast and shading.  Once my flowers were both colored, I cut out the second flower I had stamped and set it aside until my card front was finished.

Blended Bloom & Work of Art (5 of 9)

I added a panel of Designer Series Paper from the Moonlight Paper Stack to the bottom of my stamped panel using SNAIL.  I ran SNAIL adhesive across the place where my two panels joined on the front of the card, leaving a 1″ gap where I wanted to put my knot.   Then I added a length of Hello Honey 3/8″ Stiched Satin Ribbon to my combined panel and anchored it on the back with SNAIL.  I slid a shorter piece of the ribbon under that one (where I had left a space in my adhesive) and tied it in a knot.  I have found that this method saves on materials, because  you don’t have to wrap the ribbon all the way around the panel.

Blended Bloom & Work of Art (9 of 9)

Finally, I added my flower to the bottom of the card using Stampin’ Dimensionals, and added some rhinestones that I colored using the Stampin’ Blendabilties.  For the inside of my card, I created an abstract design using the paint splotches from Work of Art.

Blended Bloom & Work of Art (8 of 9)

Blended Bloom & Work of Art (7 of 9)

I am really happy with how this card turned out.  I hope you like it too.  As always, if you are a fan, please pin this project to Pinterest and leave me a comment.  You will find a “pin it” button at the very bottom of this post below the supply list and cards stock cuts.  Also, if you like my work, why not subscribe to my blog via email.  All you have to do is click on “follow” in the sidebar.

I hope you will consider selecting me as your demonstrator for your purchases of these great new products and all your other stamping supplies.  If you need any stamping supplies you can shop now in my online store!  Also, remember that I’ve got a stack of brand new catalogs hot off the presses waiting for you.  If you place an order of $25 or more during the month of May, I will send you your very own copy free of charge!  Feel free to drop me an email if you have any questions.  I’m here to help!

Happy Stamping!

Heather

  • Visit my online store here.
  • Shop the Clearance Rack here.

WEEKLY DEALS for May 13-19

weekly deals 5-13

Click here to see the Weekly Deals from Stampin’ Up! in my online store.  The Weekly Deals are only while supplies last and only available at these great prices through May 19.


Stampin’ Up! items used to create today’s project:

If you would like to order any of the products featured in today’s project, click the images below to order from my online store. (Keep in mind that some sneak peek items will not be available for purchase until June 2, 2014.)

Card Base: Blackberry Bliss – 4-1/4″ x 11″

Panels: Whisper White – 4″ x 3-1/2″ panel (front), 4″ x 5-1/4″ panel (inside); Moonlight DSP – 4″ x 1-3/4″ panel

Sneak Peek at the New 2014-2016 In Colors from Stampin’ Up!

I am having such a great time playing with all of my pre-order items.  Today, I want to introduce you to the new 2014-2016 In Colors: Tangelo Twist, Hello Honey, Mossy Meadow, Lost Lagoon, and Blackberry Bliss.  Aren’t they just yummy!  At first when I saw them I noticed how similar some of them are to existing colors from Stampin’ Up!, but as I work with them more, I realize that each has its own unique characteristics.  Although some of the differences are subtle, they are important and lead to a more complete palette of color choices.  So, without further ado, here are your new In Colors!

Work of Art In Colors (1 of 17)

For each card in this set, I paired the In Color with two other existing colors for my ombre background.  I stamped the In Color with the chevron design from the Work of Art stamp set (available in June) so it would be easy to identify which one is the new color.  I also used the In Colors for the card base and tag design.  To finish things off, I added the beautiful new 3/8″ stitched satin ribbon to the top of the tag.  I love this ribbon!  It is so pretty, with a little bit of texture for a special added detail.

Work of Art In Colors (6 of 17)

Background Colors (bottom to top):  Tangerine Tango, Tangelo Twist (In Color), Pumpkin Pie

Work of Art In Colors (8 of 17)

Crushed Curry, Hello Honey, Daffodil Delight

Work of Art In Colors (10 of 17)

Mossy Meadow, Always Artichoke, Garden Green

Work of Art In Colors (13 of 17)

Lost Lagoon, Coastal Cabana, Pool Party

Work of Art In Colors (15 of 17)

Blackberry Bliss, Elegant Eggplant, Perfect Plum

Work of Art In Colors (8 of 17)

Work of Art In Colors (11 of 17)

To add a little bling to my cards, I finished off each tag with some rhinestones that I colored with the new Stampin’ Blendabilities Markers.  Then I stamped the chevron design on the inside of the card to tie everything together.

Work of Art In Colors (16 of 17)

I know that when you are able to get your hands on these great new In Colors you will fall in love with them too.  I adore the deep, rich purple of Blackberry Bliss and the calming effects of Lost Lagoon.  Mossy Meadow adds a nice new shade to the green color family offered by Stampin’ Up!  It has a little more lushness than Always Artichoke, but isn’t as vibrant as Garden Green.  Tangelo Twist provides a bit of a rusty undertone to the orange color family, while hello honey has some greenish undertones that remind me of dijon mustard.

Work of Art In Colors (1 of 17)

I hope you have enjoyed getting to know each of these new In Colors today.  I hope you will consider selecting me as your demonstrator for your purchases of these great new shades when they become available in June.  In the meantime, if you need any stamping supplies you can shop now in my online store!  I’ve received the new annual catalogs from Stampin’ Up! and I will be mailing out complimentary copies to all my customers who place an order of $25 or more during the month of May!  Feel free to drop me an email if you have any questions.  I’m here to help!

If you like today’s project, please pin it to Pinterest and leave me a comment.  You will find a “pin it” button at the very bottom of this post below the supply list and cards stock cuts.  Also, if you like my work, why not subscribe to my blog via email.  All you have to do is click on “follow” in the sidebar.

Happy Stamping!

Heather

  • Visit my online store here.
  • Shop the Clearance Rack here.

WEEKLY DEALS for May 13-19

weekly deals 5-13

Click here to see the Weekly Deals from Stampin’ Up! in my online store.  The Weekly Deals are only while supplies last and only available at these great prices through May 19.


Stampin’ Up! items used to create today’s project:

If you would like to order any of the products featured in today’s project, click the images below to order from my online store.

Card Base: Tangelo Twist, Hello Honey, Mossy Meadow, Lost Lagoon, Blackberry Bliss – 5-1/2″ x 8-1/2″

Panels: Whisper White – 4″ x 5-1/4″ two panels (front and inside)

Colored strips for background: Darkest Color – 1-1/4″ x 3-3/4″ strip; Medium Color – 1″ x 3-3/4″ strip; Lightest Color – three strips 3-3/4″ wide and approximately 1/8″, 1/4″, and 3/8″ tall. (I did not measure for these, I just made one skinny strip, and then made the next two slightly larger each time.)

Sentiment & Die Cuts:  Whisper White – 2″ x 3″ Scalloped Tag


Sneak Peek at the New Blendabilities from Stampin’ Up!

NEW!  Blendabilities from Stampin’ Up!

Now is a great time to be a Stampin’ Up! Demonstrator!  I just got my pre-order in the mail, so today’s project is a sneak peek at the brand new Stampin’ Blendabilities Markers.  These markers are a new line of product that will be introduced with the 2014 annual catalog on June 2nd. Unfortunately, there has been a delay for their initial release, so they will not be available for purchase right away, but I’m so excited about them that I wanted to show you what these beautiful markers can do anyway!  I will keep you updated about exactly when they will be available.  This project is full of sneak peeks for you.  I used the Blended Bloom stamp because  it cried out to me… “Heather, color me, please!”  Isn’t it lovely?  You are also getting a sneak peek at some of the brand new 2014-2015 In Colors and the Work of Art stamp set from Stampin! Up!

Blended Bloom (1 of 10)

I’m sure you are excited to try Blendabilities out too, but in the meantime, I wanted to take a few moments to share with you some of the features and benefits of these fantastic new markers.

What Sets Them Apart:

  • The Stampin’ Up! rectangular barrel keeps your markers from rolling away!
  • Flat storage helps to maintain the life of each marker.
  • Each marker comes with a tip on each end: brush and fine.
  • Marker tips are made of nylon, which is superior to polyester which can fray.
  • Color coded caps.
  • Stampin’ Up! markers coordinate wonderfully with our cardstock, and can be used with transparent sheets.
  • Blendabilities are alcohol based, which makes them colorfast and allows them to blend with each other beautifully.
  • You can color on anything… rhinestones, buttons, window sheets, etc.

These exclusive alcohol-based marker sets, come in a 3-pack of light, medium and dark shades (of the same color ), and provide your projects a more saturated look with blended colors. Stampin’ Up! recommends using Whisper White Cardstock with your Stampin’ Up! Blendabilities, but any one of our cardstocks would work just as well.

Blended Bloom (3 of 10)I began with one of the brand new In Colors for my card base, Blackberry Bliss.  It is a gorgeous rich dark shade of purple.  Then I layered on a panel of Designer Series Paper from the Moonlight DSP Stack, which I punched using the Envelope Punch Board to round the corners.  This one is also a new In Color called Hello Honey.  In an upcoming post, I will show you all of the new In colors with some comparisons to other current Stampin’ Up! colors…. so stay tuned.

Blended Bloom (4 of 10)

Next, I got out my yummy new Stampin’ Blendabilities markers, which I absolutely adore.  They are my new favorite item for sure!  The colors blend together so nicely, giving a watercolor effect but with much more saturated colors.  Love, love, love!  For my art piece today I stamped the Blended Bloom flower onto Whisper White card stock three times.  Then I stamped the leaf image from Fabulous Florets several times around one of the floral images.  (Remember, Fabulous Florets is on the retiring list, so if you haven’t got it in your collection, you should try to grab it before it is gone.)

Blended Bloom (5 of 10)

I stamped the image three times because I wanted to cut out several layers to give my card some dimension.  I began by coloring in the darkest areas of my flower first and then blending in lighter and lighter colors as I moved outward on each petal.  I colored in only the part of the flower that was necessary for each layer, then I “fussy cut” them out using my paper snips.  I put the layers together using Stampin’ Dimensionals and added the flower to the front of my card using Multipurpose Liquid Glue.

Blended Bloom (10 of 10)

Because the Blendabilities work a little differently than regular markers, I plan to create a video for you in the coming weeks that will show some techniques for using them.  Again, stay tuned for more great things from Handcrafting with Heather! 🙂

Blended Bloom (7 of 10)

For my sentiment, I chose the Work of Art stamp set featured in the new annual catalog.  I stamped it in Blackberry Bliss ink on a strip of Very Vanilla card stock and used my hexagon punch to create the banner effect at the bottom.  I used a sponge dauber to ink around the edges of the banner using the same color.

Blended Bloom (6 of 10)

Finally, I used my Stampin’ Blendabilities to color in some rhinestones to match the color scheme of my card.  Yes, that’s right, you can color on just about anything using Blendabilities!

Blended Bloom (9 of 10)

To finish off the inside of my card, I stamped a brush stroke border from Work of Art in Blackberry Bliss and then layered on a strip of the Hello Honey Designer Series Paper from the front of the card.

Blended Bloom (8 of 10)

I hope you have enjoyed my project today.  I certainly had fun playing with all my new products!  If you like this card, please pin it to Pinterest and leave me a comment.  You will find a “pin it” button at the very bottom of this post below the supply list and cards stock cuts.  Also, if you like my work, why not subscribe to my blog via email.  All you have to do is click on “follow” in the sidebar.

If you find inspiration from this blog, one way you can show your support is by selecting me as your personal Stampin’ Up! Demonstrator.  One great thing about being a demonstrator is getting to preview some of the new products before they are available to the general public!  But don’t worry, you will be able to purchase the Blended Bloom and Work of Art stamp sets from Stampin’ Up! in just a few short weeks.  In the meantime, if you need any stamping supplies you can shop now in my online store!  I’ve received the new annual catalogs from Stampin’ Up! and I will be mailing out complimentary copies to all my customers who place an order of $25 or more during the month of May!  Feel free to drop me an email if you have any questions.  I’m here to help!

Happy Stamping!

Heather

  • Visit my online store here.
  • Shop the Clearance Rack here.

WEEKLY DEALS for May 6-12

weekly deals 5-6

Click here to see the Weekly Deals from Stampin’ Up! in my online store.  The Weekly Deals are only while supplies last and only available at these great prices through May 12.


Stampin’ Up! items used to create today’s project:

If you would like to order any of the products featured in today’s project, click the images below to order from my online store.


Card Stock Cuts

Card Base: Blackberry Bliss – 5-1/2″ x 8-1/2″

Panels: Hello Honey DSP – 4″ x 5-1/4″ panel; Very Vanilla – 4″ x 5-1/4″ panel (inside of card)

Sentiment & Die Cuts:  Very Vanilla – (banner for sentiment) – approximately 1-1/4″ x 2-1/2″


Work of Art Gift Bag… A Sneak Preview from Stampin’ Up!

On Wednesday, I shared with you the lovely coasters that I made for my mom for mother’s day.  Today, I’m going to show you how I used the fabulous Work of Art stamp set form Stampin’ Up! to create a super cute gift bag to put them in.  This stamp set is one of the brand new sets that will be available with the release of the new annual catalog on June 1st.  I just received my catalogs in the mail yesterday and I will be sending out complimentary copies to my customers!  If you place a $25 order with me during the month of May you will receive a copy of the new catalog in the mail for your reading enjoyment!  Just one more reason to go ahead and order those items from the Spring occasions catalog and the retiring list before they are gone!  Happy shopping! (I will also be launching a new customer loyalty program soon.  Every $25 purchase will earn creativity credits that can be used for free stuff.  More details will follow, but all orders placed during the month of May will qualify.)

Work of Art (2 of 7)-Edit

Isn’t that just adorable?  I know my mom will love it, and it was really quick and easy too!  If you are a fan of this project, I would love to hear your thoughts.  Also, if you find inspiration from my work, why not have my posts delivered to your inbox automatically.  Just click the “follow” button in the sidebar to subscribe.  Please help me get to 200 followers by telling your friends who love crafting about my blog!

Work of Art (7 of 7)-Edit

I started my project by cutting a banner in Whisper White card stock using the second largest Banner Framelits Die.  Then I trimmed the banner to be 2″ wide and punched the top using my Scalloped Tag Topper Punch.   Next, I stamped the “paint stroke” stamps from Work of Art in Coastal Cabana, Strawberry Slush, and Crisp Cantaloupe ink.  Then I stamped my sentiment on top using Stazon Black ink.

Work of Art (4 of 7)-Edit

For a layered effect, I cut strips of Designer Series Paper (from the In Color DSP stack) in Coastal Cabana and Crisp Cantaloupe.  I used my hexagon punch to create the banner end at the bottom.  Then I adhered the layers together with Stampin’ Dimensionals and tied a length of Strawberry Slush Stretch Ruffle Trim around them.

Work of Art (3 of 7)-Edit

Next, I used my Stamp-a-ma-jig to stamp the chevron image across the bottom of a white gift bag in Coastal Cabana ink.  I stamped the circle image in Strawberry Slush above the chevrons to get a polkadot effect.  To add a little dimension, I stamped off for some of the circles and stamped others full strength.

Work of Art (6 of 7)-Edit

I think the packaging of this gift is almost as great as what is inside.  I can’t wait to give them to my mom!  I hope you will give this a try too.  Be sure to pin this project to Pinterest for future inspiration!  If you scroll to the bottom of this post, you will find a complete list of supplies used to make today’s project.  Below the supply list, you will find a “pin it” button.  I would appreciate your help in spreading the word about my work.

If you find inspiration from this blog, one way you can show your support is by selecting me as your personal Stampin’ Up! Demonstrator.  One great thing about being a demonstrator is getting to preview some of the new products before they are available to the general public!  But don’t worry, you will be able to purchase the Work of Art stamp set from Stampin’ Up! in just a few short weeks.  In the meantime, if you need any stamping supplies you can shop now in my online store!  I would love to help you out.  Feel free to drop me an email if you have any questions.  I’m here to help!

Happy Stamping!

Heather

  • Visit my online store here.
  • Shop the Clearance Rack here.

WEEKLY DEALS for May 5 – 12

 weekly deals 5-6

Click here to see the Weekly Deals from Stampin’ Up! in my online store.  The Weekly Deals are only while supplies last and only available at these great prices through May 12.


Stampin’ Up! items used to create today’s project:

If you would like to order any of the products featured in today’s project, click the images below to order from my online store.